How We Store All of Our Photos
At first we didn’t really think much about this process, but as our hard drives started to fill up, we realized we needed a solution. So in this post, we will walk you through our entire photo storing and organization process, from start to finish!
BASIC SET UP
We edit in a program called Adobe Lightroom Classic (not the cloud version, because it has some limitations still). We keep our Lightroom Catalog (“LR Catalog”) on the desktop of Sydney’s Macbook Pro. Initially, we stored the LR Catalog on an external drive, but it proved to be cumbersome with connecting and disconnecting frequently. Long story short, we keep the LR Catalog on the desktop and backup the catalog on a monthly basis. We store one copy of LR Catalog backup on the Macbook, another backup copy on an external hard drive, and another backup copy in the cloud via OneDrive. We cannot emphasize enough the importance of backing. things. up. The catalog is our baby, because she contains all of our edits through the years.
It is important to understand that while we keep our LR Catalog on the computer, we do not store any of our actual photos on our computer. ALL photos are kept on external drives. So we map the LR Catalog to external drives, which allows us to not run into storage issues on our laptop. Lightroom remembers the “path” to the photos from your original import, but will grey out with a ‘?‘ next to the specific folder, and photos will not be available to edit unless you plug in the hard drive where the photos are stored (see below). Once the proper drive is plugged in, the folders are no longer greyed out and you can access the photos with any edits you previously applied.
Note: Don’t worry about if you change the storage location of your photos - you can easily right click on the folder and select “Find missing folder” to remap to the new location.
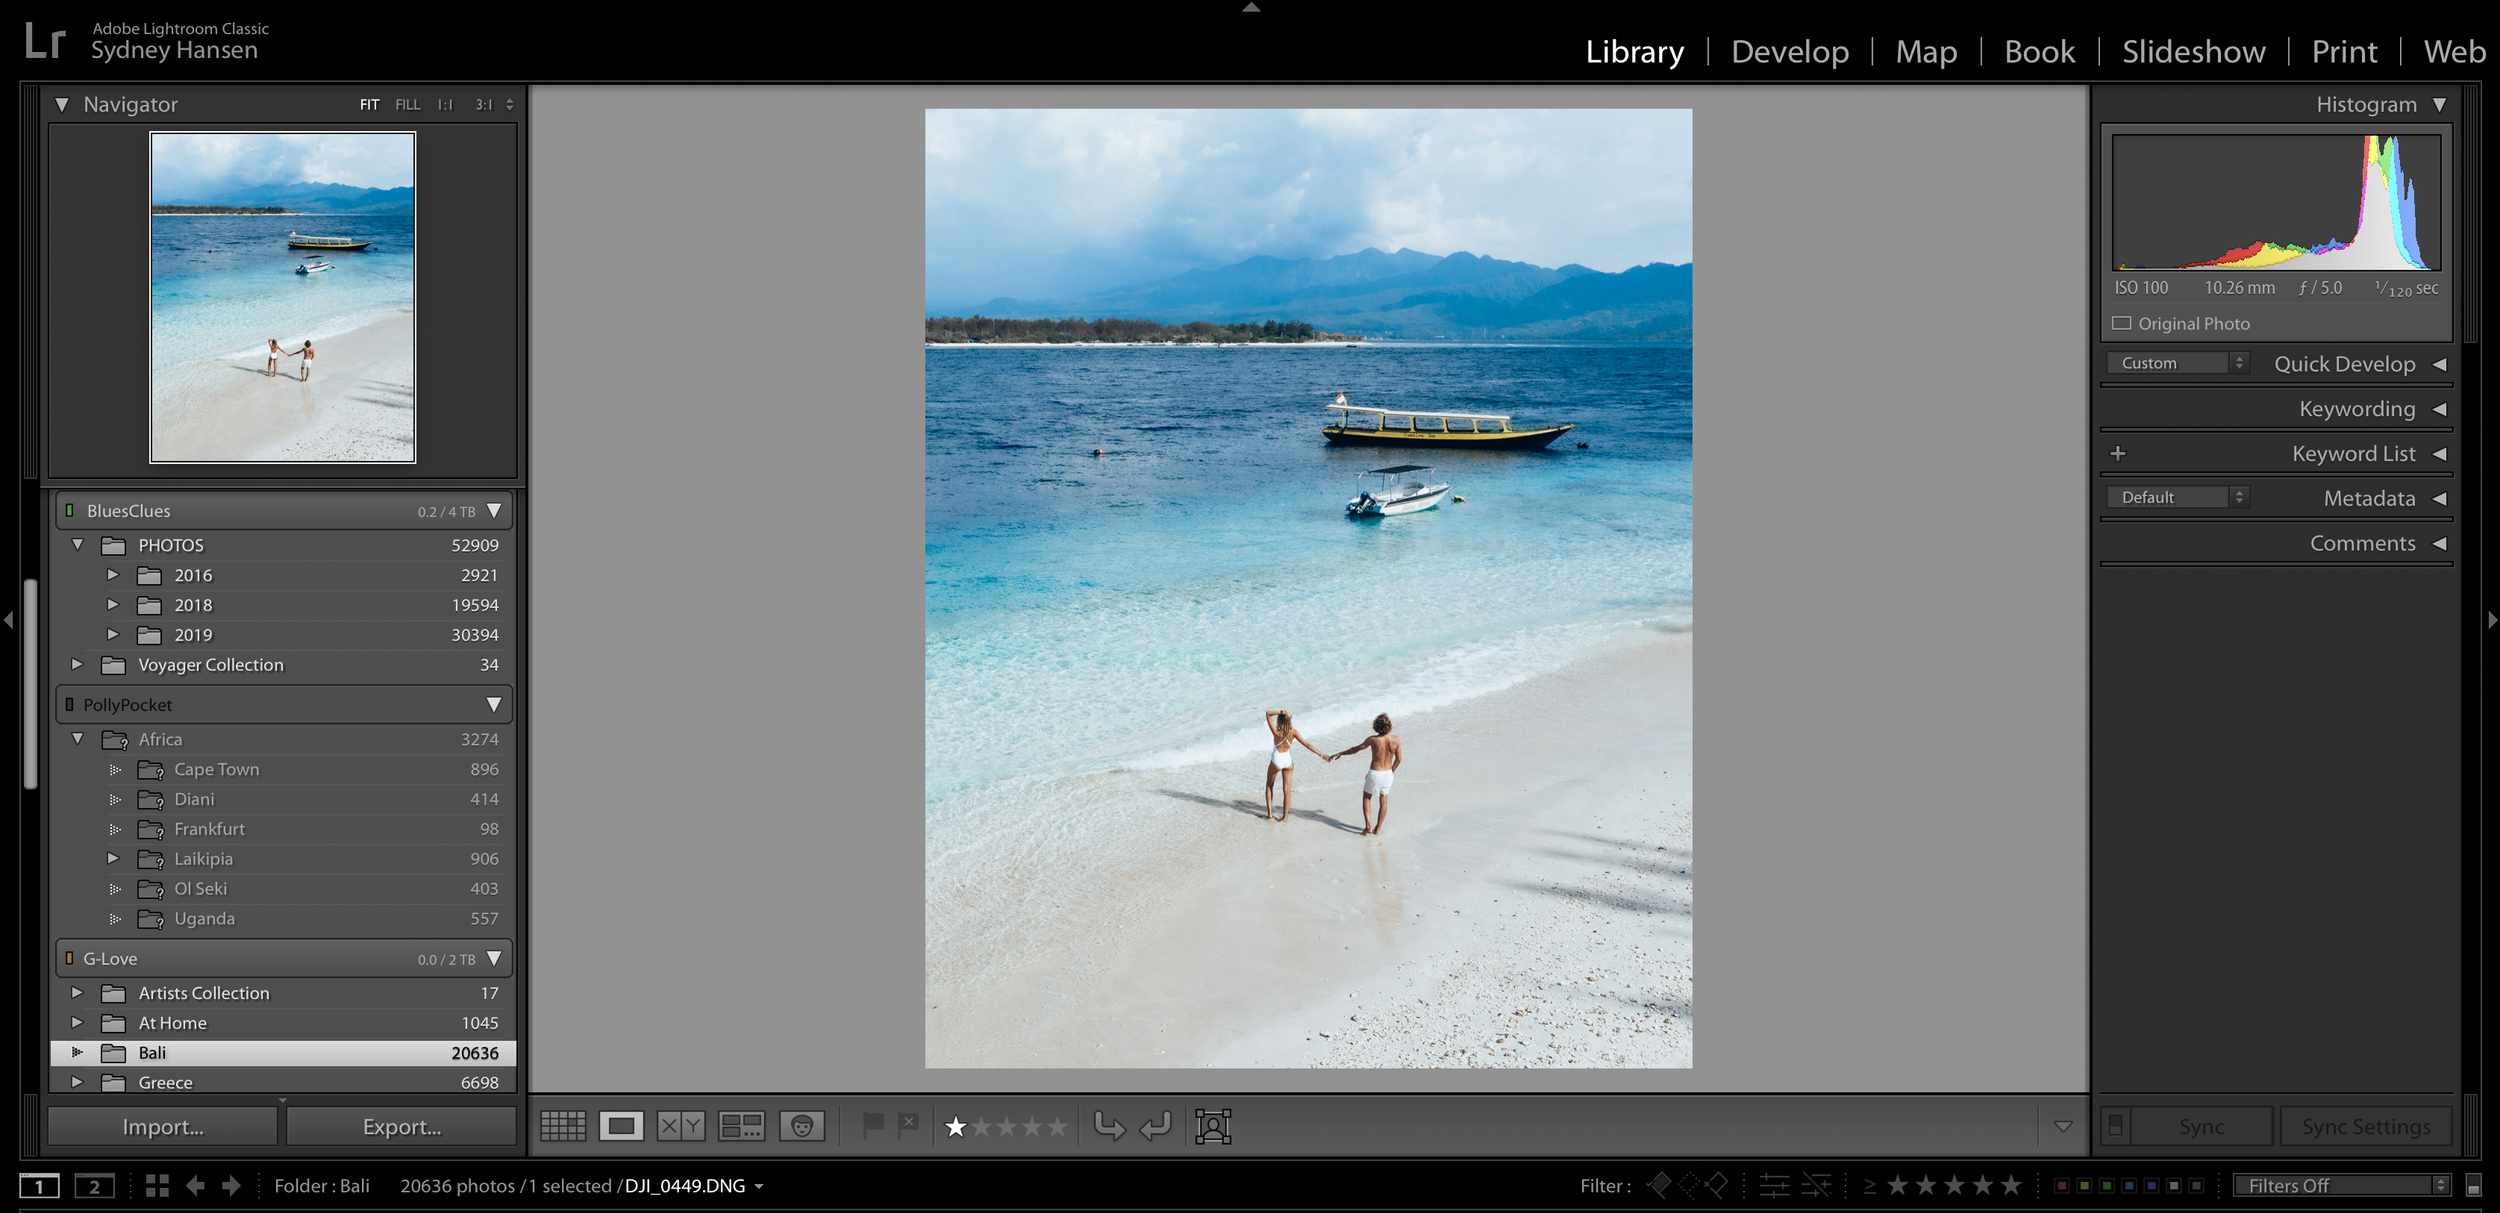
Lightroom Catalog Library - Pollypocket drive is not connected so folders are greyed out with '?' next to them.
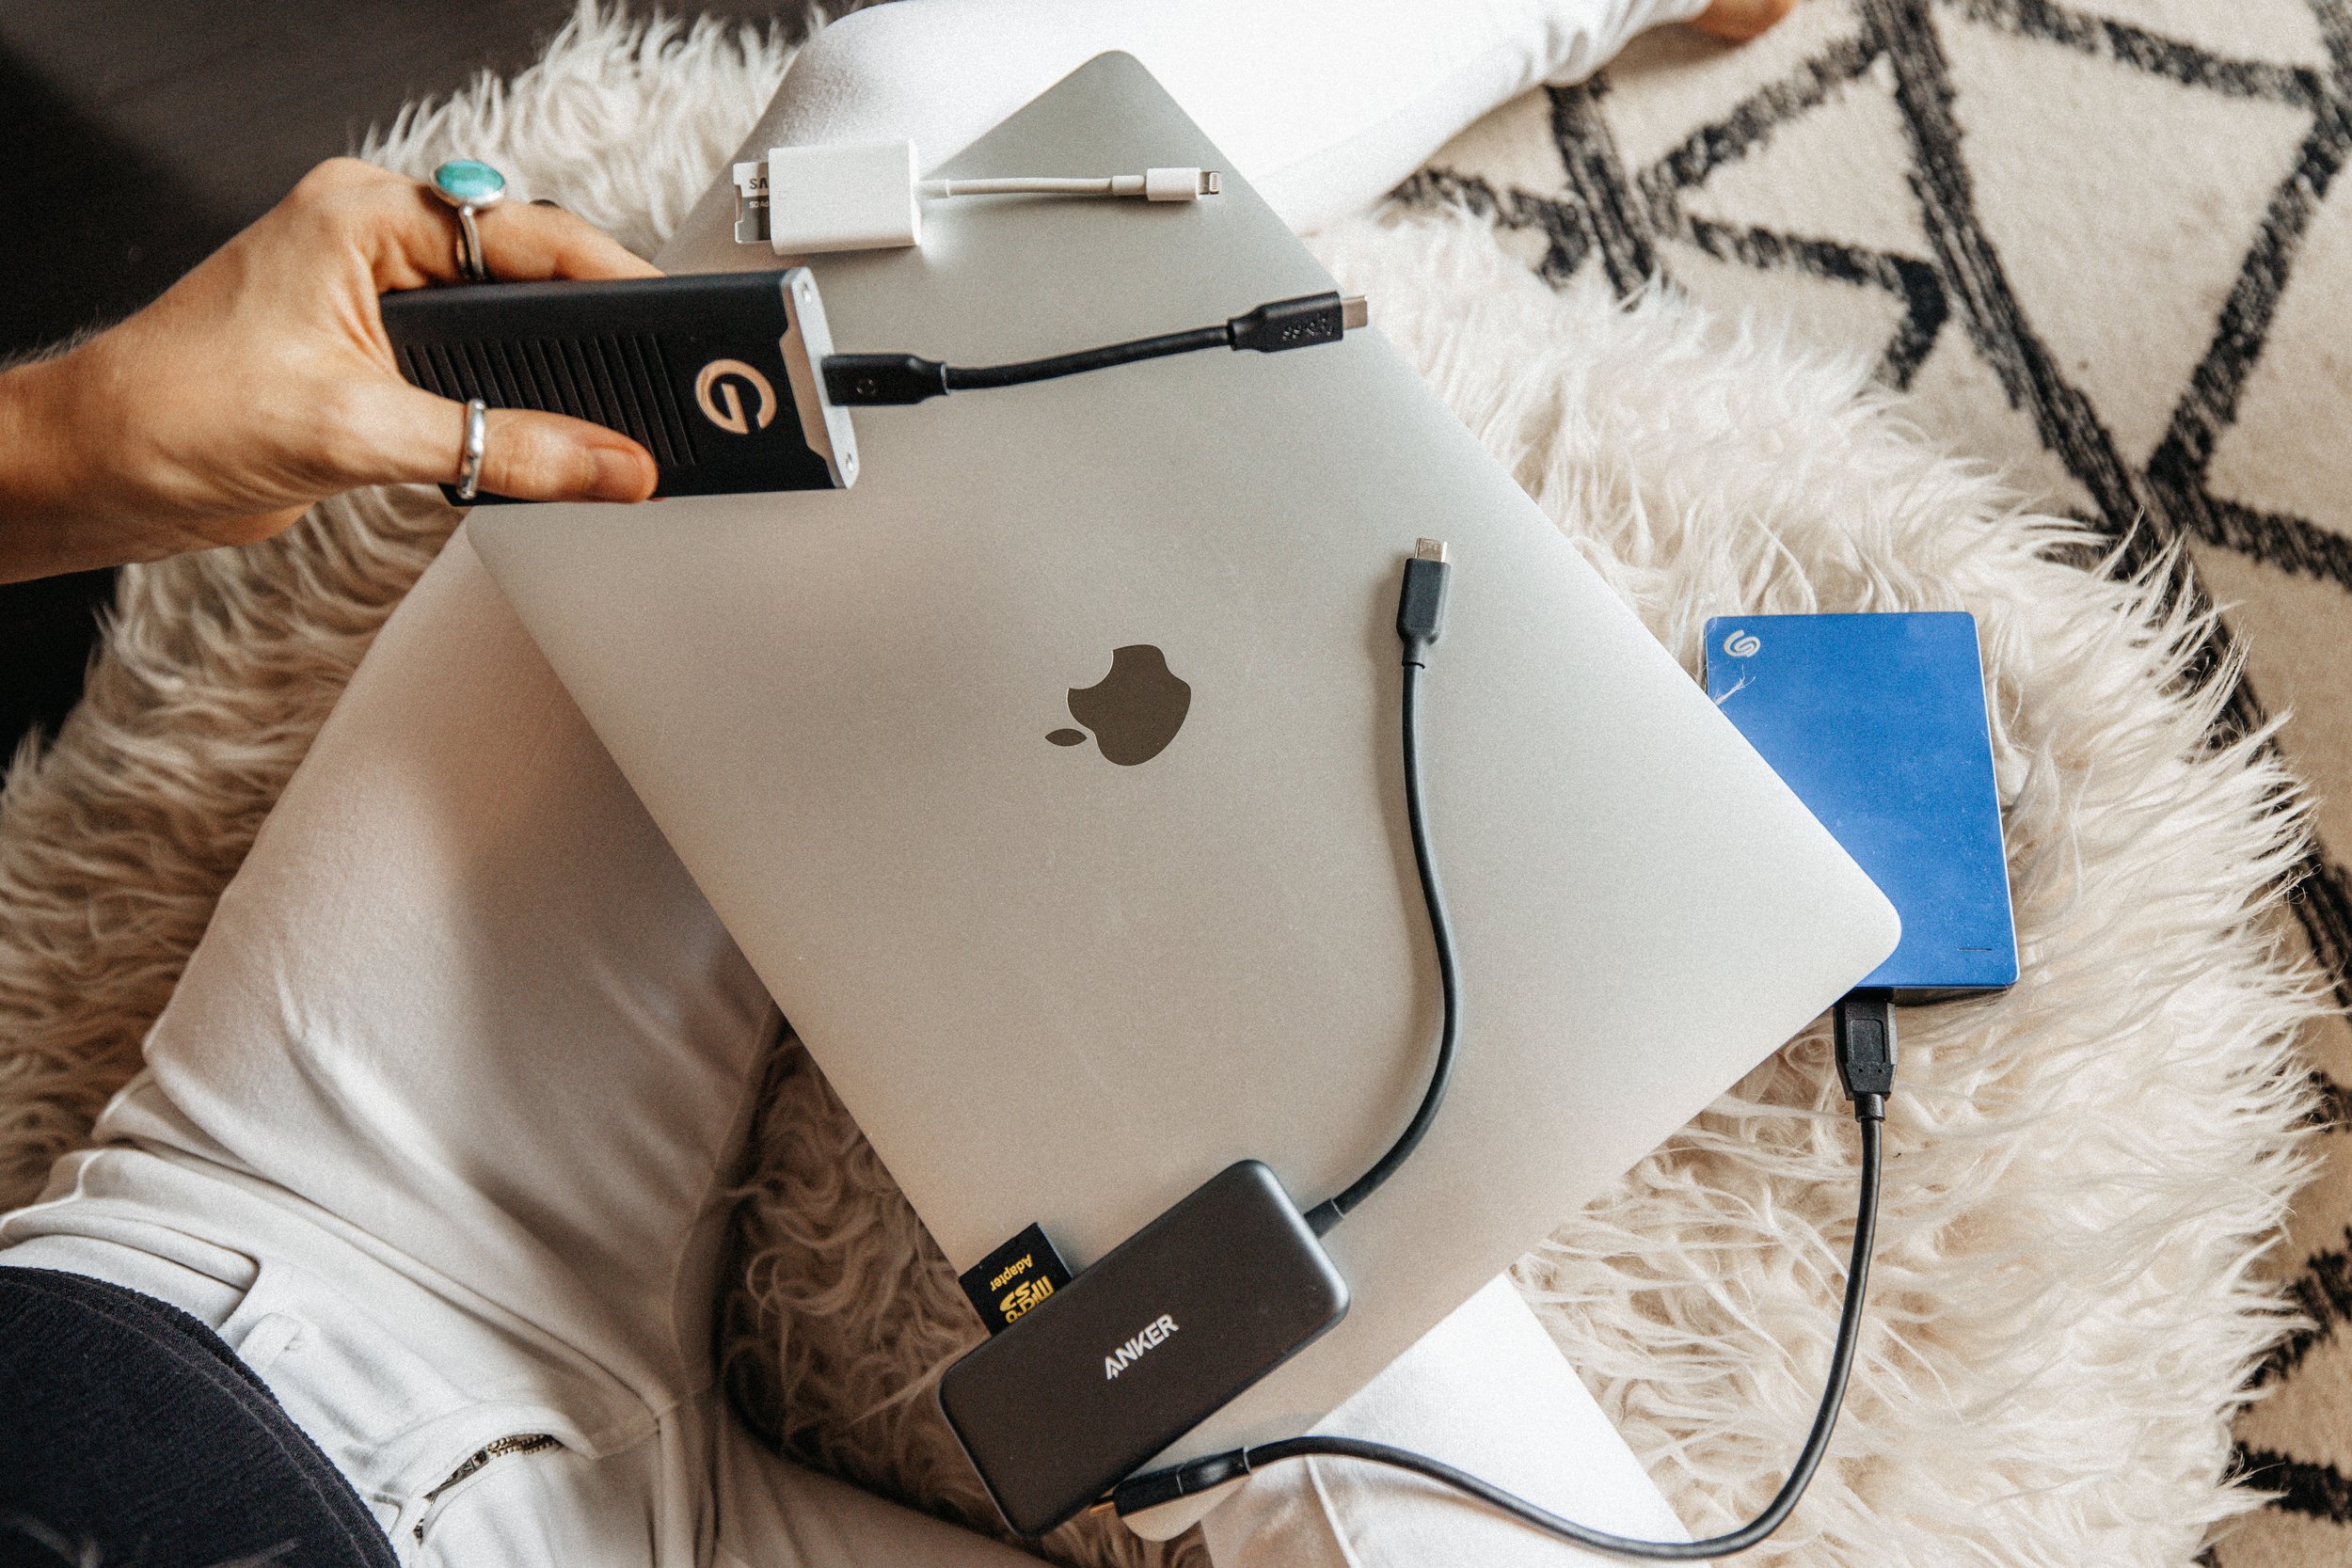
Storage
We shoot all of our media in RAW format, so the files themselves are quite large. We shoot media across our full frame camera, iPhone, drone, and GoPro. When we are on the road, we will upload all of our photos for the day to an external hard drive (2 TB G-Drive SSD) and also to a backup external hard drive (4TB Seagate HD). Then we import into Lightroom Classic. Our main working drive is the 2TB G-Drive SSD. As it is a solid-state drive (SSD), it is very fast and more durable simply because of the design. We carry the 4TB Seagate HD with us on the road mainly as a back up (it was our old drive, until we upgraded to the SSD). Because it is larger we will also have any photos from past projects we might need while while traveling for blog posts, Instagram, etc. If we could do it again, we would buy all SSD because they are so fast.
It’s important to find a storage system for naming folders and photos that makes it easy to quickly access whenever you need them. It took us a while to find a system we like, but now that we have it worked out, we can find any image we like in a matter of seconds.
Here is what our drive folder hierarchy looks like:
Type (i.e. Photos, Videos)
Year (i.e. 2020, 2019, 2018, 2017)
Location (i.e. Bali, Tulum, Scotland, Greece)
Day (i.e. D1, D2, D3, D4)
Gear (i.e. Drone, Canon, GoPro, iPhone)
So a typical file path would look like:
PHOTOS/2020/Komodo/D3/Canon/IMG_2543

FLOW
Once we have imported the raw footage from SD and MicroSD cards to our external drives, we format the camera cards and put them back into the gear, so they are fresh and empty to shoot the next day. For iPhone, we found it easiest to Airdrop clips to the computer and organize from there. We will also keep the iPhone photos and videos on our phones to use on Instagram stories until we are finished with that trip. After we return home, we can go through and delete all the footage to free up space on our phone.
Now that the media has been uploaded to its respective folder on our 2TB G-Drive SSD, we backup those same files from the day onto our other external hard drive the 4TB Seagate HD (and once we get home, we back up everything again from the trip onto our larger 5TB hard drives).

Now that we have our media from the day uploaded onto 2 different external drives, we import the photos to Adobe Lightroom Classic. We import with ‘1:1 Previews’ because we prefer the most detail possible when deciding which photos to use for content. Once they are imported in, we will look through the shoots from that day and decide if we have to redo any of them the following day. We can realize this pretty quickly by applying a couple different presets to see if we got the jist of what we were looking for (for more info on our editing process see post HERE). Typically we will not do a full edit immediately, but as our presets get us about 90% of the way there, we are able to quickly decide if we are happy or not with the photos.
During this first look through, we will mark ones we like with 1 star rating and then revisit later when deciding what to use from that shoot. We do not delete photos very often, unless there was an excessive amount of photos without us in them (having a timer on the camera will do that). Otherwise, we keep probably 90% of all our photos. You never know when you will need them. We’ve been surprised at the photos we have gone back to and actually ended up loving the second time around.

In summary, Lightroom Catalog is stored on the computer desktop. Lightroom Catalog Backup is on the desktop AND an external drive AND the cloud. The photos themselves are stored on multiple external hard drives. Lightroom Catalog links to the photos stored on external drives.
Our Lightroom Catalog has data on all of our photos ever edited, dating back to 2010. Obviously our little 2TB G-Drive SSD cannot hold all of those photos, so the catalog is actually linked to different drives for specific trips. For example, our Bali trip photos are on the 2TB SSD, so the catalog is linked to that drive for the Bali edits. But our Africa trip (2017) is only on our 5TB hard drive at home, so the LR Catalog links the edits for the Africa trip to the 5TB hard drive at home. As you can imagine, we cannot access these photos until we go home again, even though the catalog shows they exist (they will just have a ‘?’ next to them, because Lightroom cannot locate the source). This can seem complex at first, but we actually created a spreadsheet outlining which drives have which trips on them, so we can easily access photos from a specific trip by referencing this sheet. We keep it simply chronological.
Here is how we allocate our photo storage:
SD, MicroSD Cards - Content created in last 24 hours. We format these each night after we upload to external drives.
2TB G-Drive SSD - Most recent content (typically last 12 months)
4TB Seagate HD - Backup of most recent content (anything on 2TB G-Drive SSD)
5TB Seagate HD #1 (at home) - Archive of all footage shot up to present trip
5TB Seagate HD #2 (at home) - Backup of archive of all footage shot up to present trip
OneDrive Cloud - LR Catalog Backup
Exporting Final Edits
The final step in organizing our information is exporting and storing our edited work. We like to do this very similarly to our photo storage explained earlier, but just under a different parent folder named ‘Project Edits', which is then differentiated by photos and videos. We again will arrange by year, destination, but this time by the project/client whose photos were edited for (instead of the day they were shot). For example here is what the file path looks like for photos of a clothing company we shot in Bali:
Project Edits/Photos/2019/Bali/”Company Name”/IMG_2543
This way we can keep things separate in case we use a photo multiple times for our website, client, and Instagram and we can know which crop and edit were used where.

And there you have it. That is how we store and organize all of our photos and videos. Let us know if you have any other questions or tricks for organizing your content in the comments below!