The SECRET to Taking Better Couples Photos
One of our favorite ways to document travel has been by creating memorable photos to capture that specific moment. There is nothing like having a beautiful photo to look back on and remember how wonderful an experience really was. Photos transport us back to the emotions, the sounds, the smells and everything that created a time and place. But really nailing the shot is not always as easy and effortless as it may seem.
Whether or not we want to admit it, we all pose for photos in one way or another. Anything other than the normal feet-planted-and-smile routine can feel awkward, silly, or even scary. This is especially true if there are random people around. Additionally, if you want to capture a nice couples photo, you have to coordinate your poses together! It starts to feel complicated, fast. We hear you and we were there not too long ago. Yes, some things just take time, but there are a few things we’ve learned that will make this a much faster and more enjoyable process.
Note: Everything we learned has been self taught mostly through trial and error. So if we can learn it, you can too!
In this post we share our secrets on gear, mindset, composition and also some of our favorite go-to poses. Let’s get to it!
GEAR
Having the right equipment can make the difference. When we first started out, we struggled because we didn’t have the right tools to take photos of ourselves. We relied on other people to take photos for us. This really limited us on on our ability to really capture a moment, and also heightened the anxiety about posing. We would feel self conscious and wanted to rush and capture “the shot” in only 1-2 photos. Now with our current set up, we take at least 30-60 photos before we find one we like. There are only a couple essential items you need to do this yourself, which we will outline below, but if you are interested about ALL of our gear in the camera bag, check out our post HERE.
CAMERA OR SMARTPHONE
Having a DSLR camera will help to capture a variety photos in different lighting situations. These more expensive cameras are able to capture a wider range of light, providing more options for editing later. Think darker darks and lighter lights without too much of the grain. We use a Canon EOS R for most of our shooting. We like it because it has a flip screen, which allows us to see ourselves from the other side of the camera.
That being said, don’t underestimate the power of a smartphone (remember your best camera in a situation is always the one you have with you). We keep the iPhone X handy for quick moments on the go. The quality of smart phones is quickly improving and can be great for spontaneous moments. Some of our favorite photos have actually been iPhone selfies that we took on the fly when we didn’t want to set up our tripod.
2. CAMERA HOLDER
For us, this is always a tripod. We love the freedom we have to set it up anywhere at anytime. Before getting a tripod we would try setting the camera on things like a rock or table nearby which can work okay, but limits the perspective. When we travel, our tripod comes with us everywhere we go. Our photos improved so much when we decided to start using one, and it is the best way for solo travelers or couples travelers to get photos of themselves. Make sure you have one that is stable enough you don’t have to worry about your camera falling over! Our first tripod was cheap and flimsy. This resulted in our camera falling over and cracking a lens. We decided to upgrade to this one here and have loved how stable and easy to use it is.
Alternatively, you can still grab a friend, family member, or even a random person walking by to hold the camera. If you are going this route, be sure to frame up the shot beforehand, so you can convey the simplest directions to capture what you are looking for. We recommend even taking a photo of how you want it to look and showing it to them, telling them where you want to be in the shot. You may have to remind them to flip the shot horizontal/vertical depending on your preferences (we shoot everything vertically if it is for Instagram).
3. SELF TIMER / INTERVELOMETER
Most cameras and phones have some sort of a self timer built in or apps that will accomplish the same. When we started, we were using the 10 second timer on our camera. This involved a lot of running back and forth. Unfortunately, we kept “just missing” the shot. We would get fatigued and leave with only a few shots of a place, or have to spend close to an hour to get it just the way we wanted it. We also had to be within “running distance” of the camera which really made things tricky for far away photos. In short: it was cumbersome.
Then we learned about a nifty device called an intervelometer. This hooks up to the camera and shoots continuously on 2 second intervals for as many photos as we want. All we have to do is frame the shot and let it click away! This sped up our shooting process significantly and is a necessity if you plan on taking photos on your own. It also helped us to be more creative and natural in front of the camera because we were able to relax and let our natural, goofy, loving selves come out to play.
PROPS
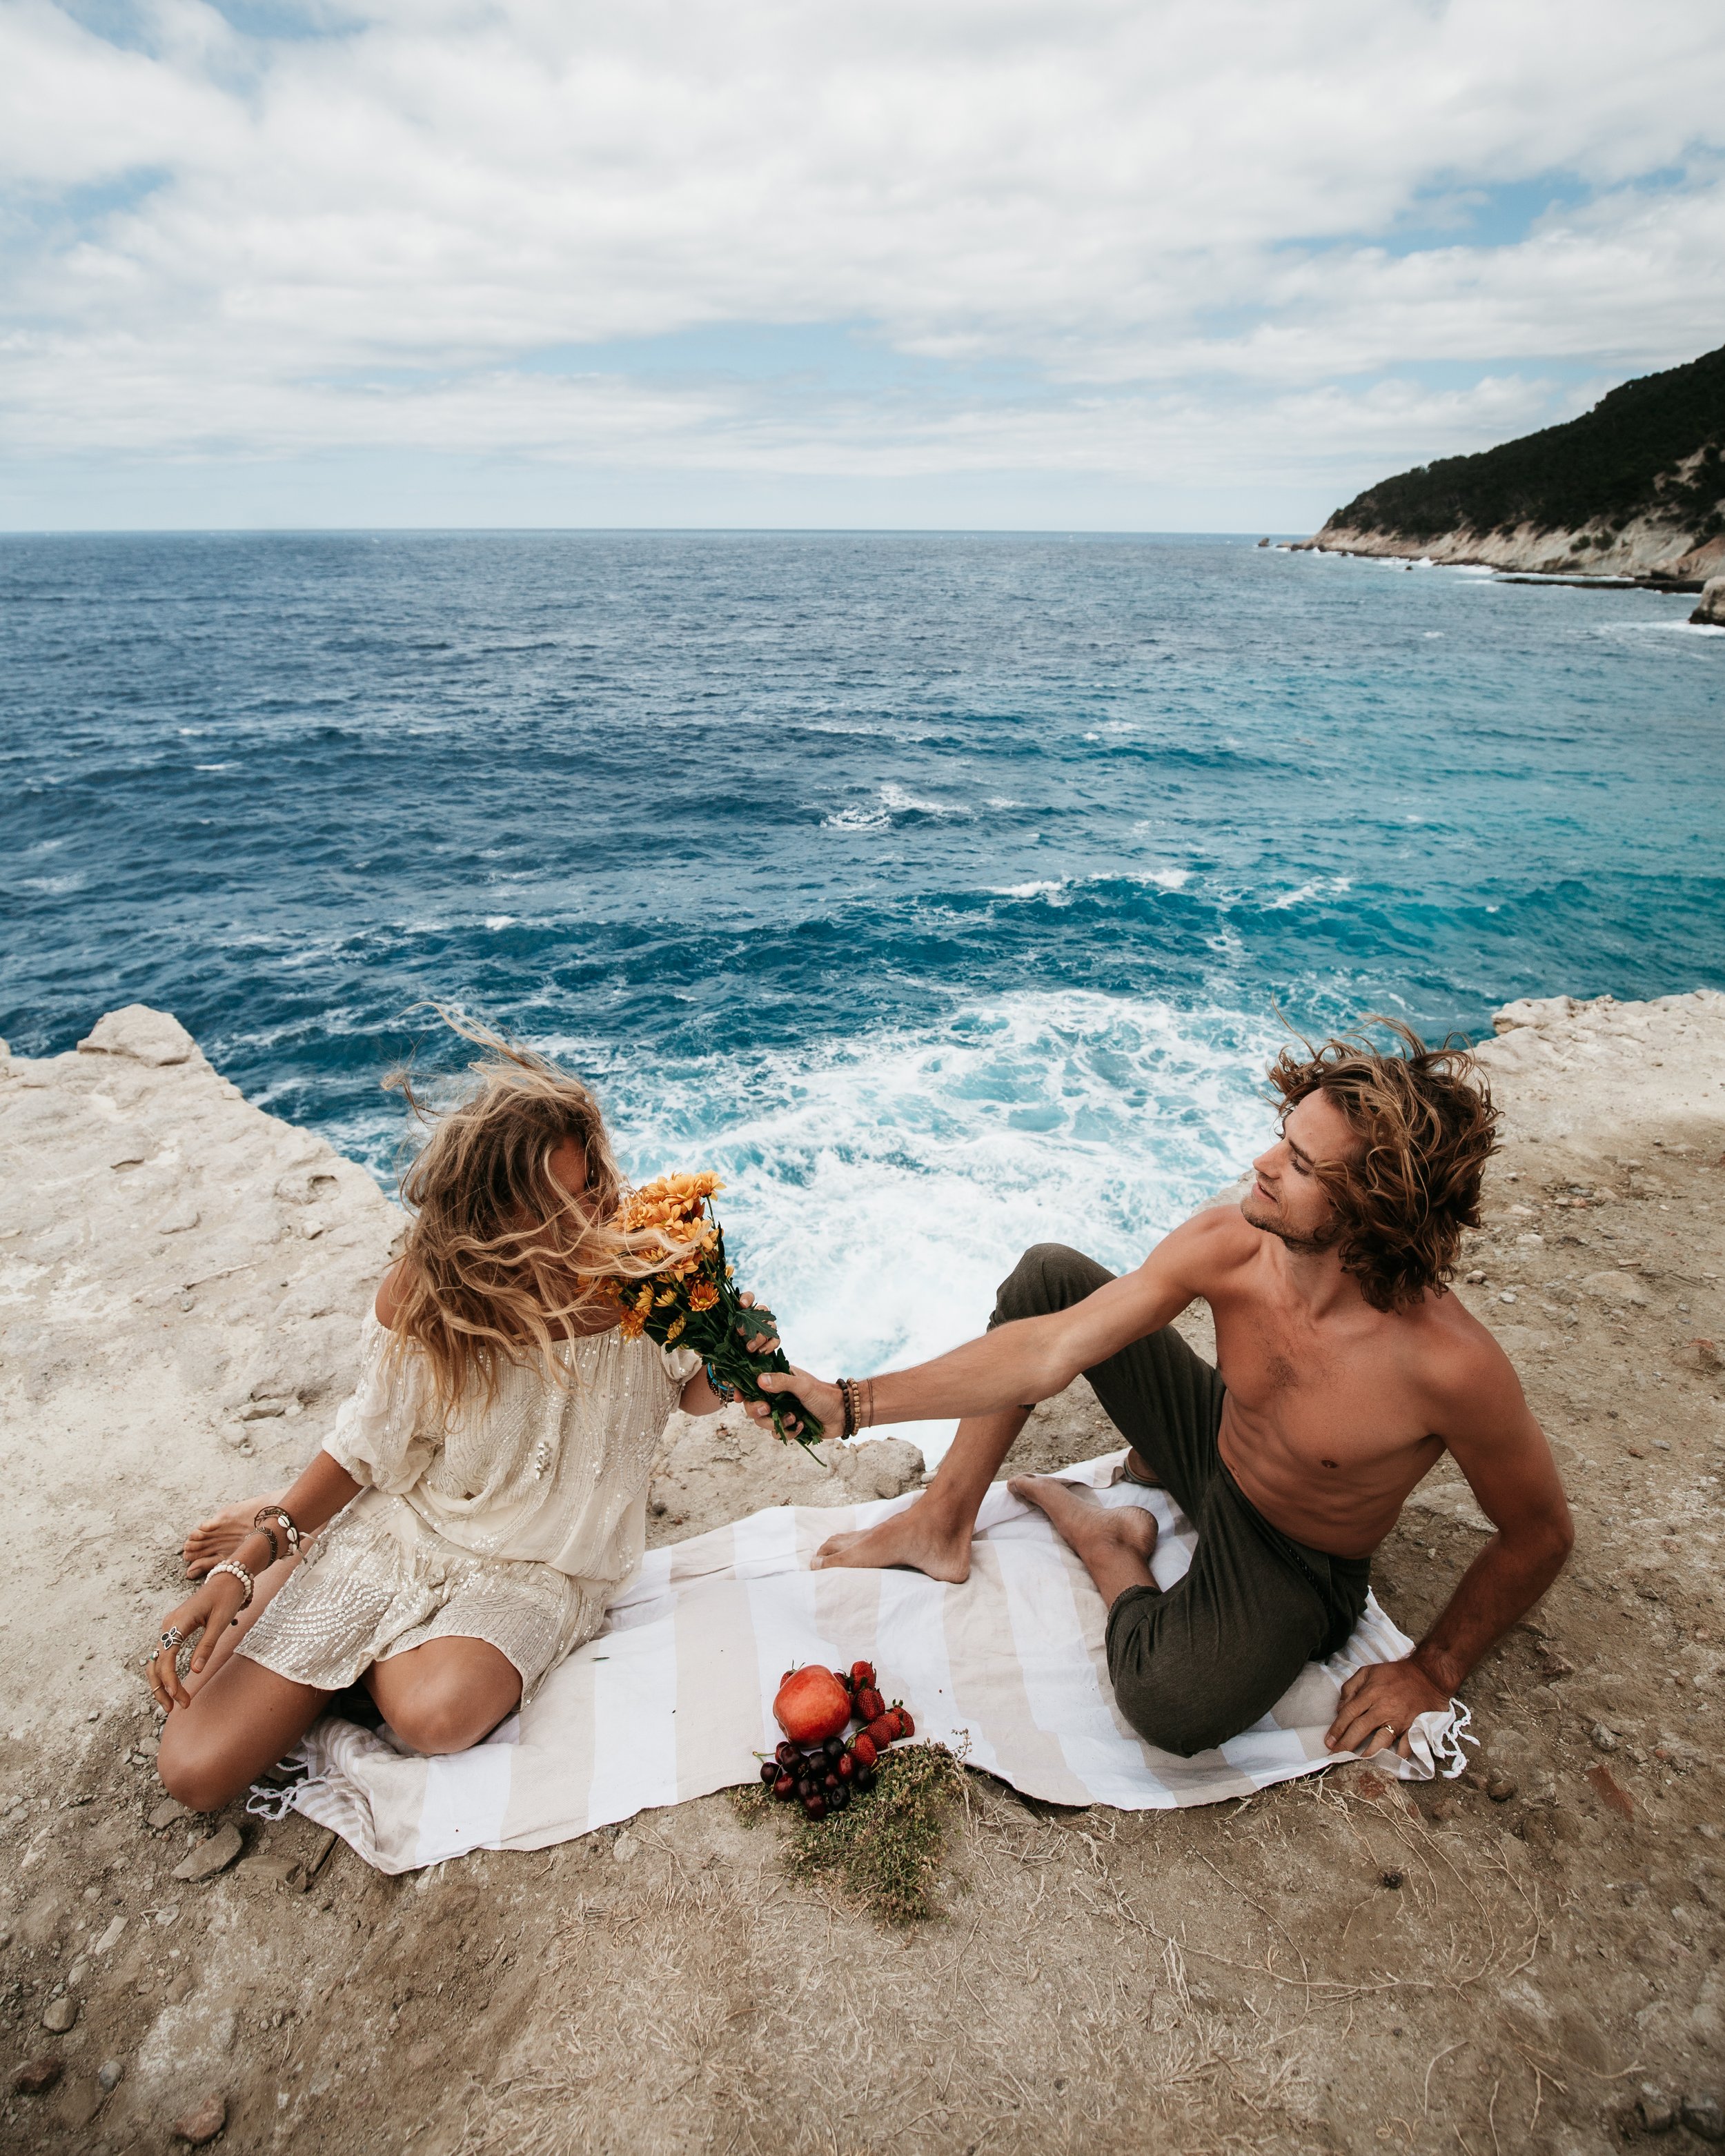
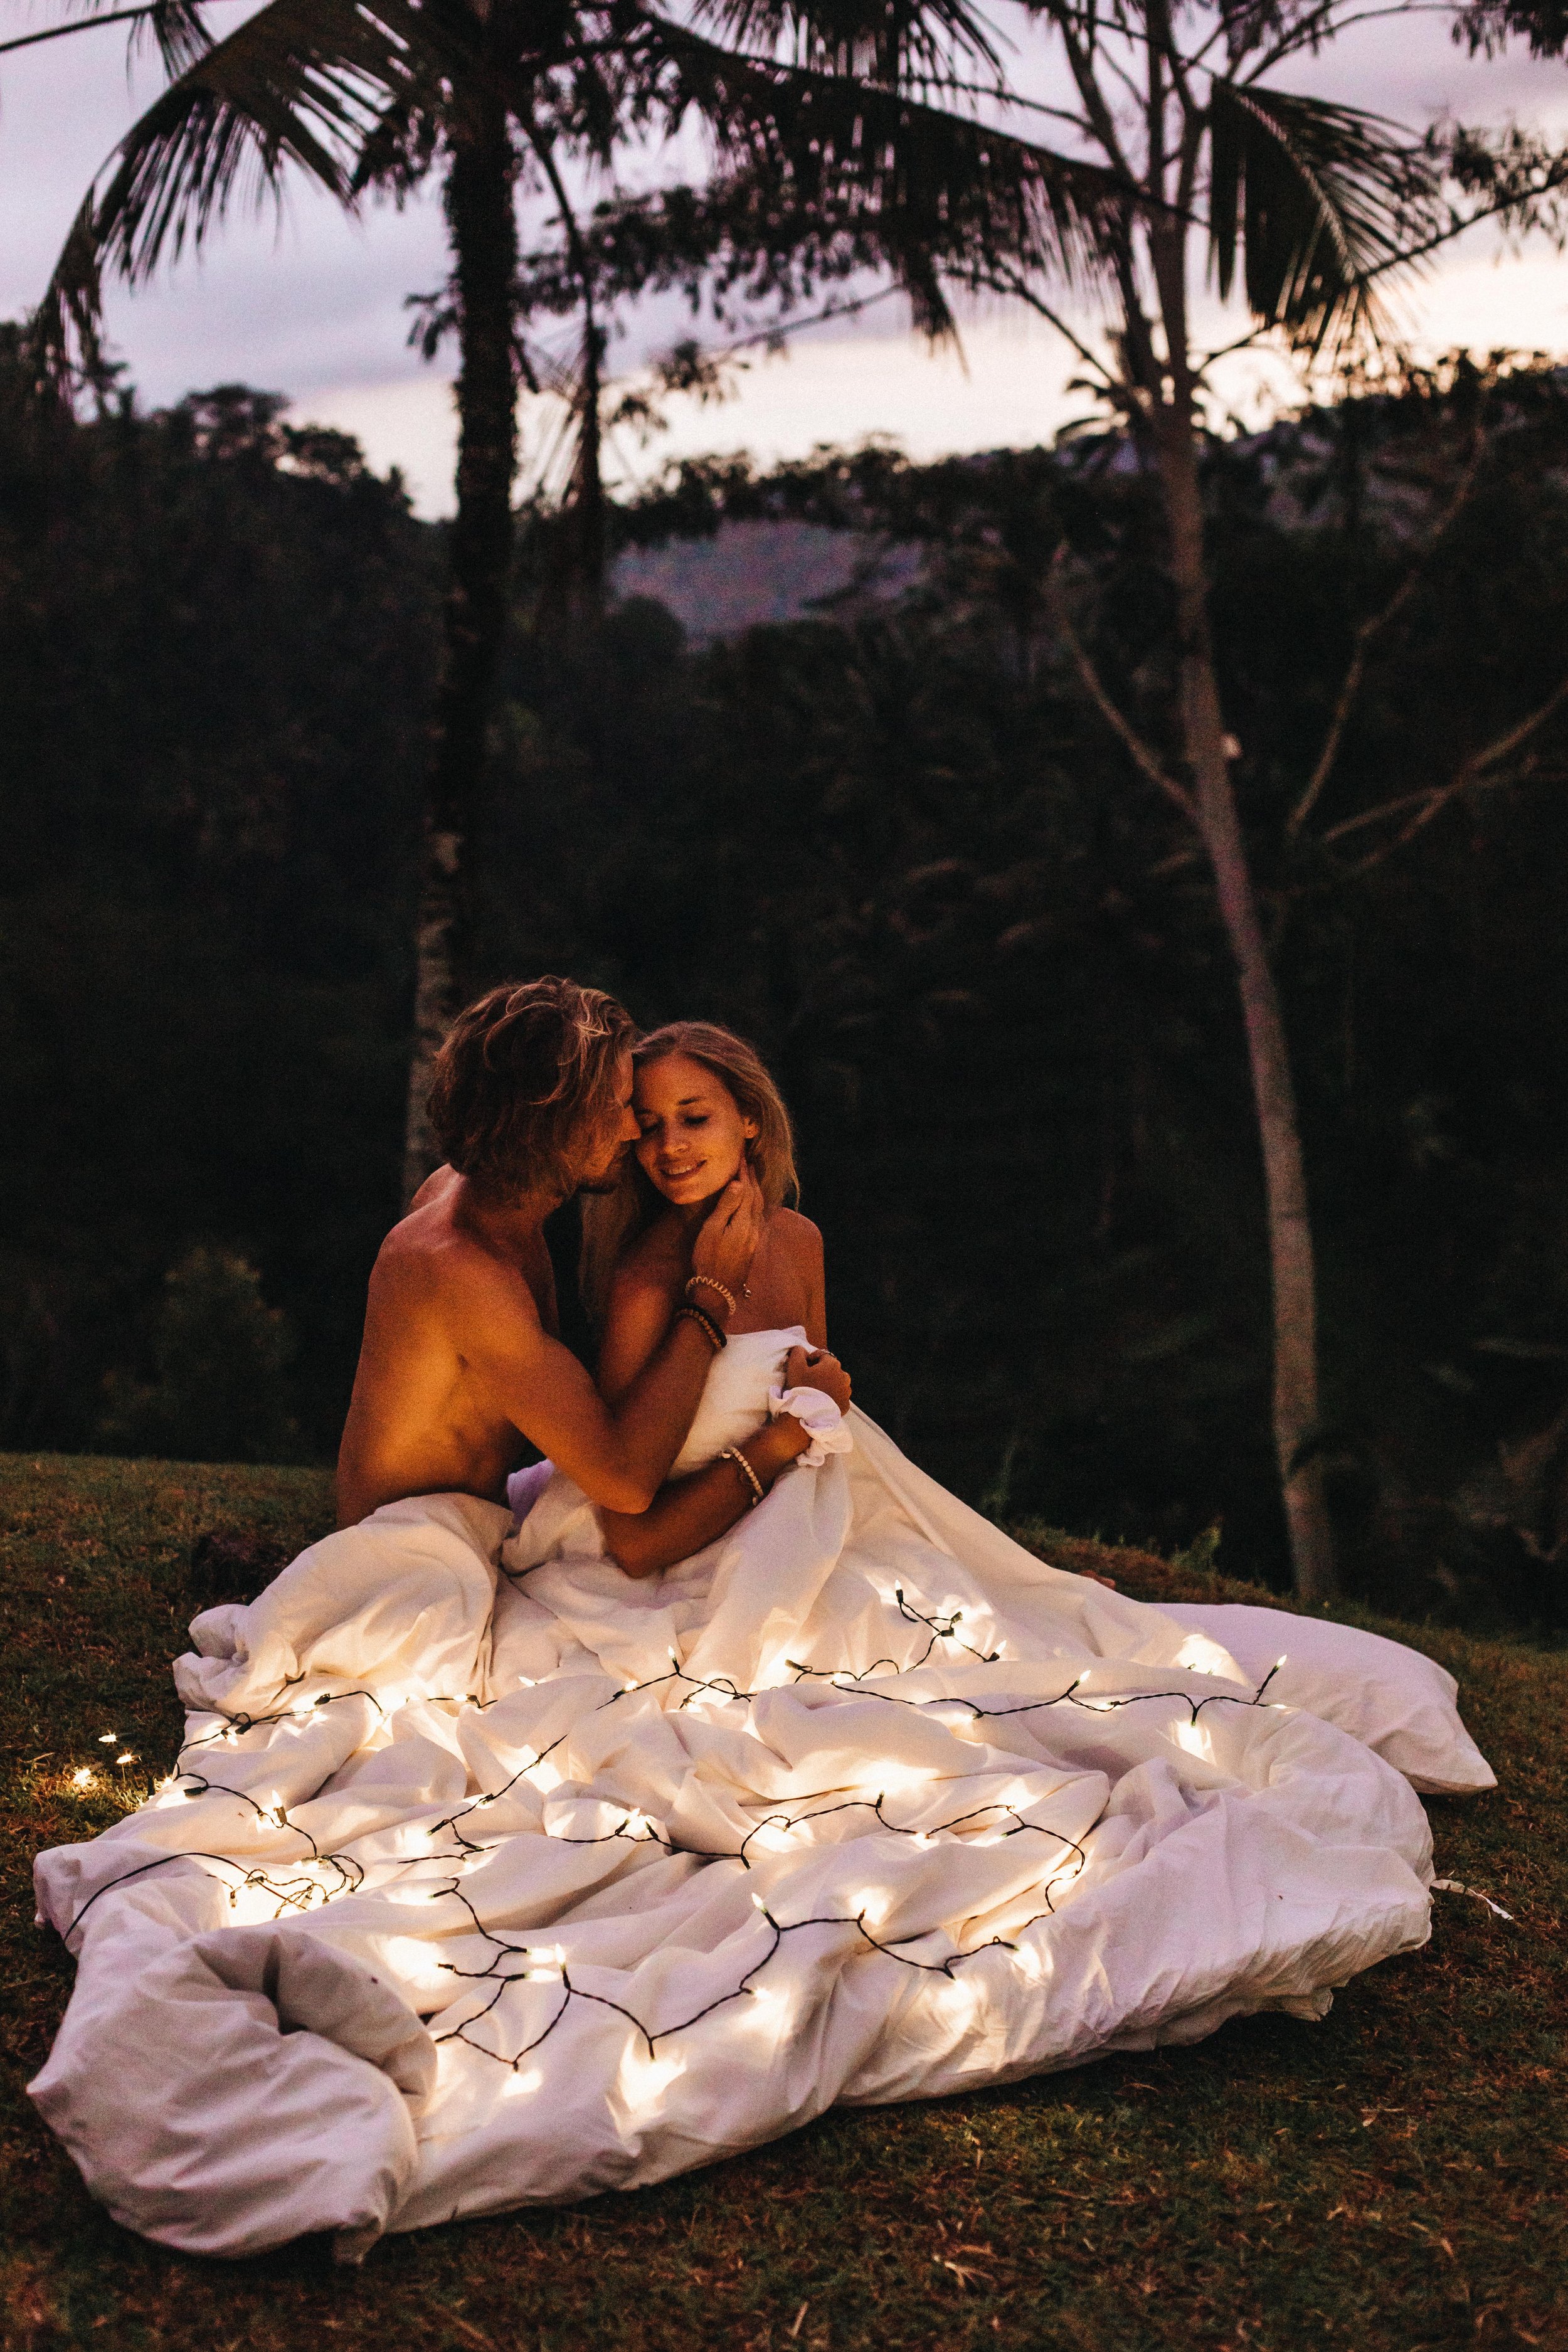
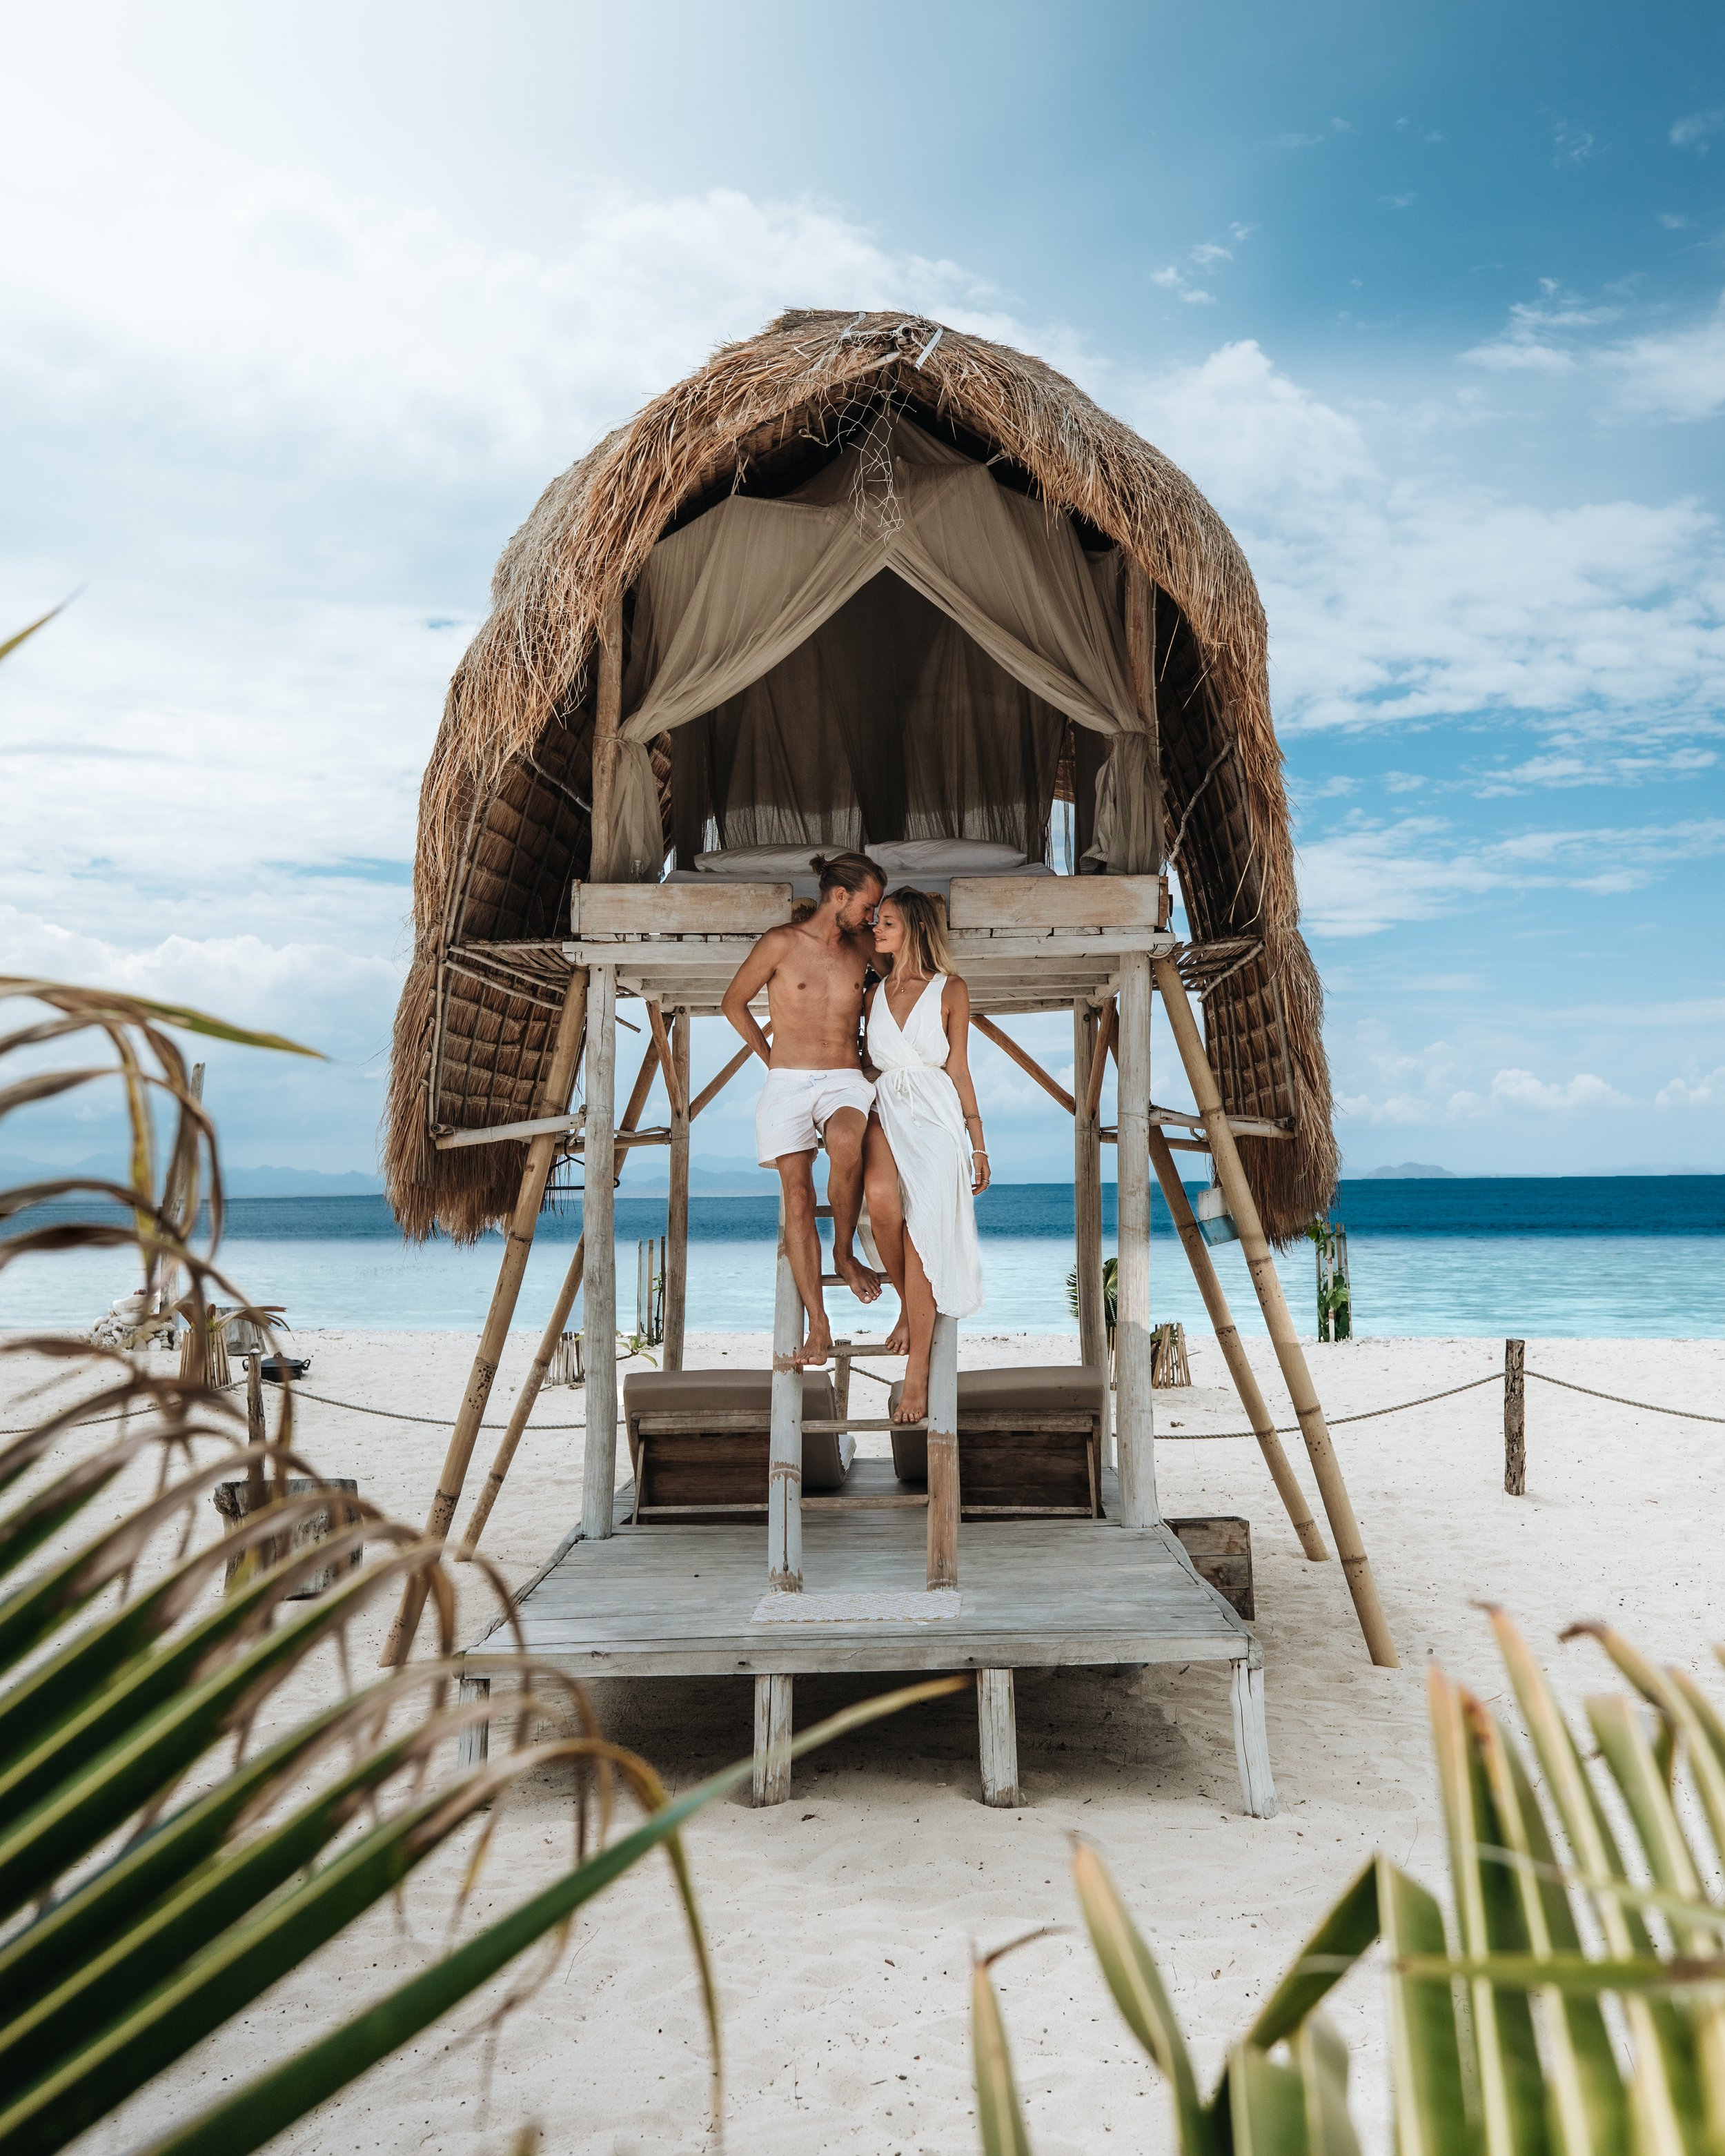
Props can be the X-factor to your photos. These really help in telling a story with your images versus just standing in front of another beautiful backdrop (which can be great, but also can lead to every photo looking exactly the same as the other). They can give you something to play with and even inspire you in how you pose. Whenever we are feeling a creative block with a photo or concept, we usually try to take a step back and ask ourselves “what else could I add to the photo would help to make that moment come to life?” This could be anything from flowers, food, cups, hats, blankets, candy, twinkle lights, books, newspaper, etc. We love props because they help us to really think about the the photo as a whole and determine the moment we are really trying to convey!
Take a look at the photos below. The one on the left we bought fruit and flowers from the market that morning and brought a towel to sit on. For the middle photo, we took some twinkle lights and our bed sheet out to the rice terraces in Bali. For the shot on the right, there was a wedding the day before, so there was a bunch of rice on the ground. We decided to gather it up and throw it in the air!
When thinking about props, consider how planned versus spontaneous you want the photo to look. More props can lead to extravagance while a few props can look simple and candid.
MINDSET
Powerful photos usually convey some sort of emotion. We’ve found that if we are not able to really get into the mindset, it shows up in our photos. If we try and take a photo when we are too tired, angry or self conscious, the connection just isn’t there and the photo carries that energy. It is just as important to have the right energy and mindset for photo as it is to frame the shot correctly or choose the right settings.
If you are having trouble getting in the right mood here’s some things to try:
Play some music: We love to play anything from cheesy love songs to high energy electronic dance music depending on how we are feeling. Play some music either out loud or in your head and allow yourself to really get into it. Some of our best photos even come when we are actually dancing because of the movement it adds to the shot.
Talk to each other: Many times when you see us looking like we are whispering something in the other one’s ear it’s because we actually are. This helps us to really feel into the moment or make the other person laugh.
Channel your inner (fill in the blank): We all have people that inspire us. Most of our social icons do this by portraying a specific mood. So if your having a hard time getting out of your head, think about channeling your favorite movie character or celebrity.
DEALING WITH CROWDS
While we usually try and shoot really early in the morning (around sunrise is best) to avoid crowds, or find a private spot over to the side, sometimes crowds are inevitable. So here’s the simple truth and dealing with them: It is going to be awkward. It is going to be fun. And it is all perfectly OKAY.
You may have to wait out crowds until there is a small window of calm to grab a photo. You may have to wait in lines to get “the” shot. There are going to be onlookers and there are going to be people who laugh. But at the end of the day, you are creating a memory and you are expressing yourself. Spectators can laugh all they want, but we are firm believers that life is best lived IN the arena.
We still get nervous when shooting in front of crowds. And if there is one thing we learned, there is always someone in that crowd that secretly wants to do what we are doing. We have had people come up to us and ask us how we do what we do and how they also would like to try. When you are expressing yourself, you are inspiring others to do the same.
And if you start to feel really uncomfortable, just giggle your way through it, even if it’s fake giggling, it looks good ;)
COMPOSITION
Photographing as a couple adds a layer of complexity to posing, but also opens up a lot more options. It allows you to create a “moment” and show connection which can bring a lot of emotion and feeling to the image. One of the most helpful things we did when we first started was to study the images that others created. We would try to determine why a certain shot worked when others didn’t. Was it the background, the facial expression, the lighting? Where were their hands, their faces, their feet and how did it all work together? Knees bent? Toes pointed?
Overtime we have come to find four things to be most helpful to us when considering a shot together:
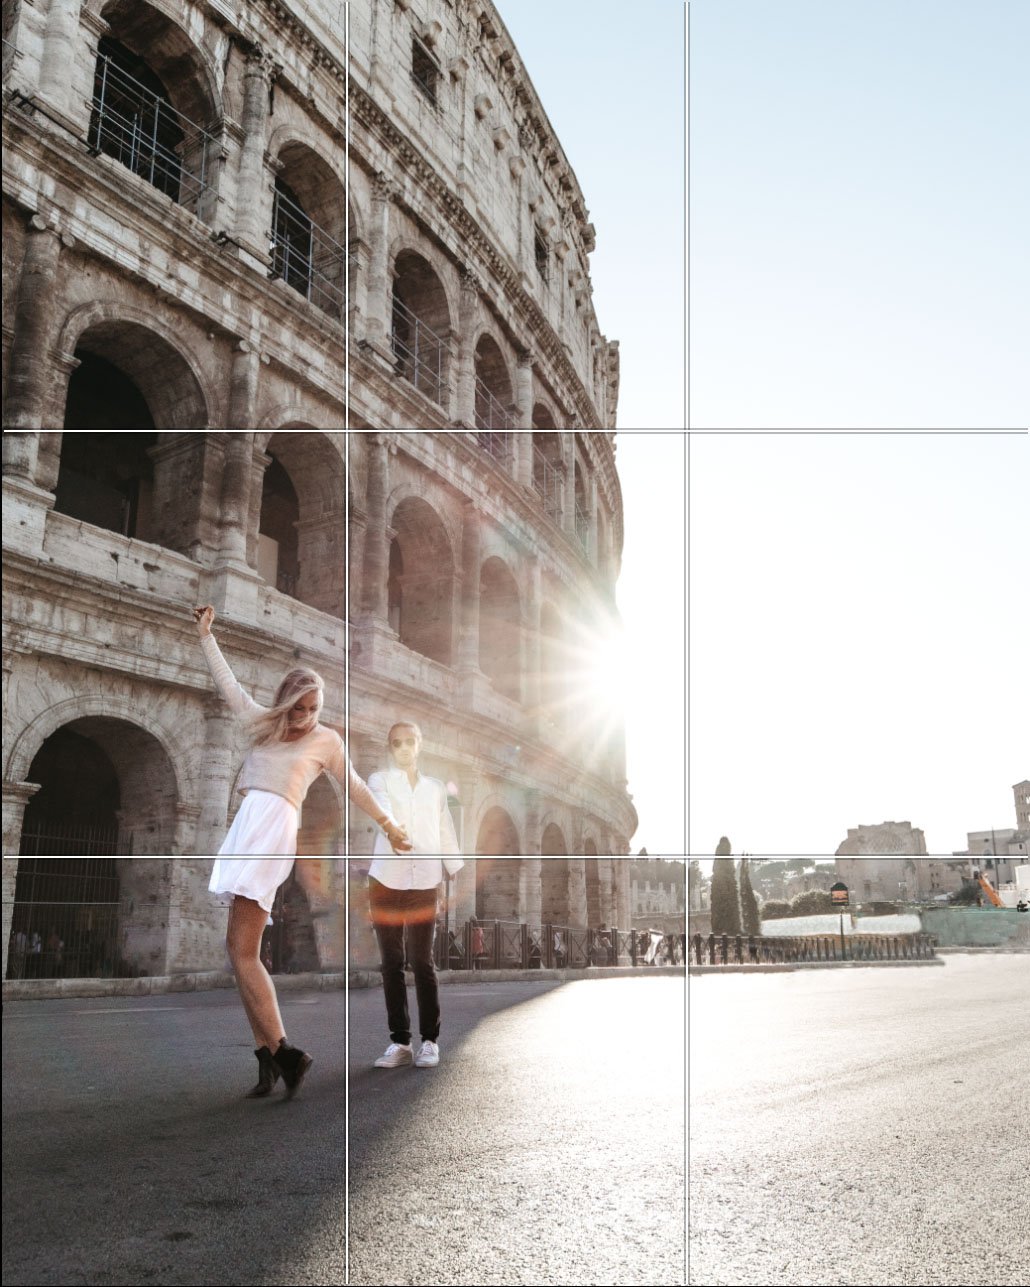
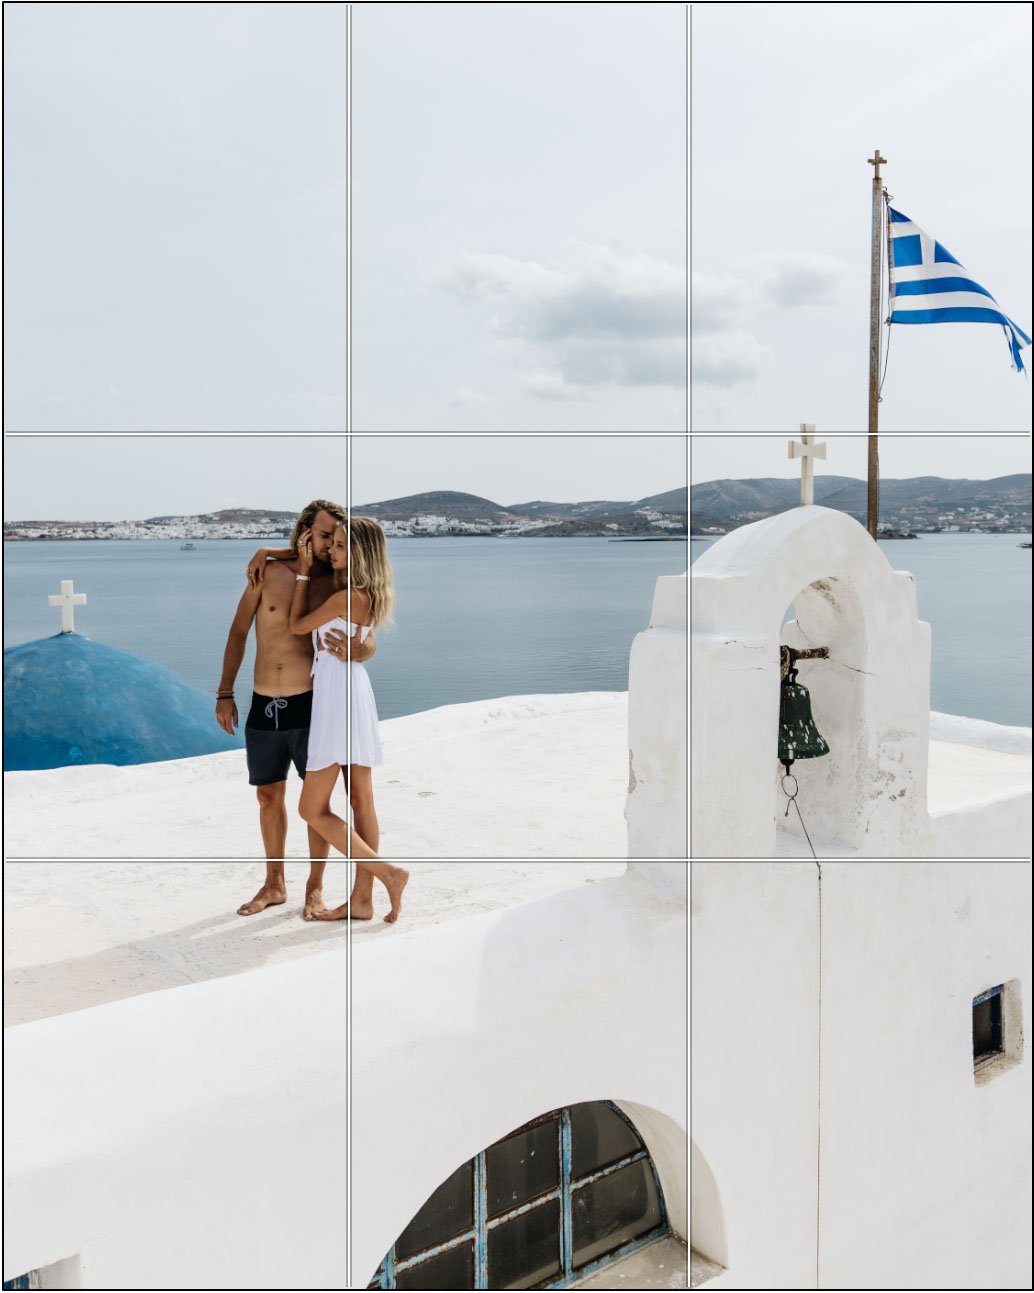
Balancing the Composition: Typically we will either try to be centered in the frame or at least lined up along the rule of thirds. The rule of thirds essentially means if you were to put a grid over a photo (think a giant hashtag sign #) which divides the shot into thirds laterally and horizontally. Now place the subject along one or two of those lines. A lot of cameras will have this grid build in as a setting to see in the viewfinder.
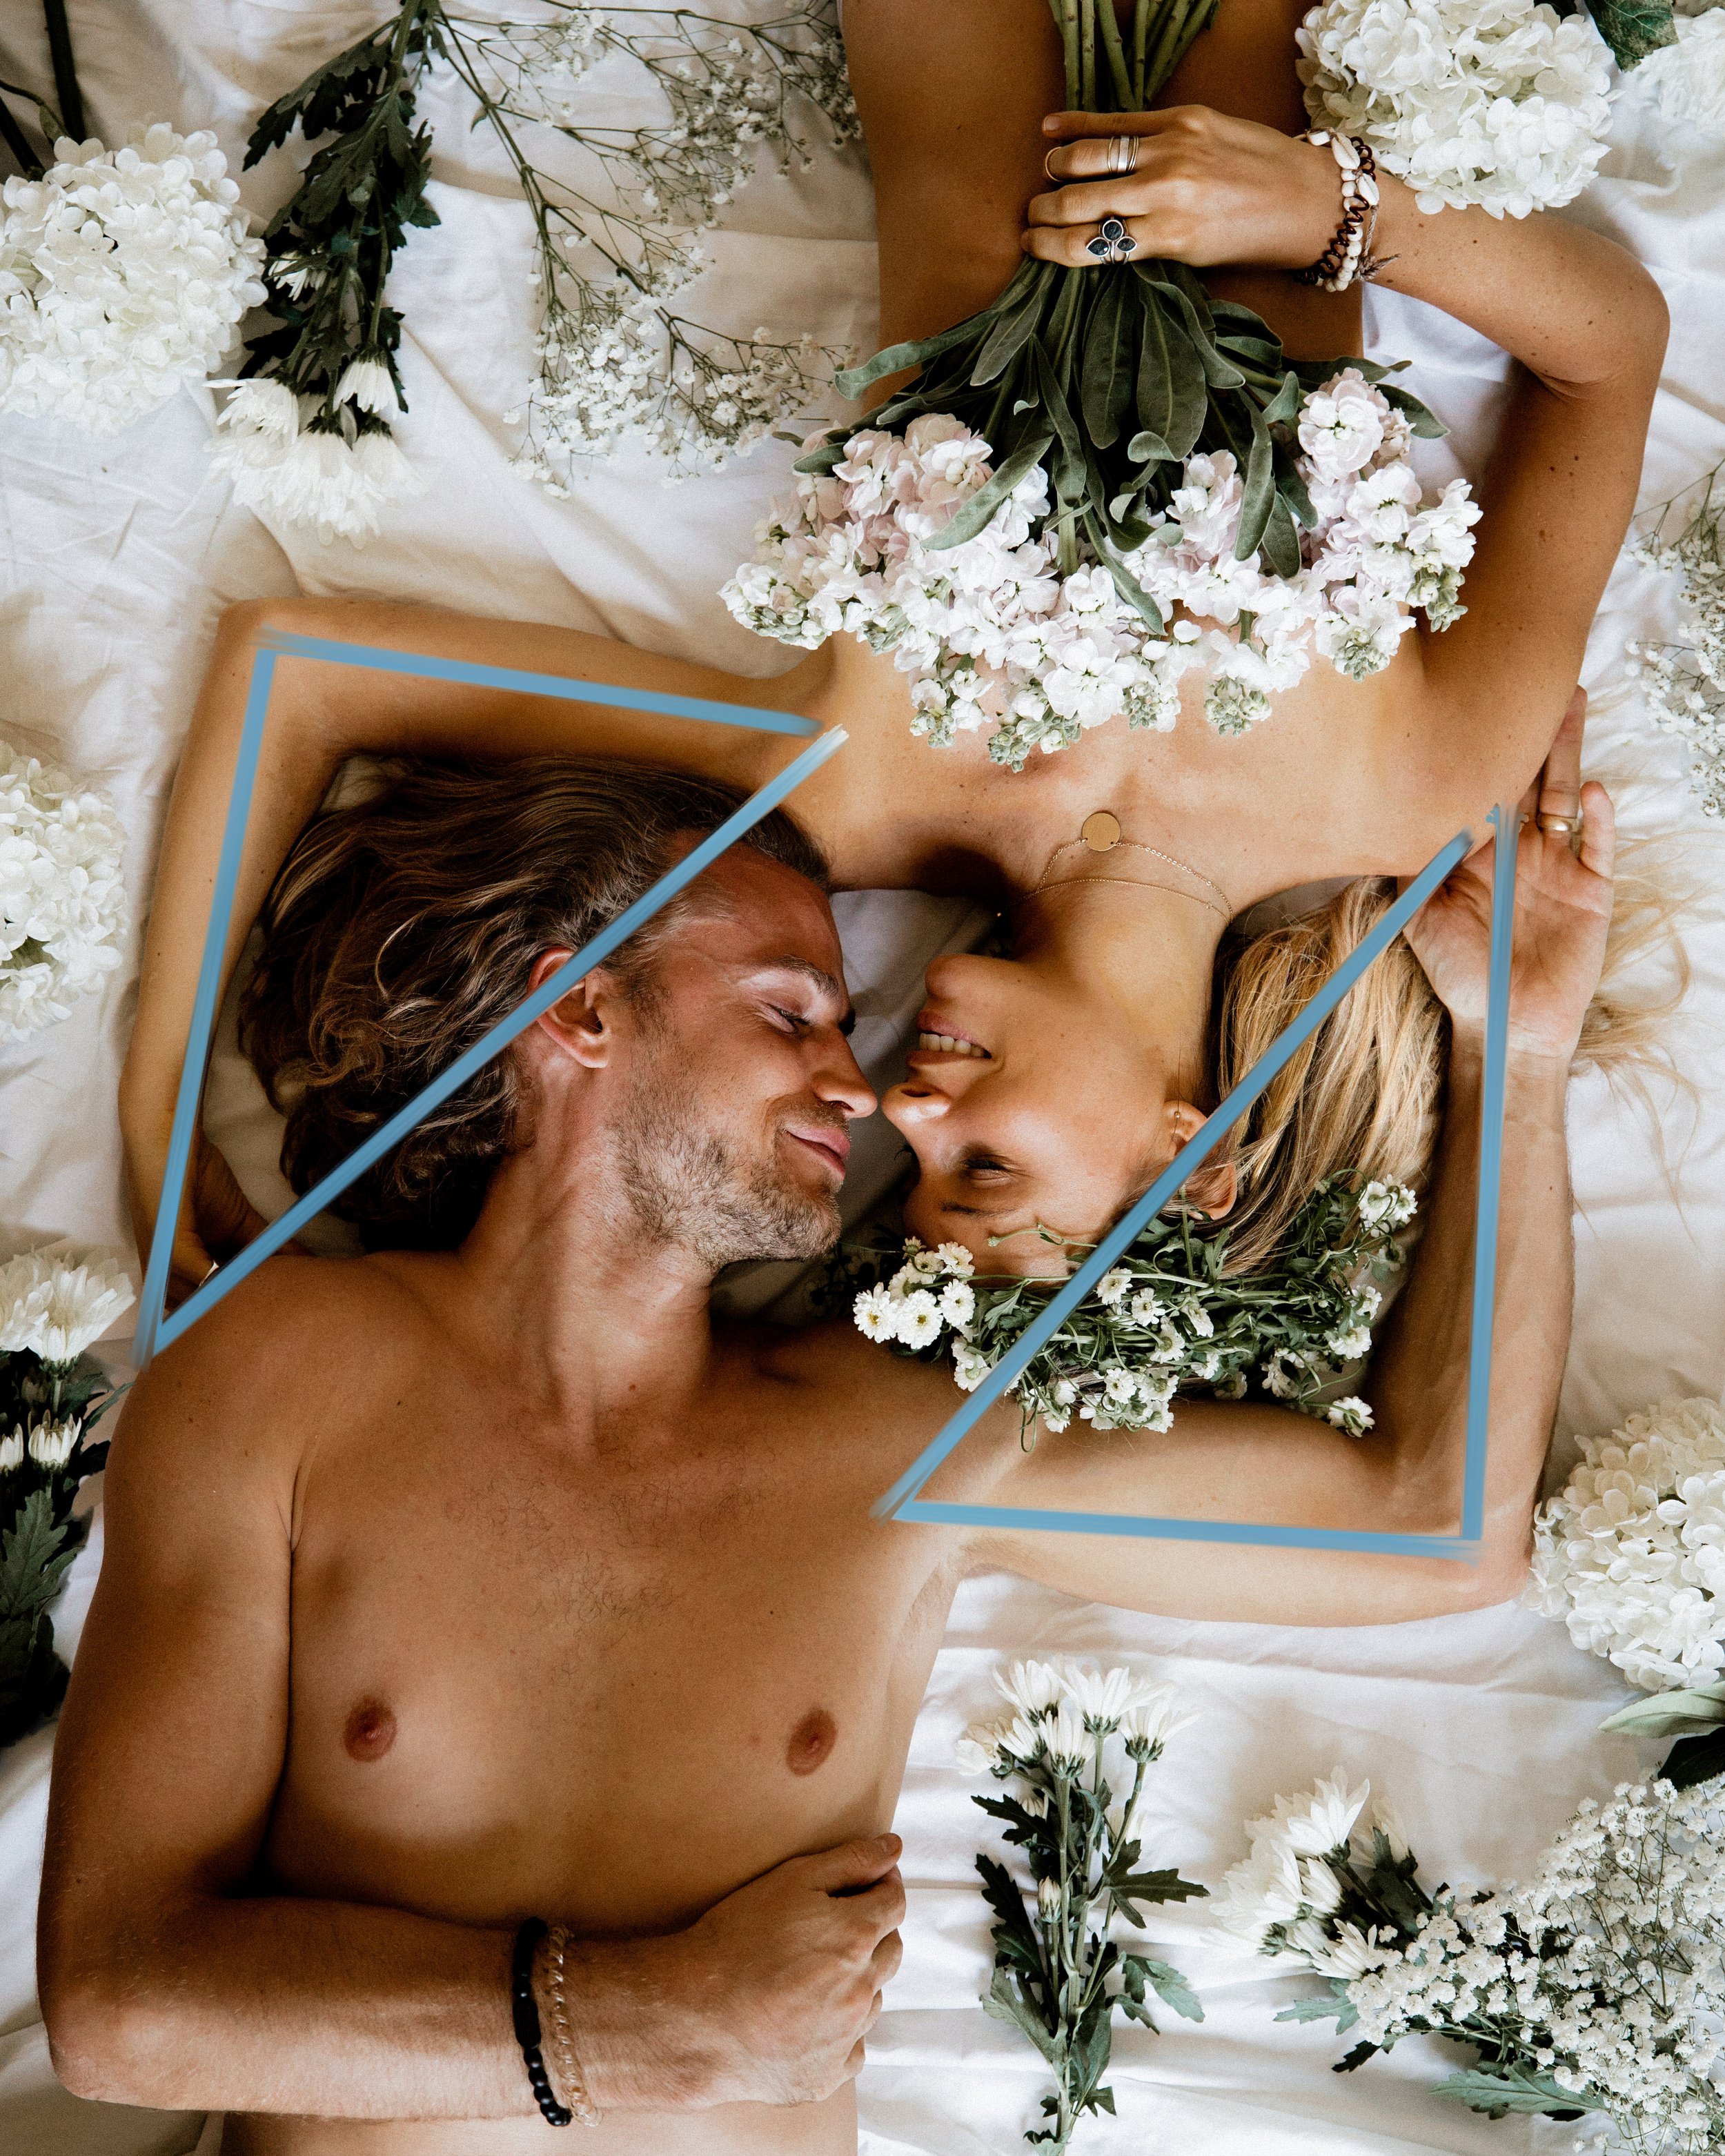
Geometric Shapes: Something that has been so helpful to us is to take a step back and look at what is the overall shape of the pose we are creating? Some basic shapes that can be extremely helpful to consider are:
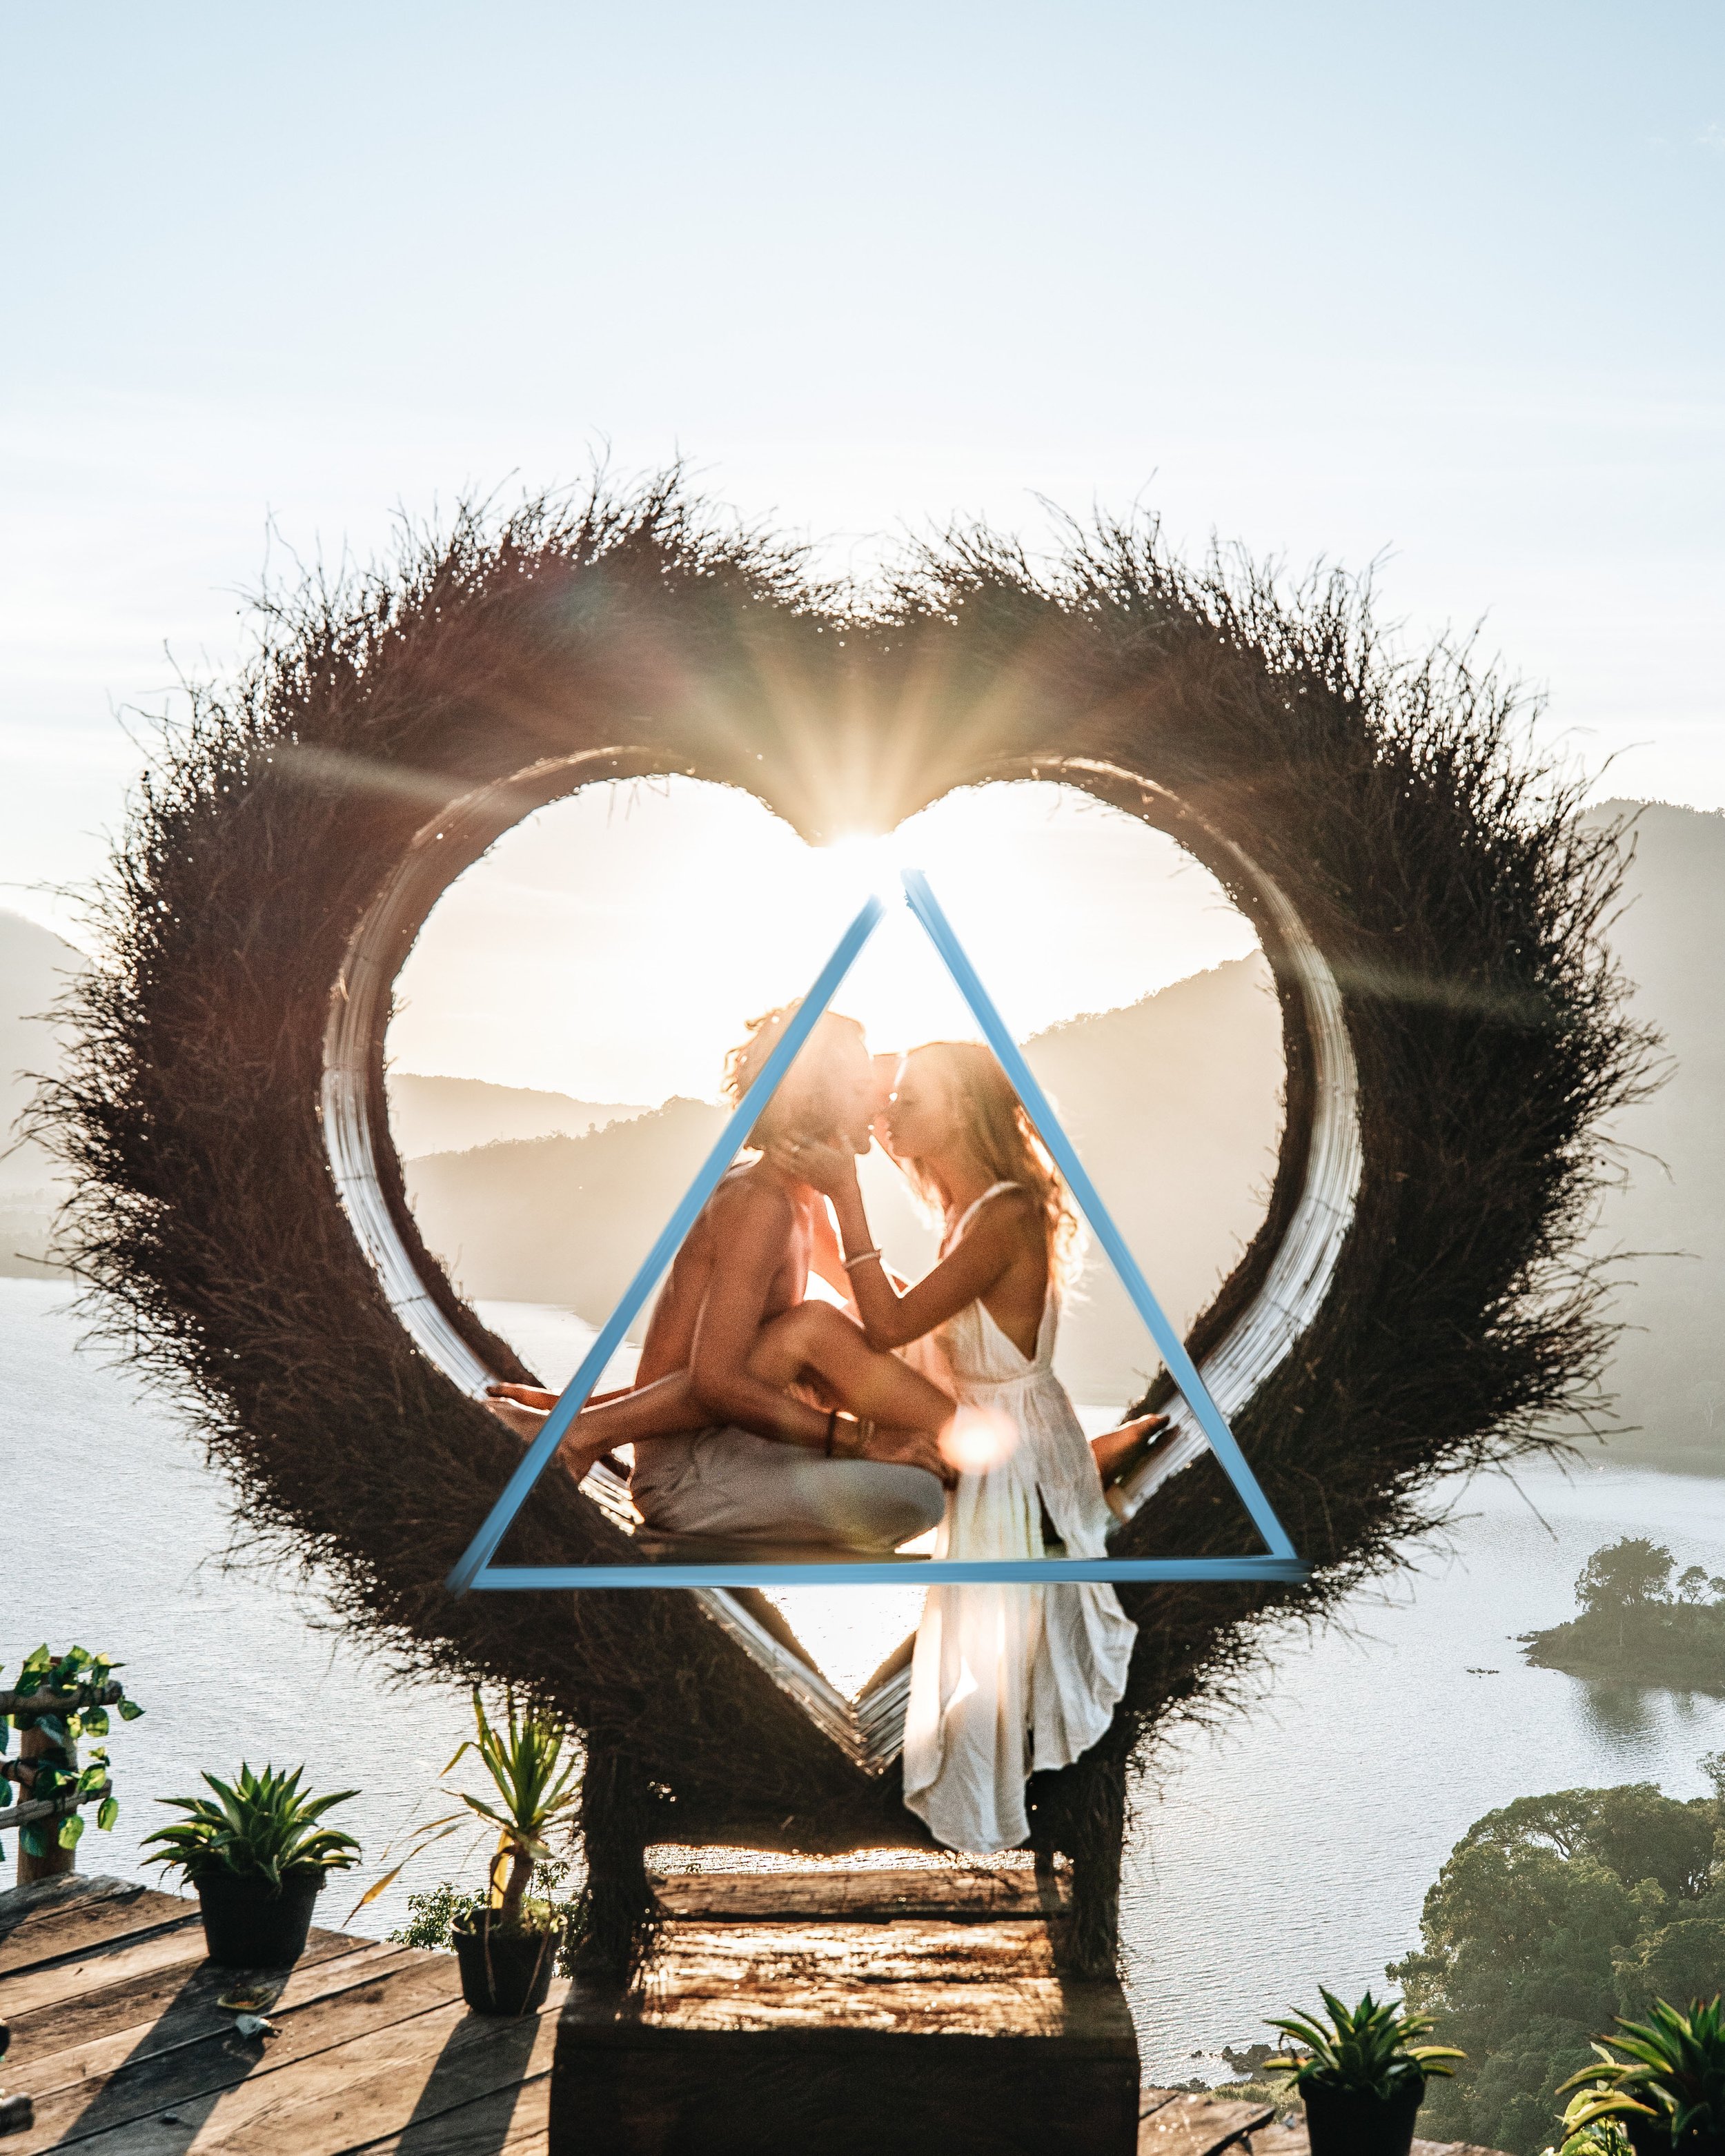
Triangles: We will usually try and either create an overall triangle by aligning our bodies together or mirror and balance the shape in each other. This means for example if one of us creates a triangle with their arm up, the other might create a triangle with their leg in the opposite direction. You can also play around with the square shape (two triangles fit together)
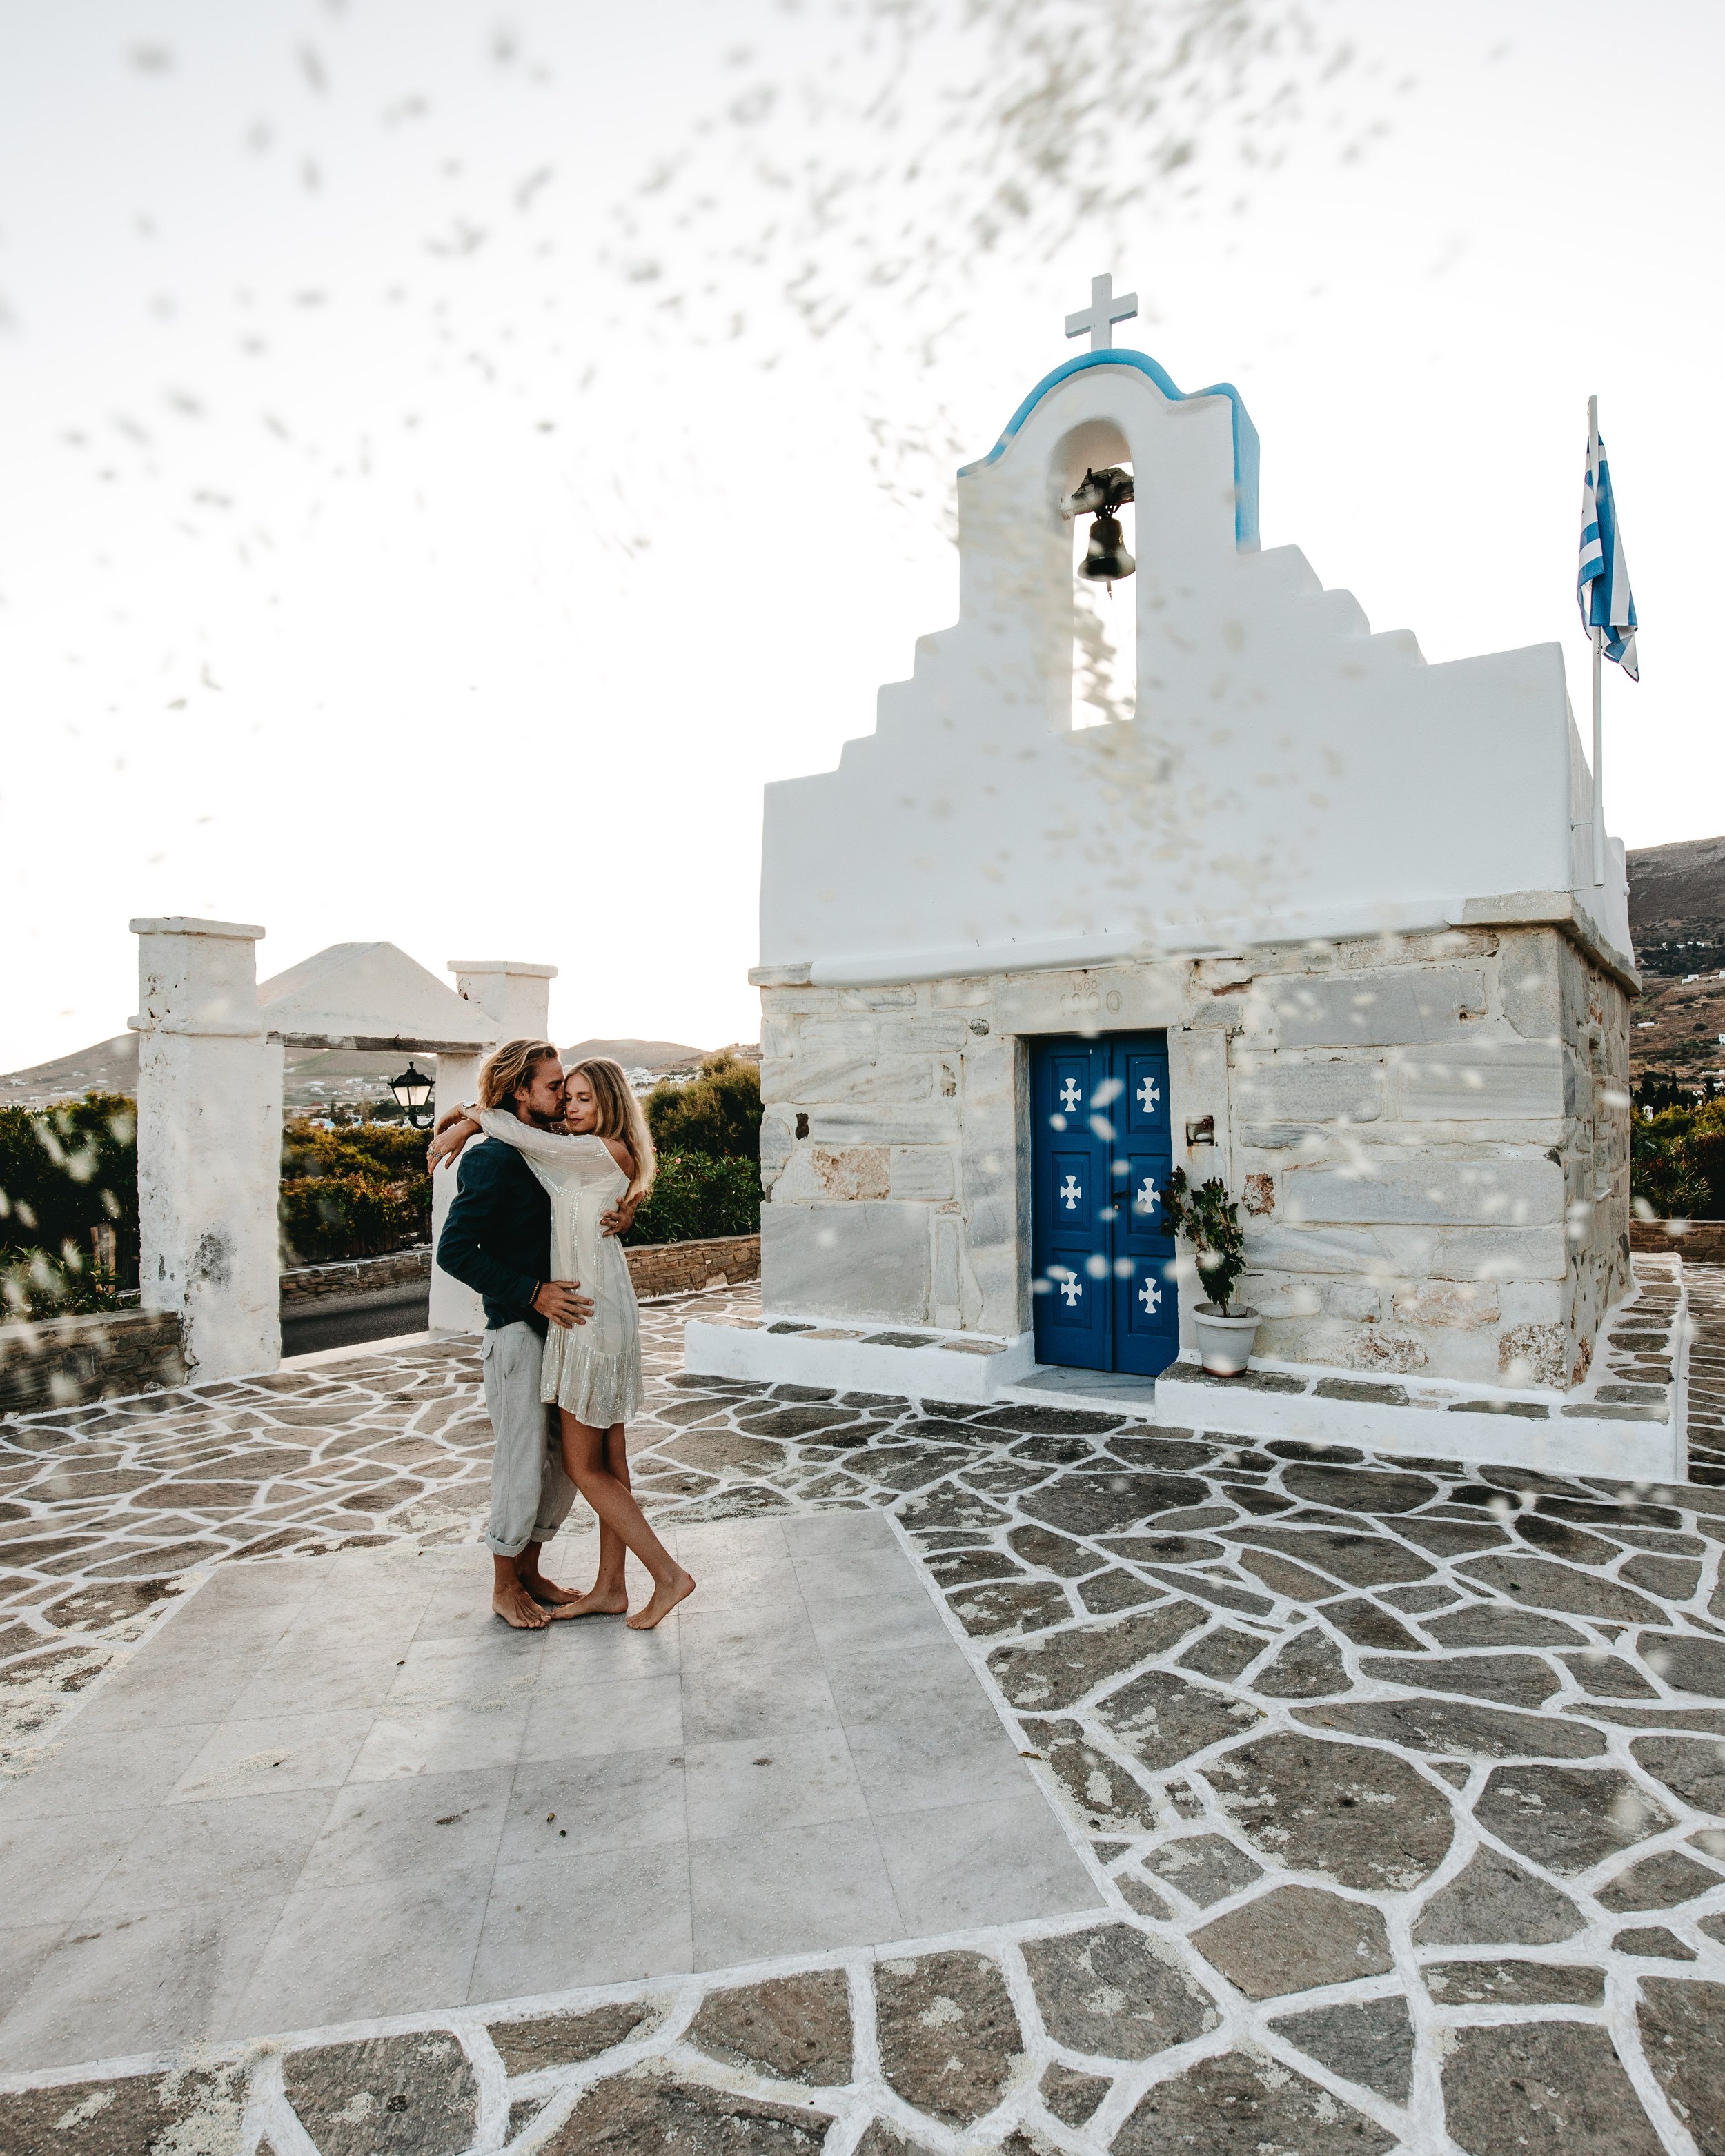
S-Curves: This is most helpful for standing poses. We try and balance ourselves to be turned into each other with the S going down the middle. It adds dynamic to what can sometimes be a stagnant standing pose.
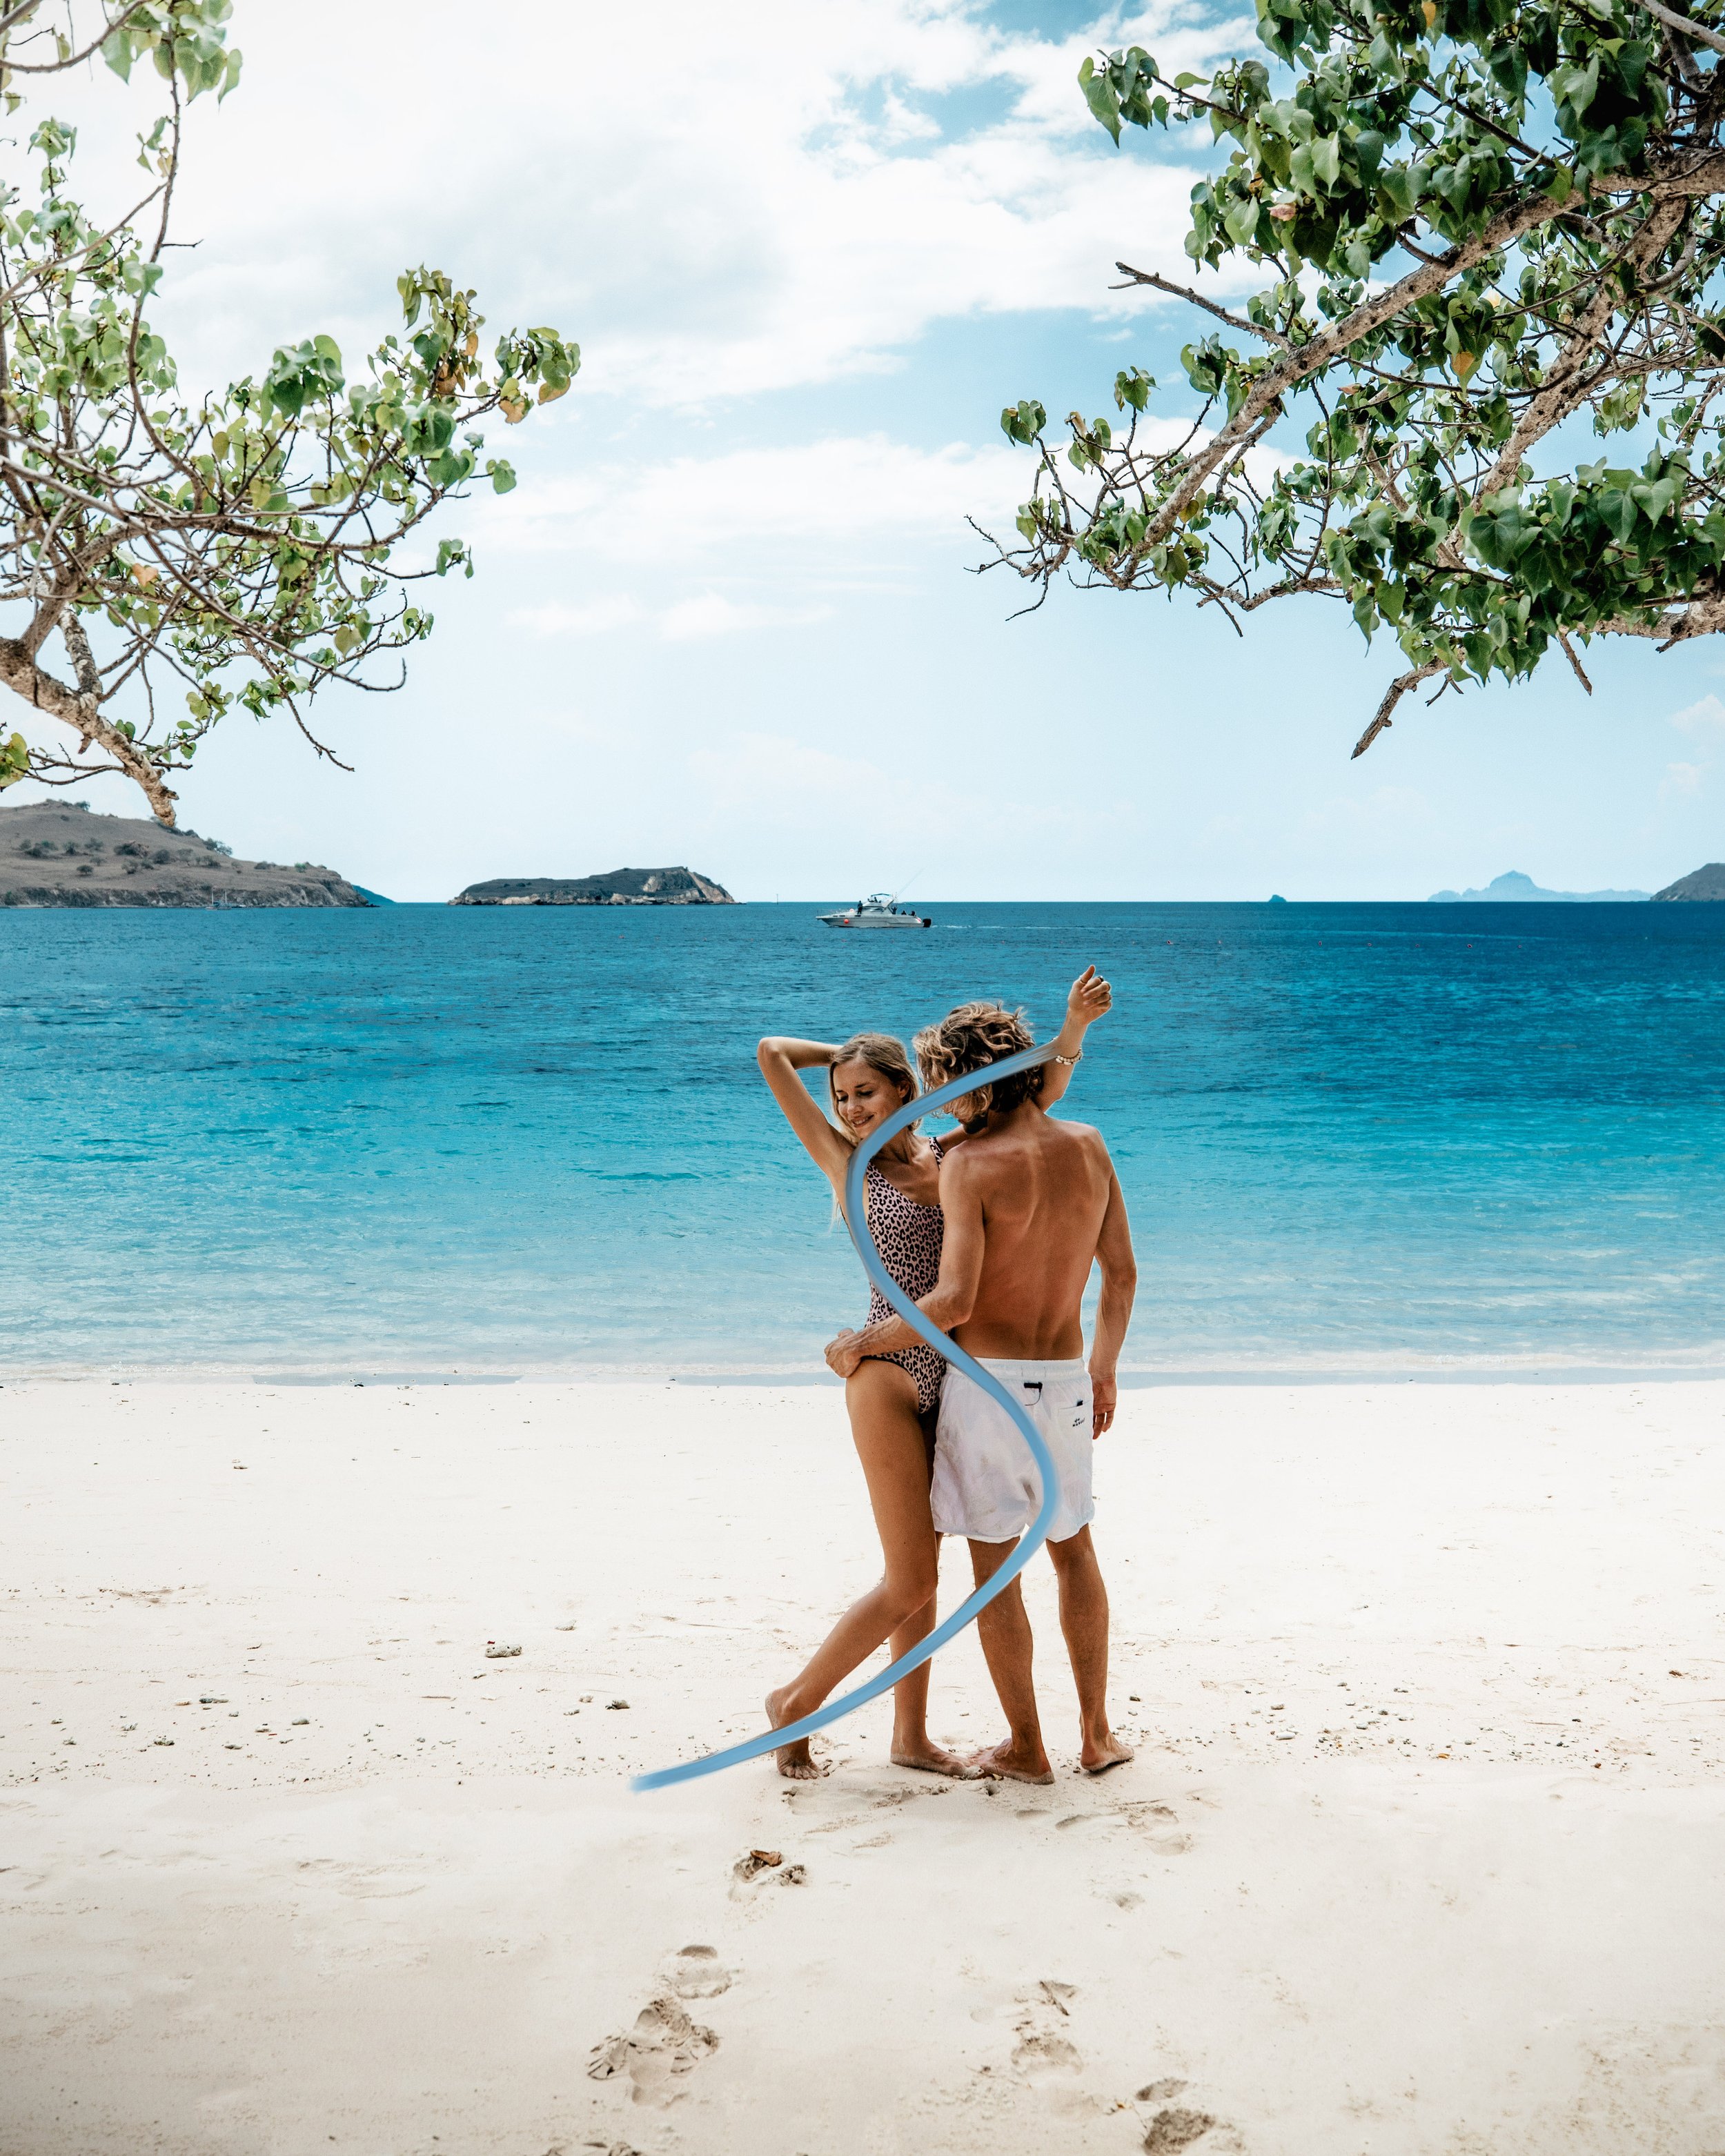
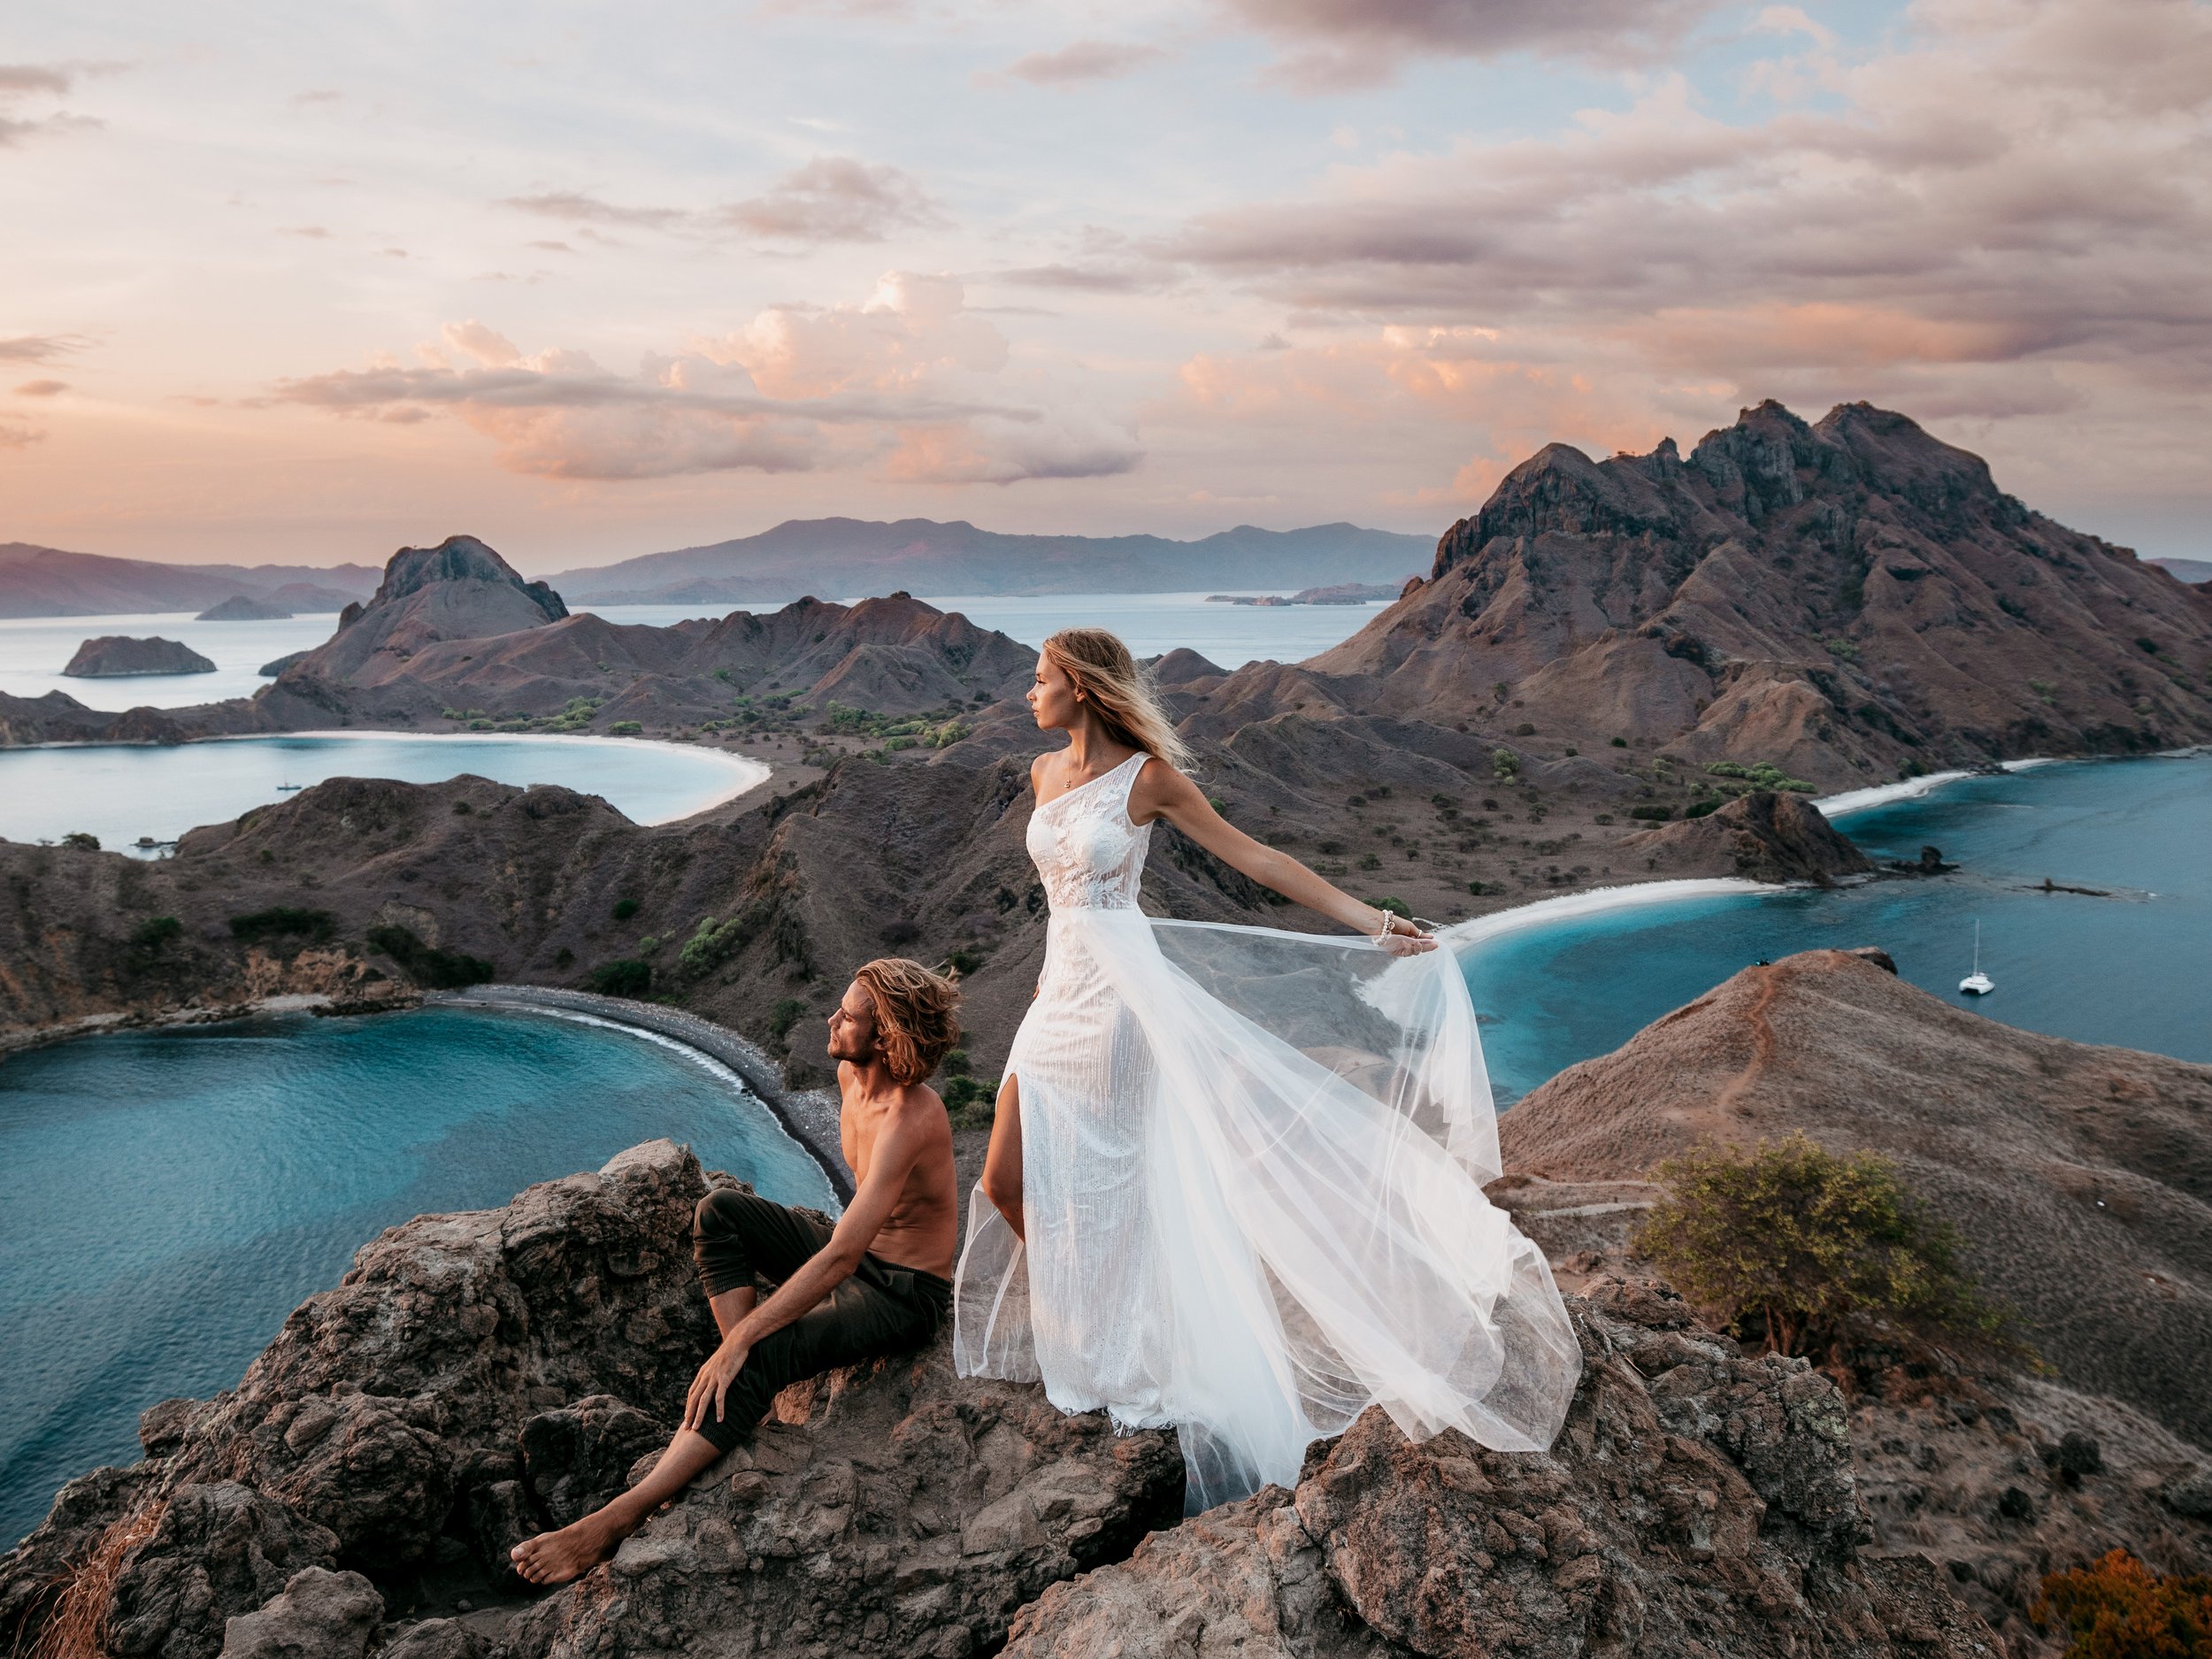
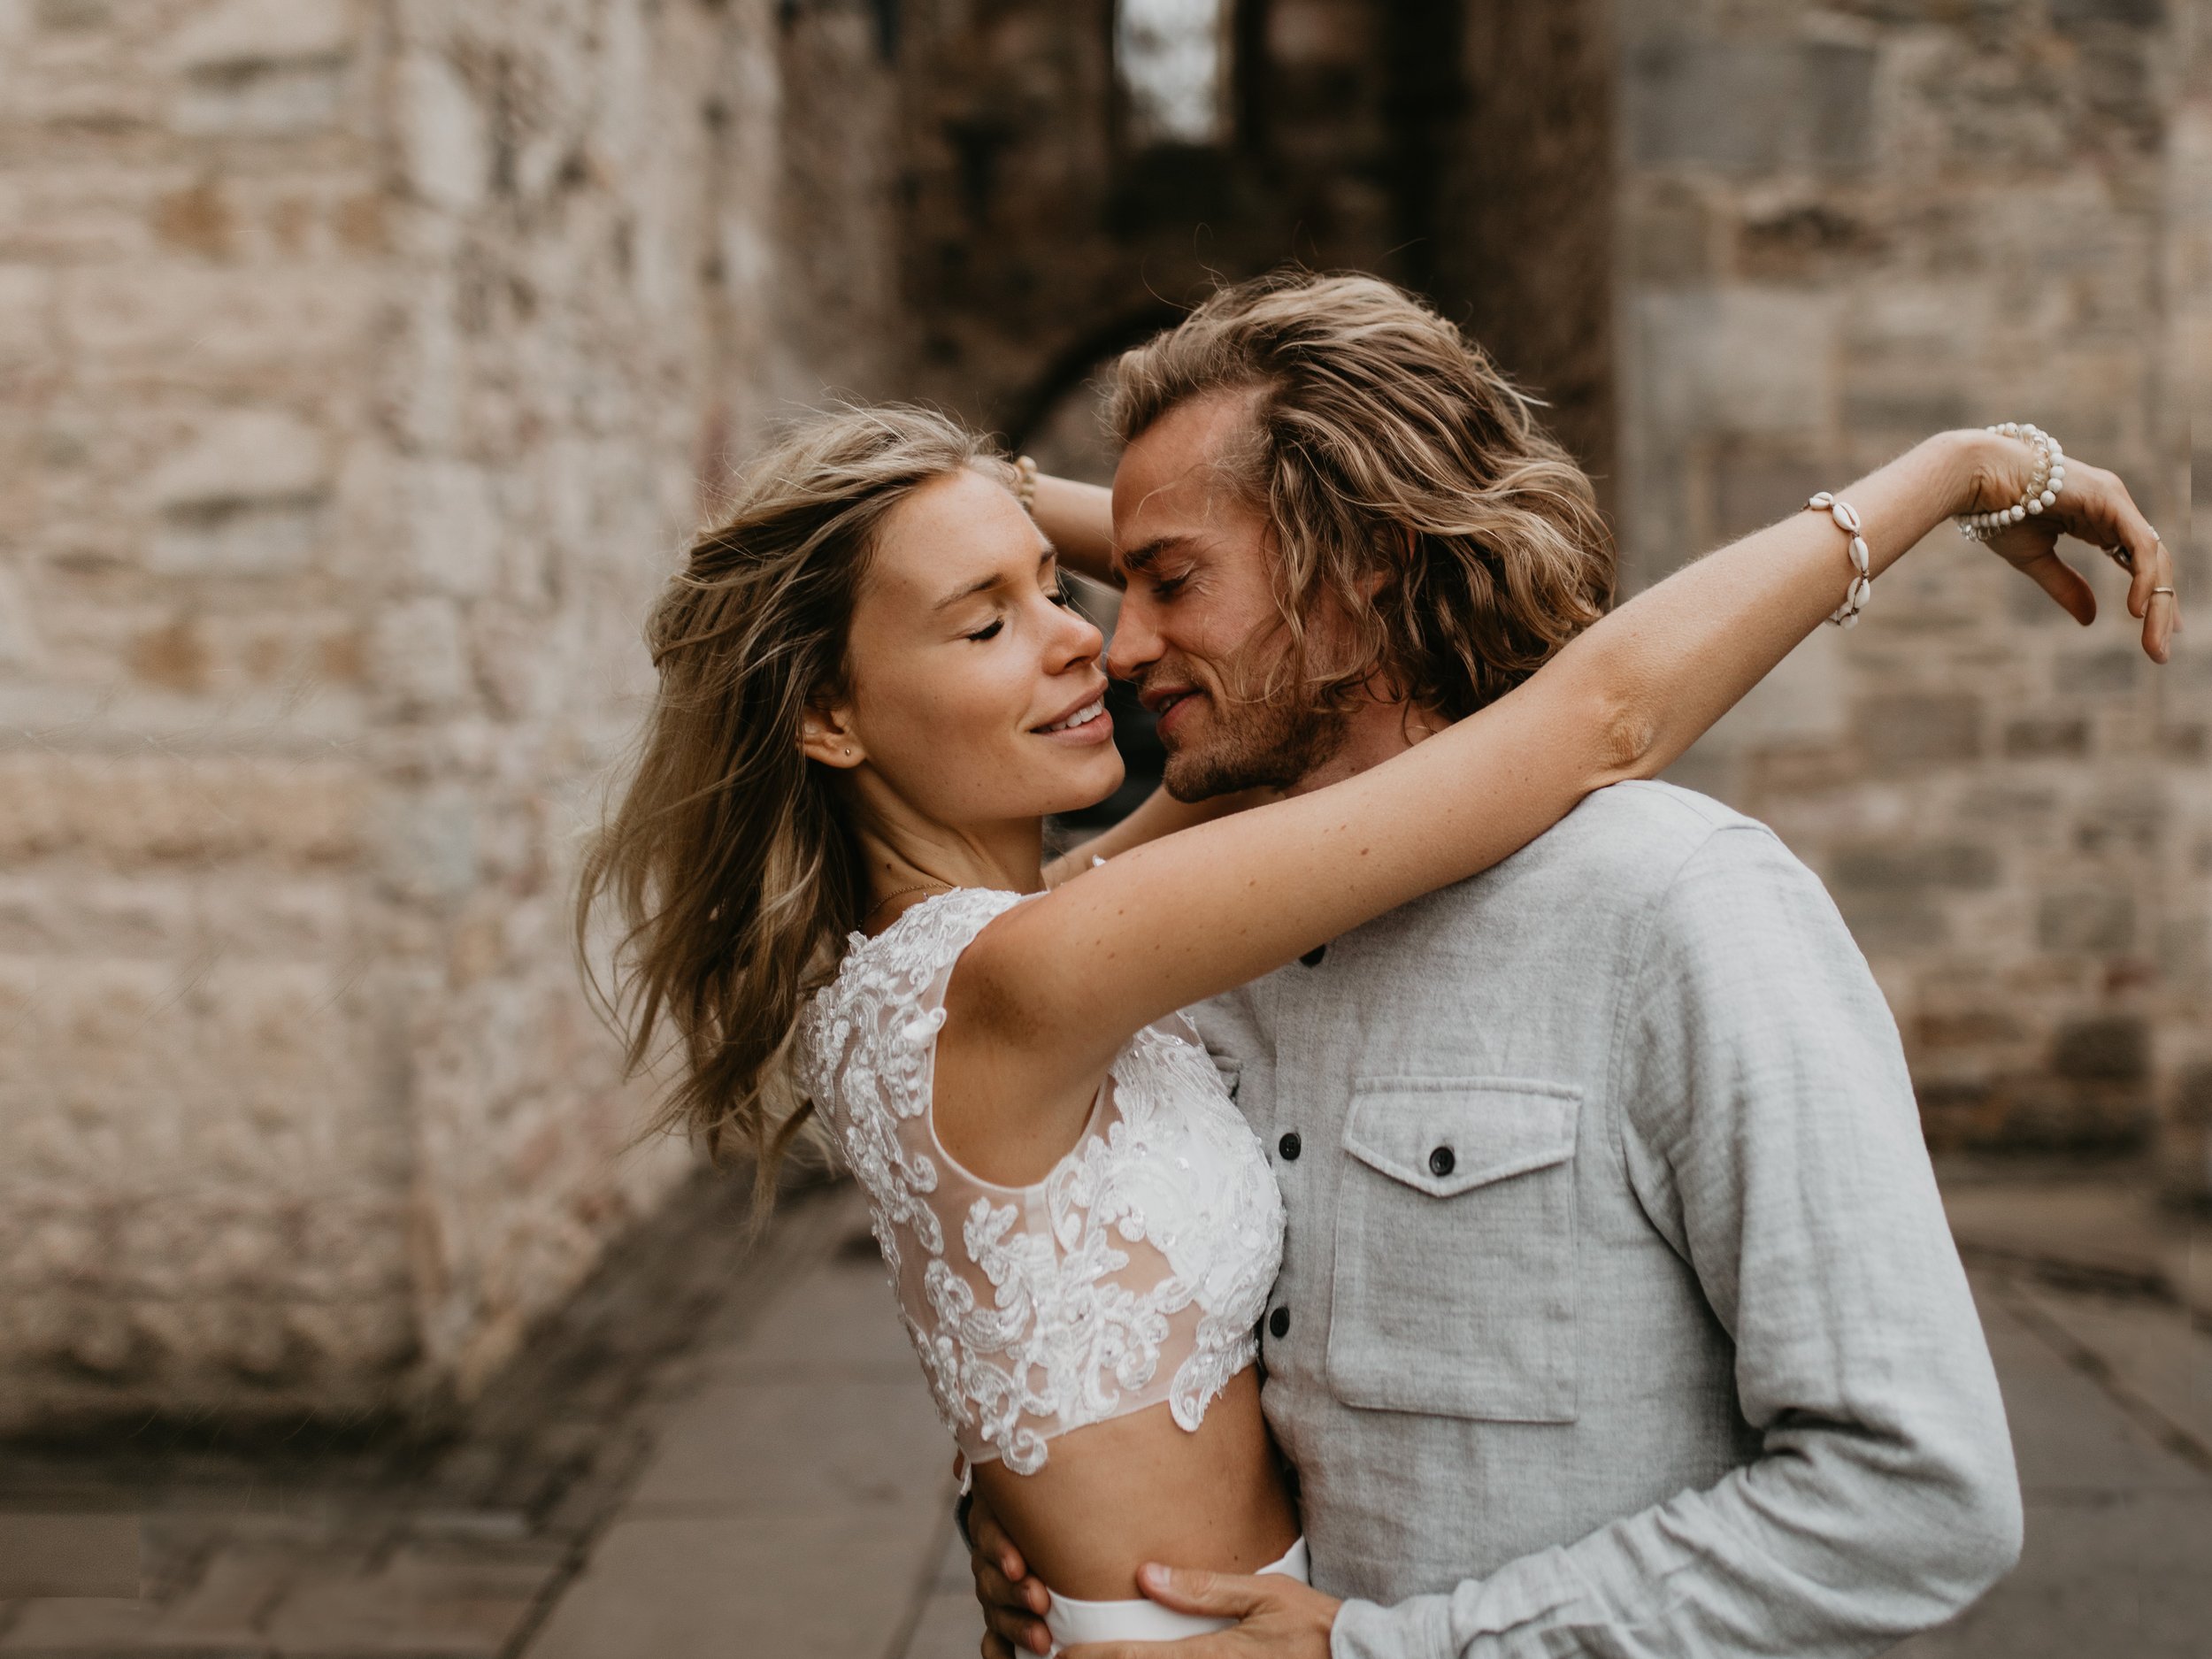
Movement: This is one of our favorite things to add to a photo. This can be wind blowing your hair, twirling a dress, catching yourself mid step, or just before you are about to kiss. It adds drama. Think about sports photography - how they are always catching the subject “in the act” of scoring a goal, running towards the finish line, or winning the game. It helps to give the viewer a more complete picture of what is actually happening during the photo and feel into that moment.
Eyes: A simple yet interesting element to a photo. Depending on where you are looking, it can tell a very different story.
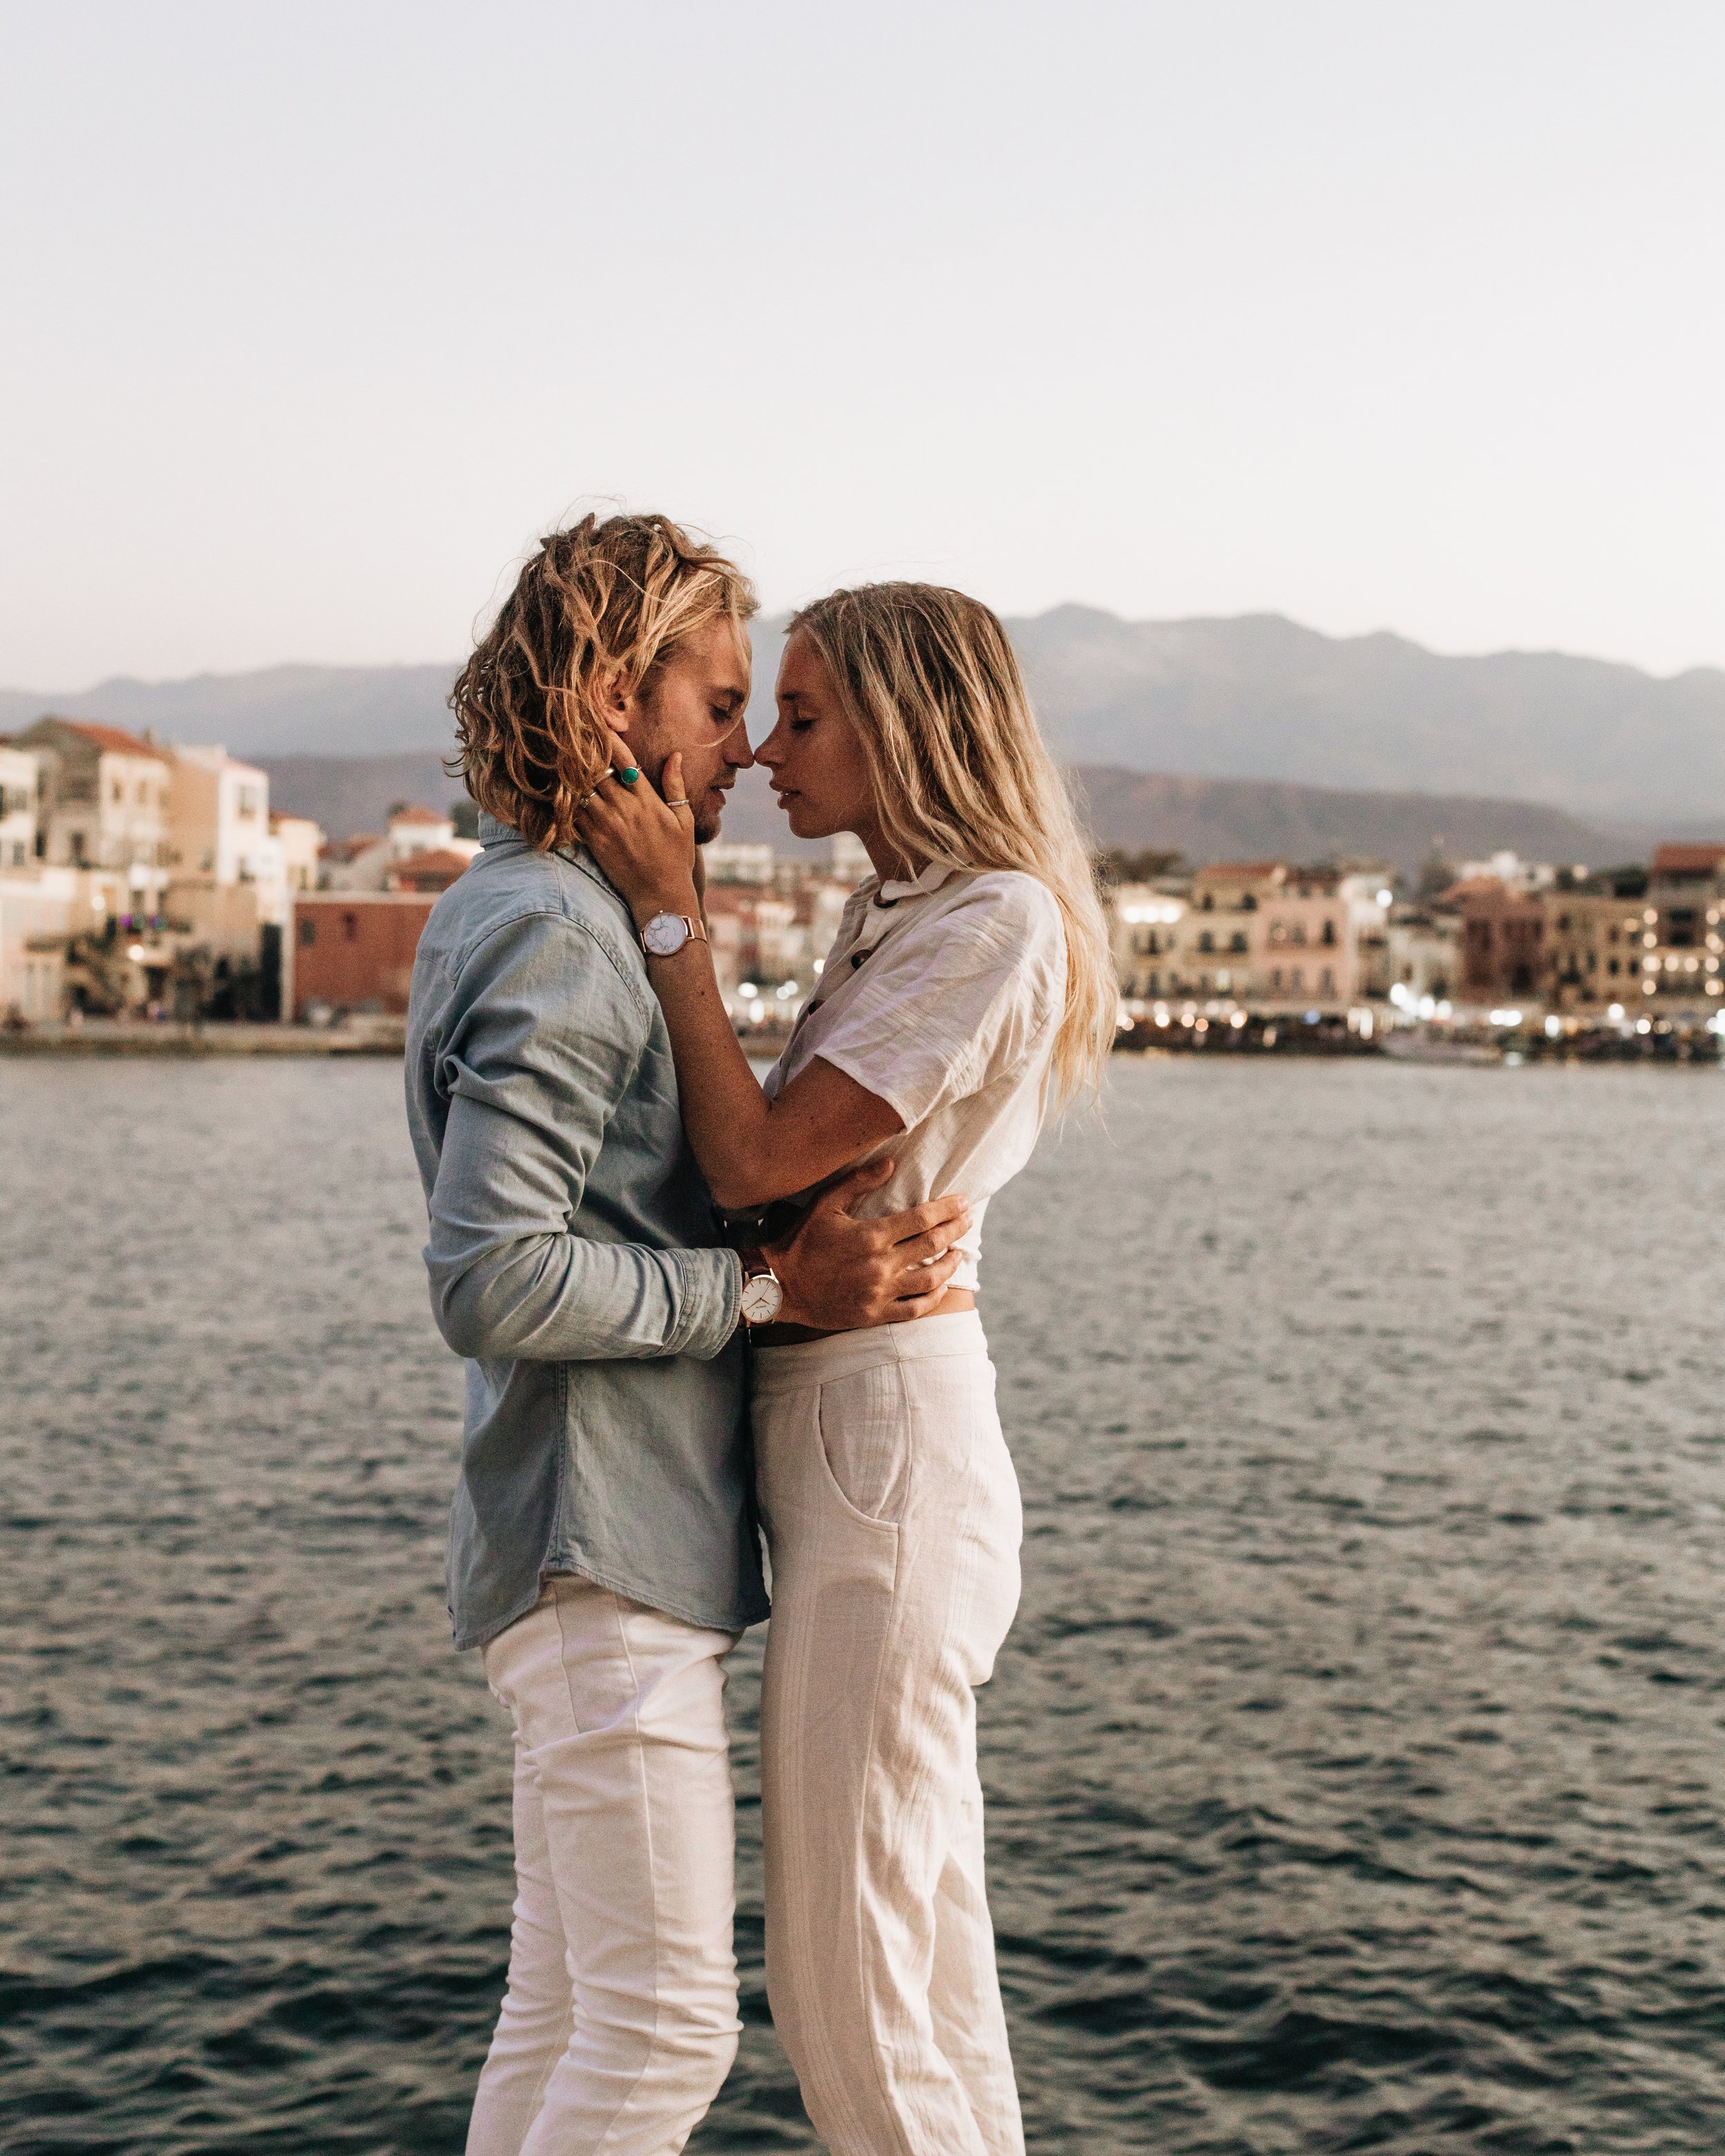
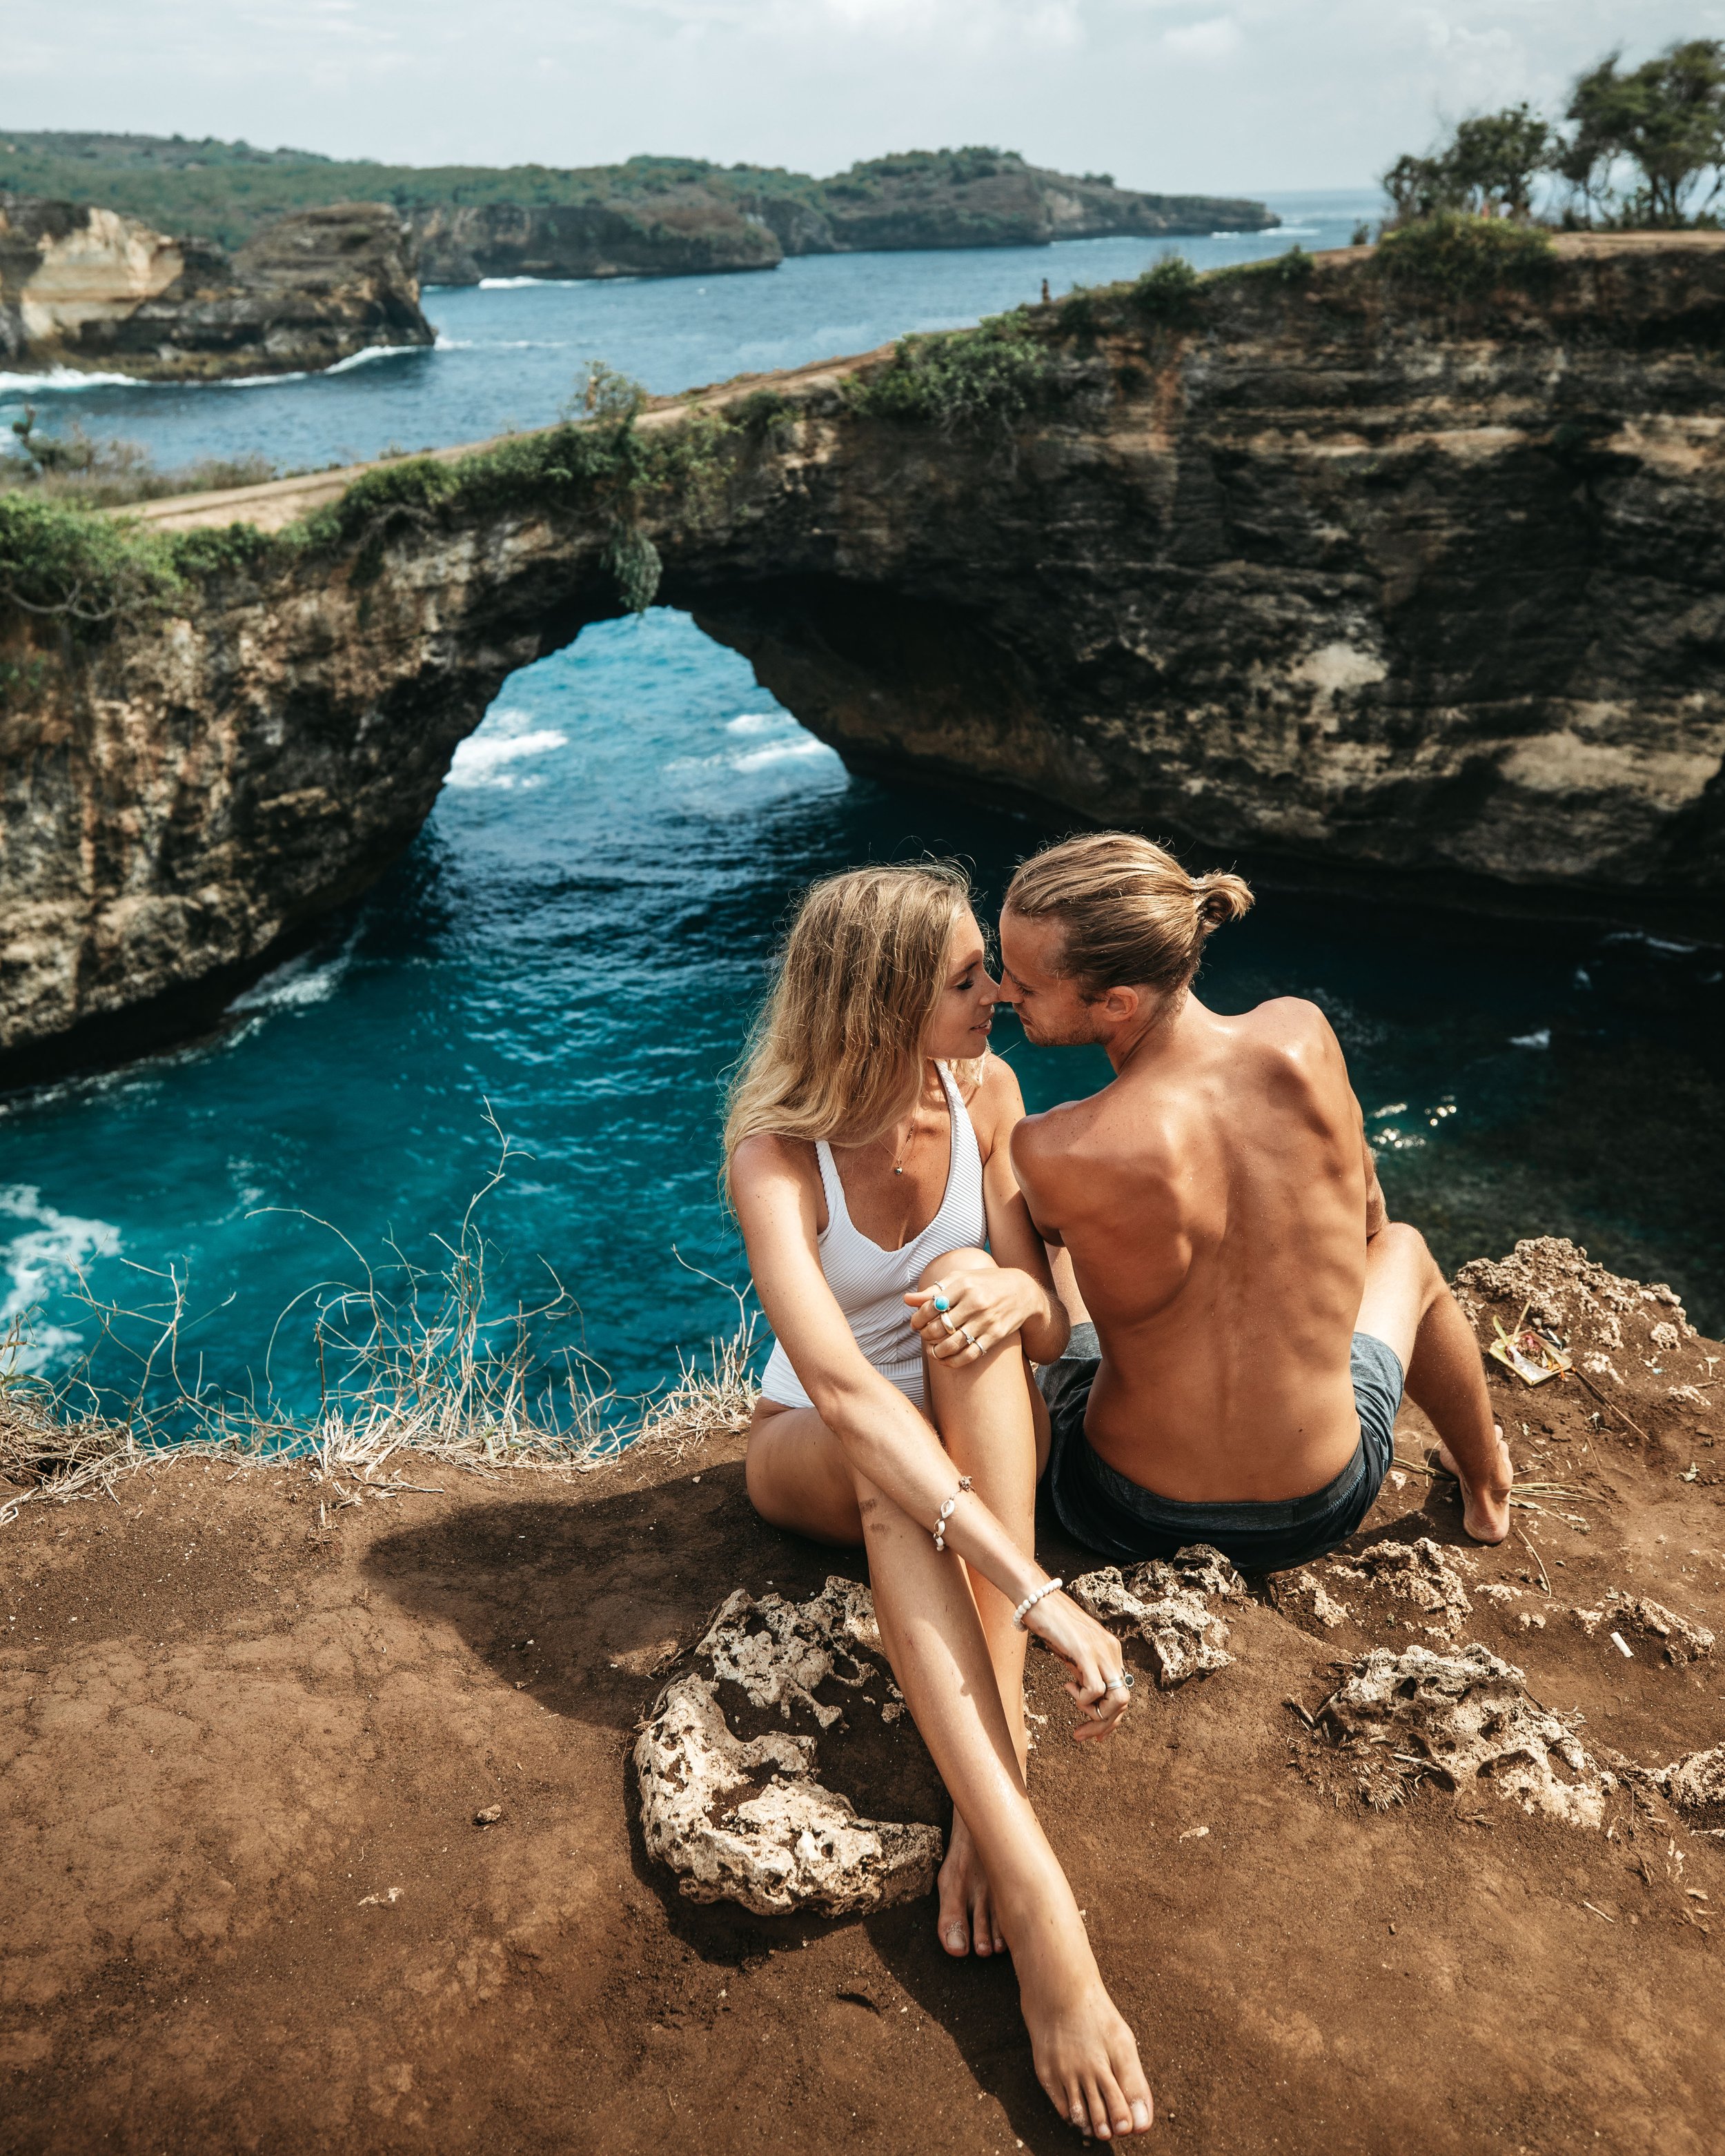
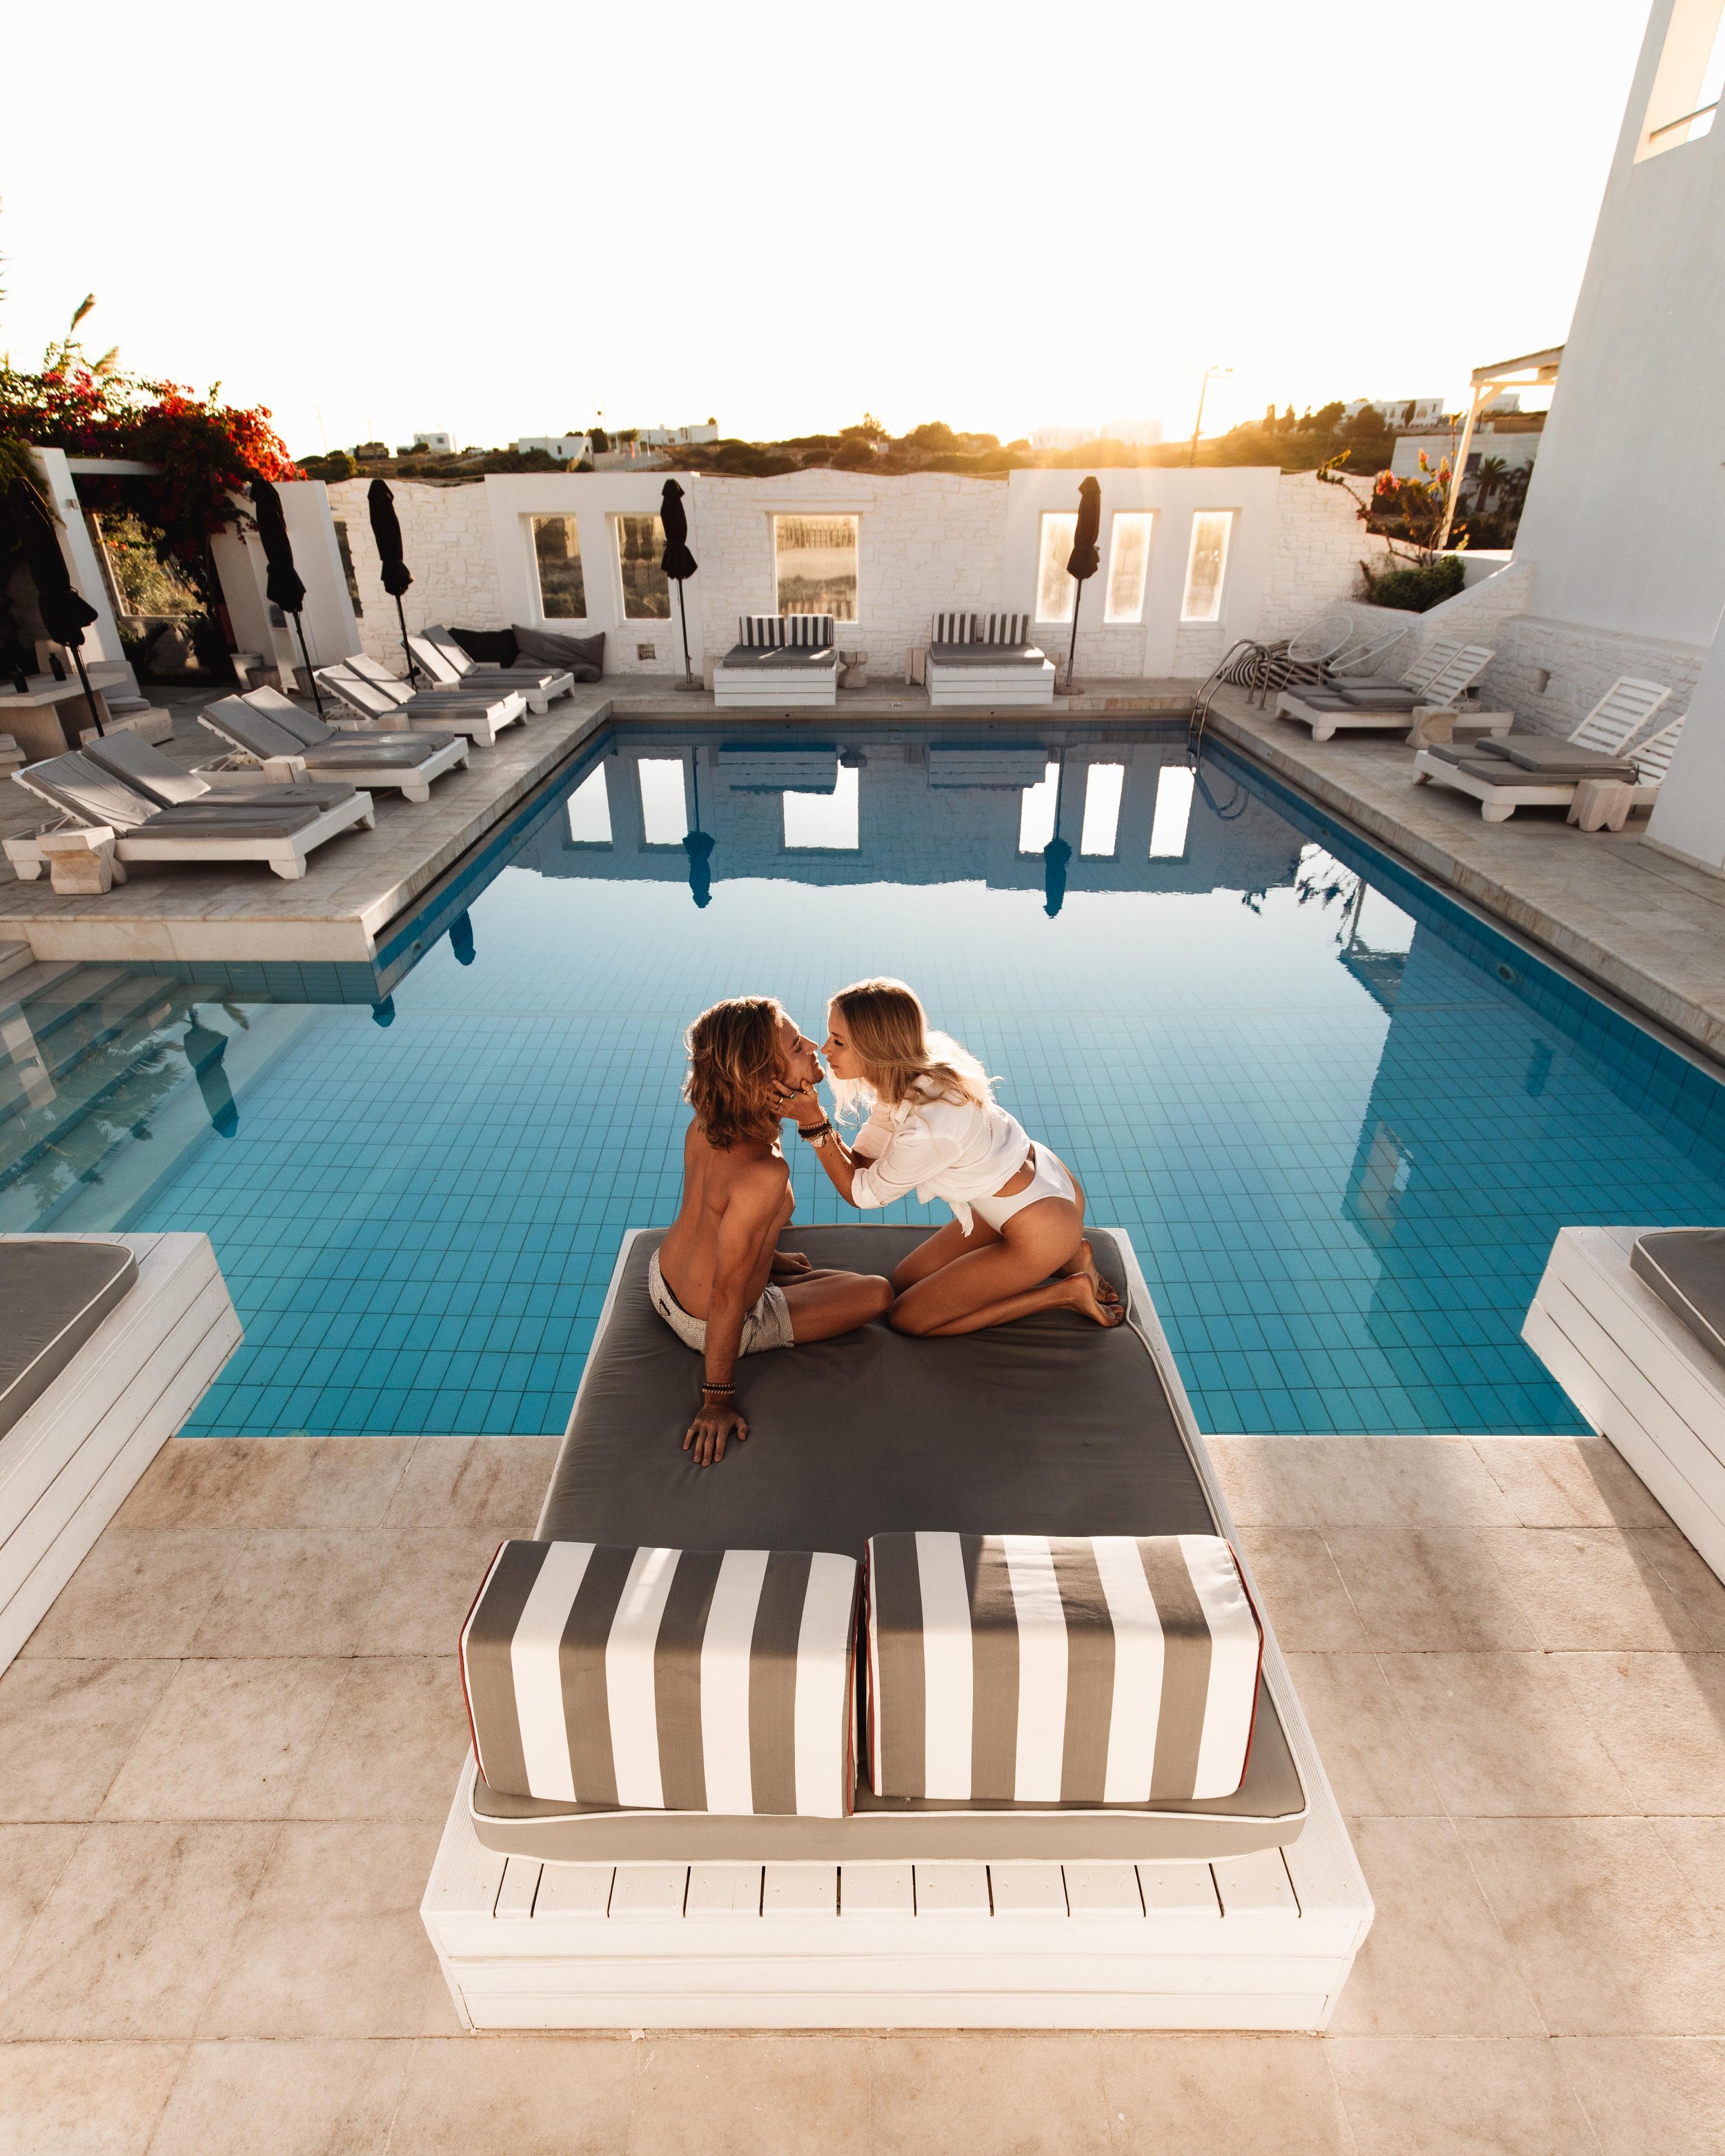
Looking together: If we are both looking together it creates something very intimate and romantic.
Both looking towards something: If we are both looking towards something like a sunset it will draw the viewers to also look and focus on the sunset.
Looking up/down: Looking up can bring a sense of happiness and wonder, while looking down can bring softer emotions of peace and calmness (but can also look sad if you are not careful).
Eyes closed/open: Eyes closed can create a strong sense of emotion/passion, while eyes open can bring more connection.
Looking towards the camera: This lets the viewer know you are aware of the camera and looking at them. It can create a very strong connection with the viewer, but can also make the photo seem less candid and in the moment.
FAVORITE POSES
As we mentioned studying photos of others can be very helpful in getting ideas. We love to look at others on social media as well as wedding photographers or even magazine ads to see the story they are trying to tell. Here’s a few go-to poses of ours that we will try when we are searching for inspiration:
1.THE PRETZEL
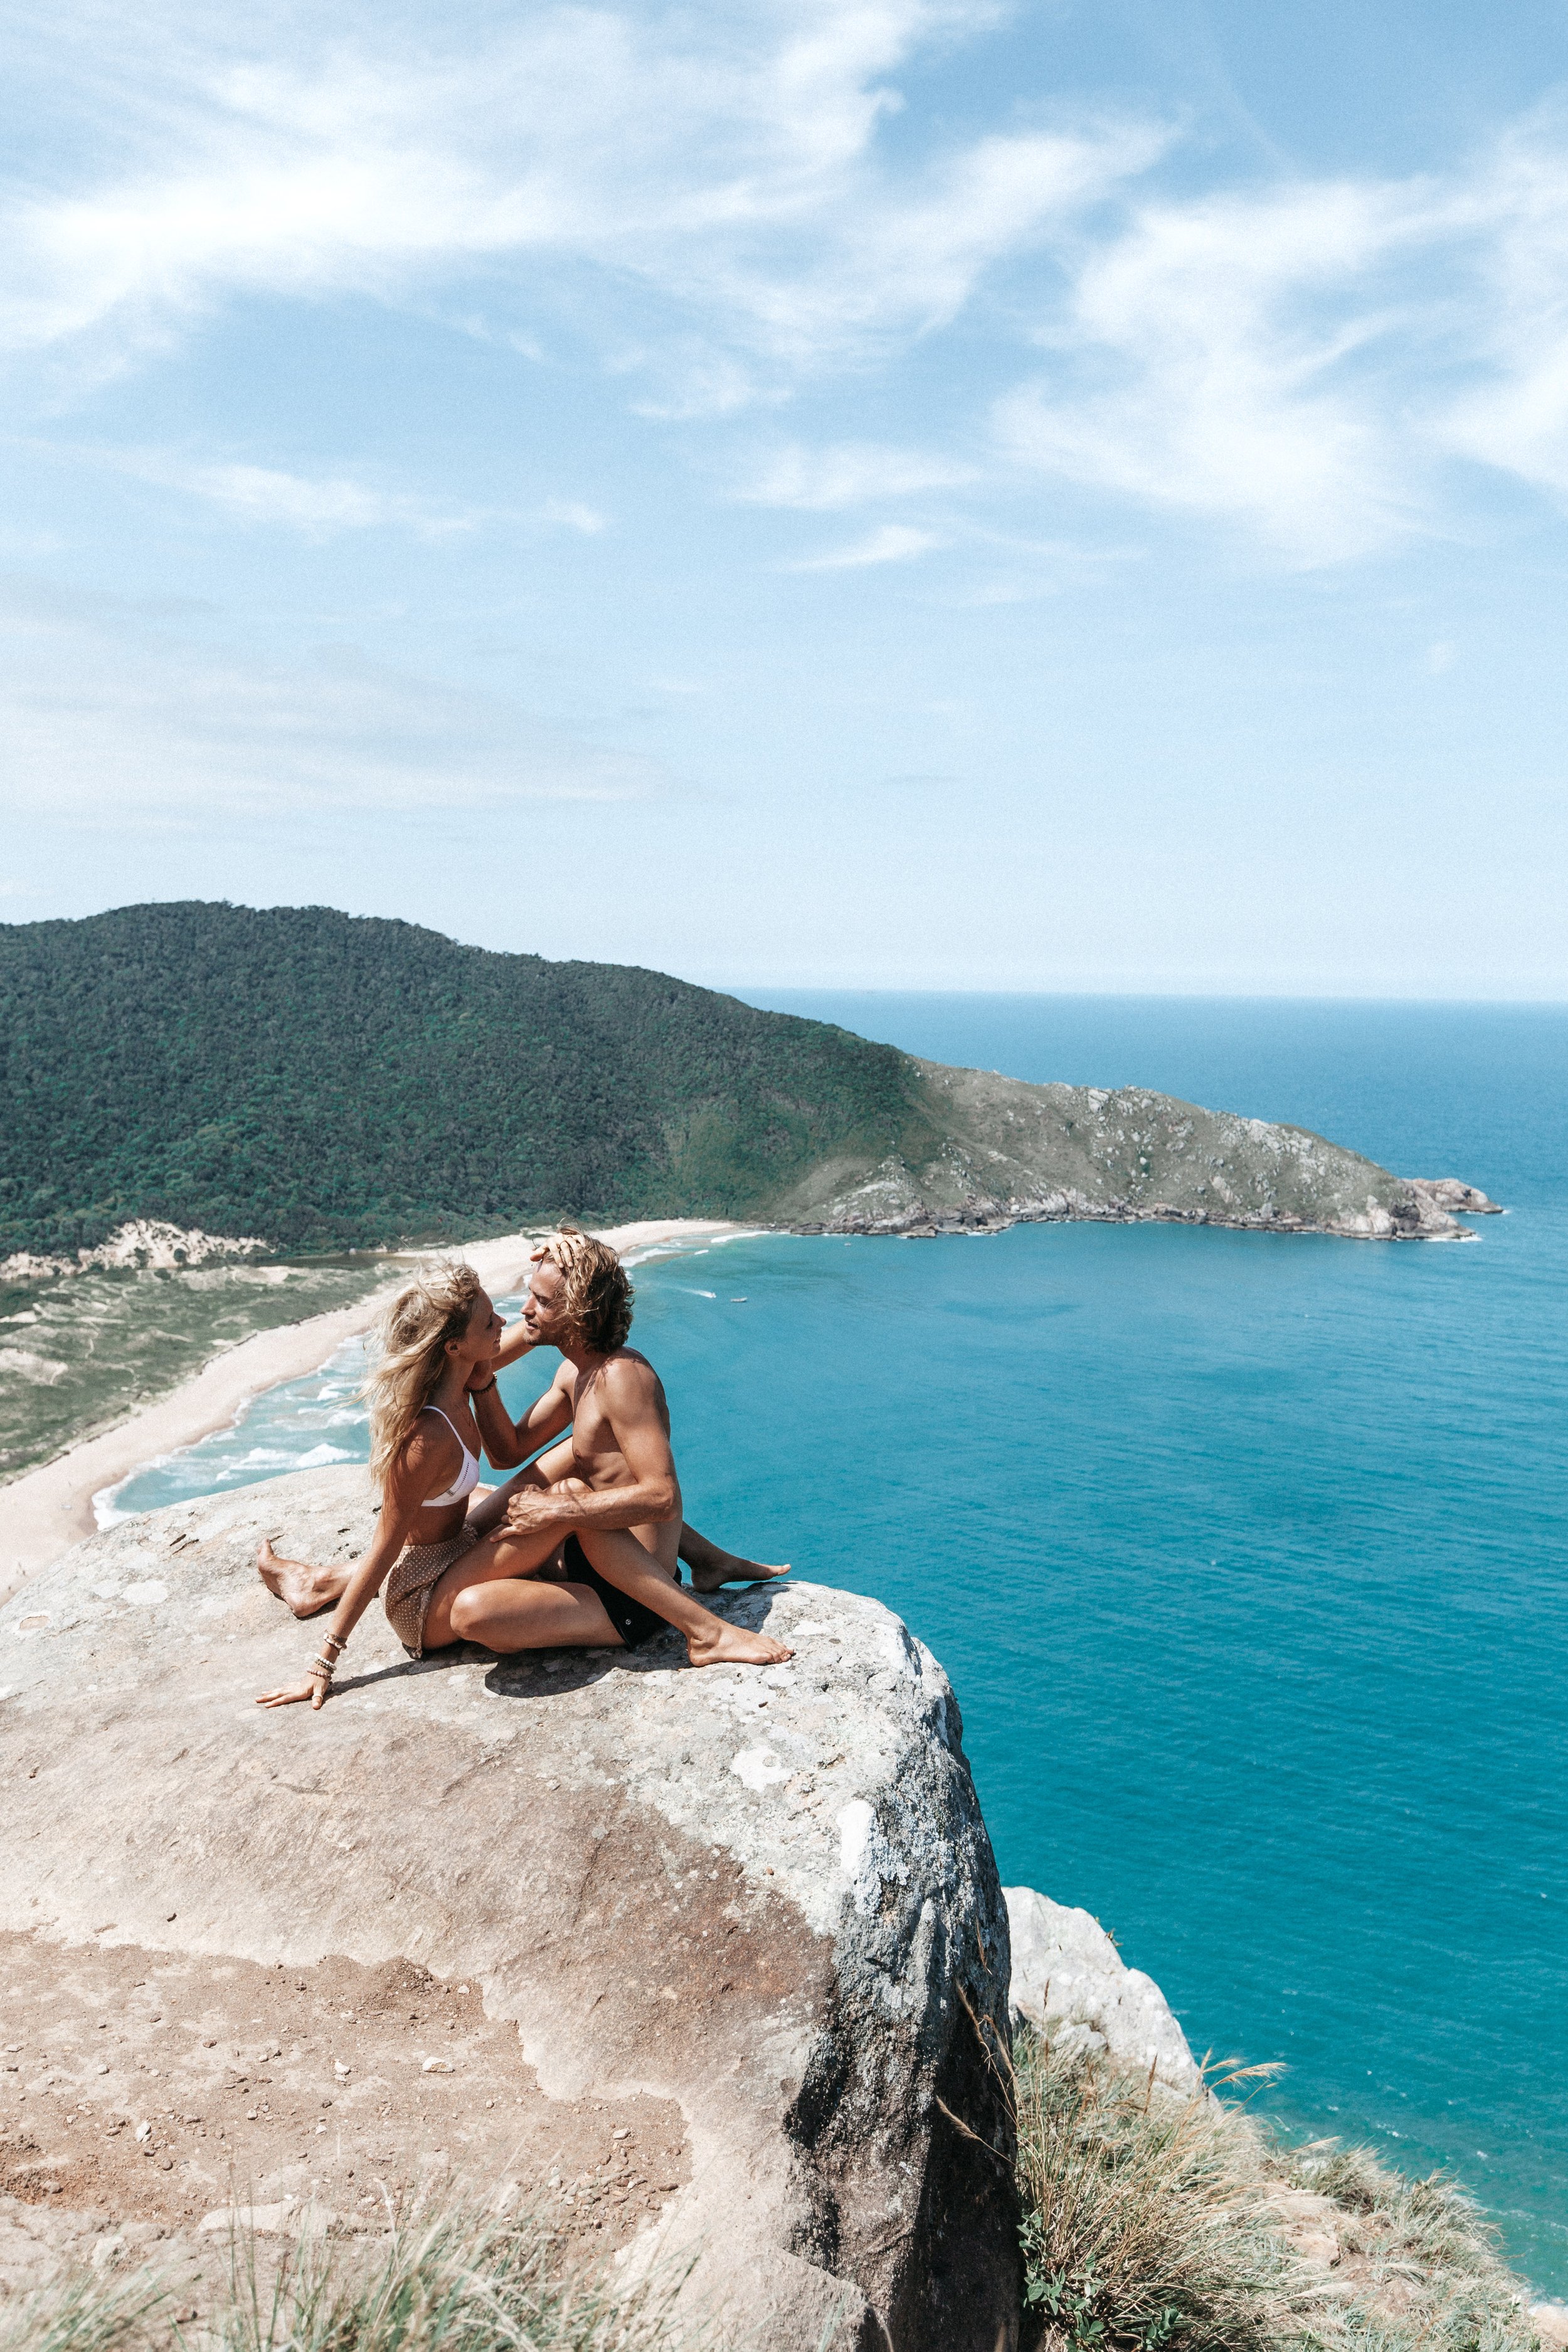
This is when we are seated and facing each other. It looks simple in the photo, but can be tricky to execute unless you break it down. First, make sure you are wearing clothes that can get into this pose and you don’t mind getting a little dirty. Next the person on the bottom will have one leg straight (can’t be seen) and one leg fully bent. The second person then wraps both legs like a koala, but is sitting with their bum on the ground. You want to make sure and have some space between each of you to keep things balanced out. This space also allows for you to reach toward one another or lean in for a kiss.
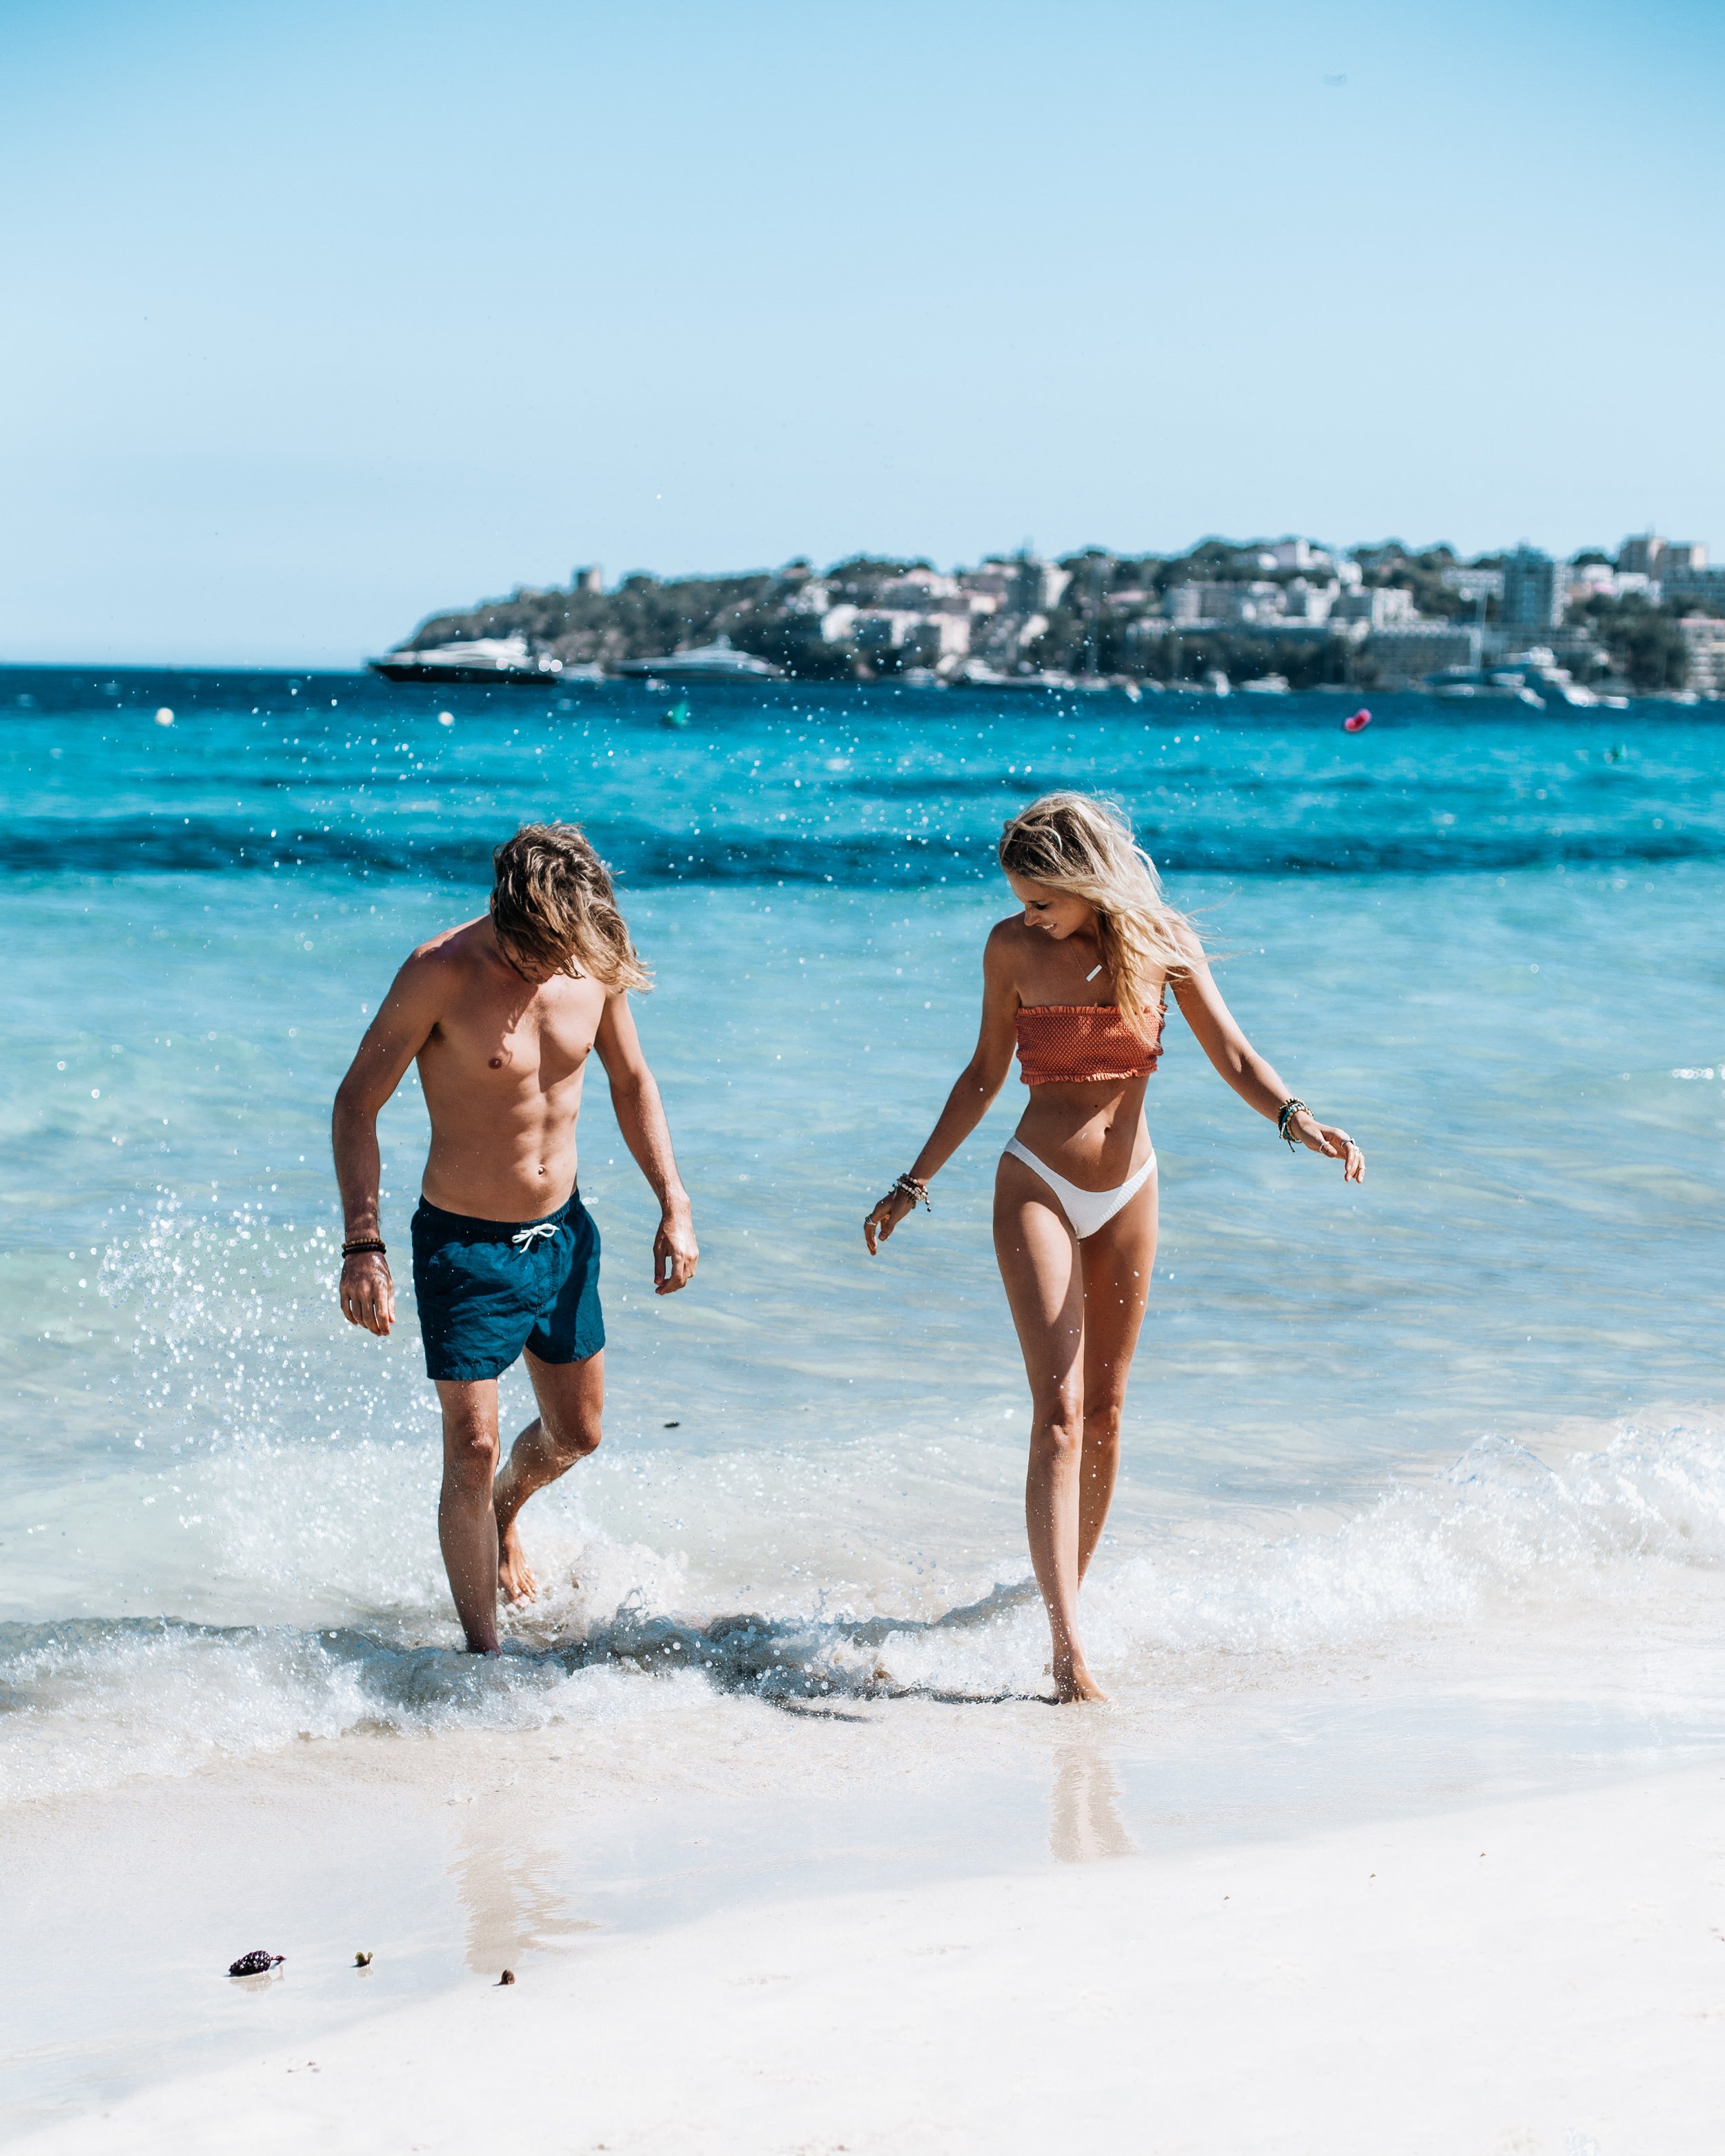
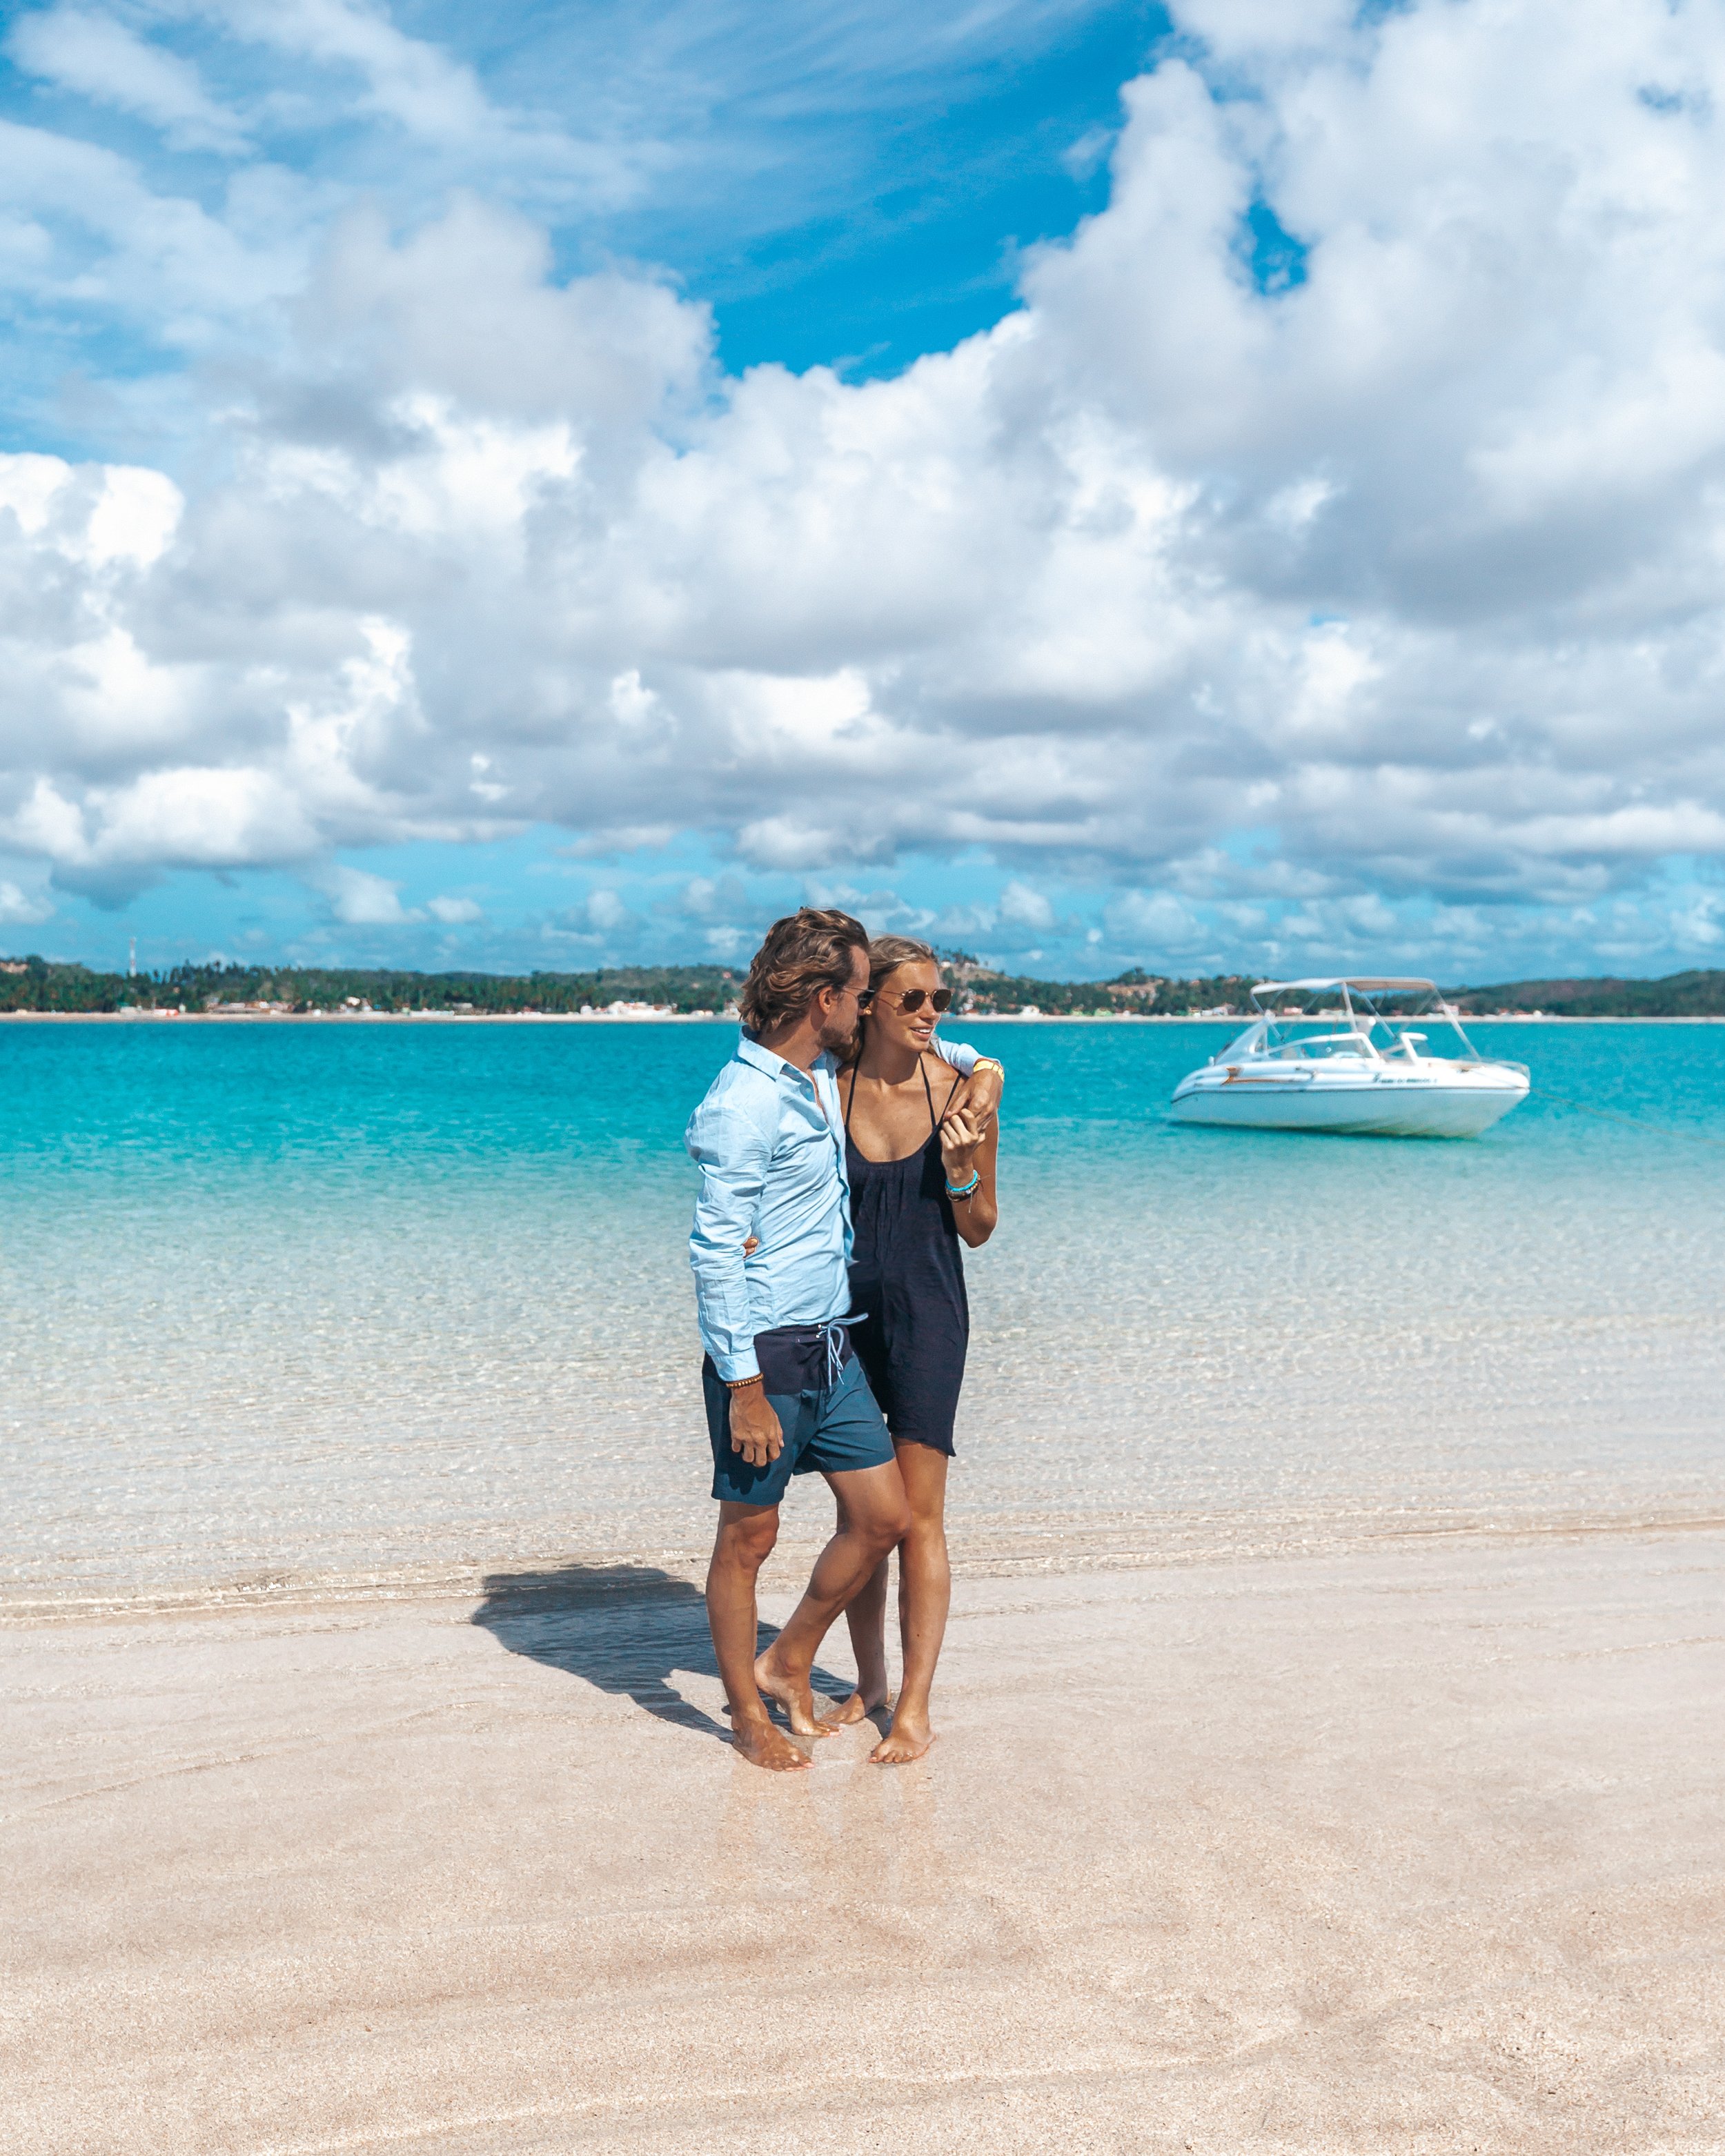
2. WALKING INTERTWINED
Simple but elegant. You can do this a couple of different ways by either holding hands or one arm around each-other (with this one Sydney likes to reach up and grab Davis’s hand that’s around her shoulder for another layer of connection).The trick here is to not get caught flat footed. The focus is on getting a photo mid step. A lot of times this means just holding your foot in the air and waiting. Holding tension only in the thigh with the lower leg looser and knee bent can be helpful. Sometimes this helps to look down a little bit with your chin, to make it look like you are actually walking.
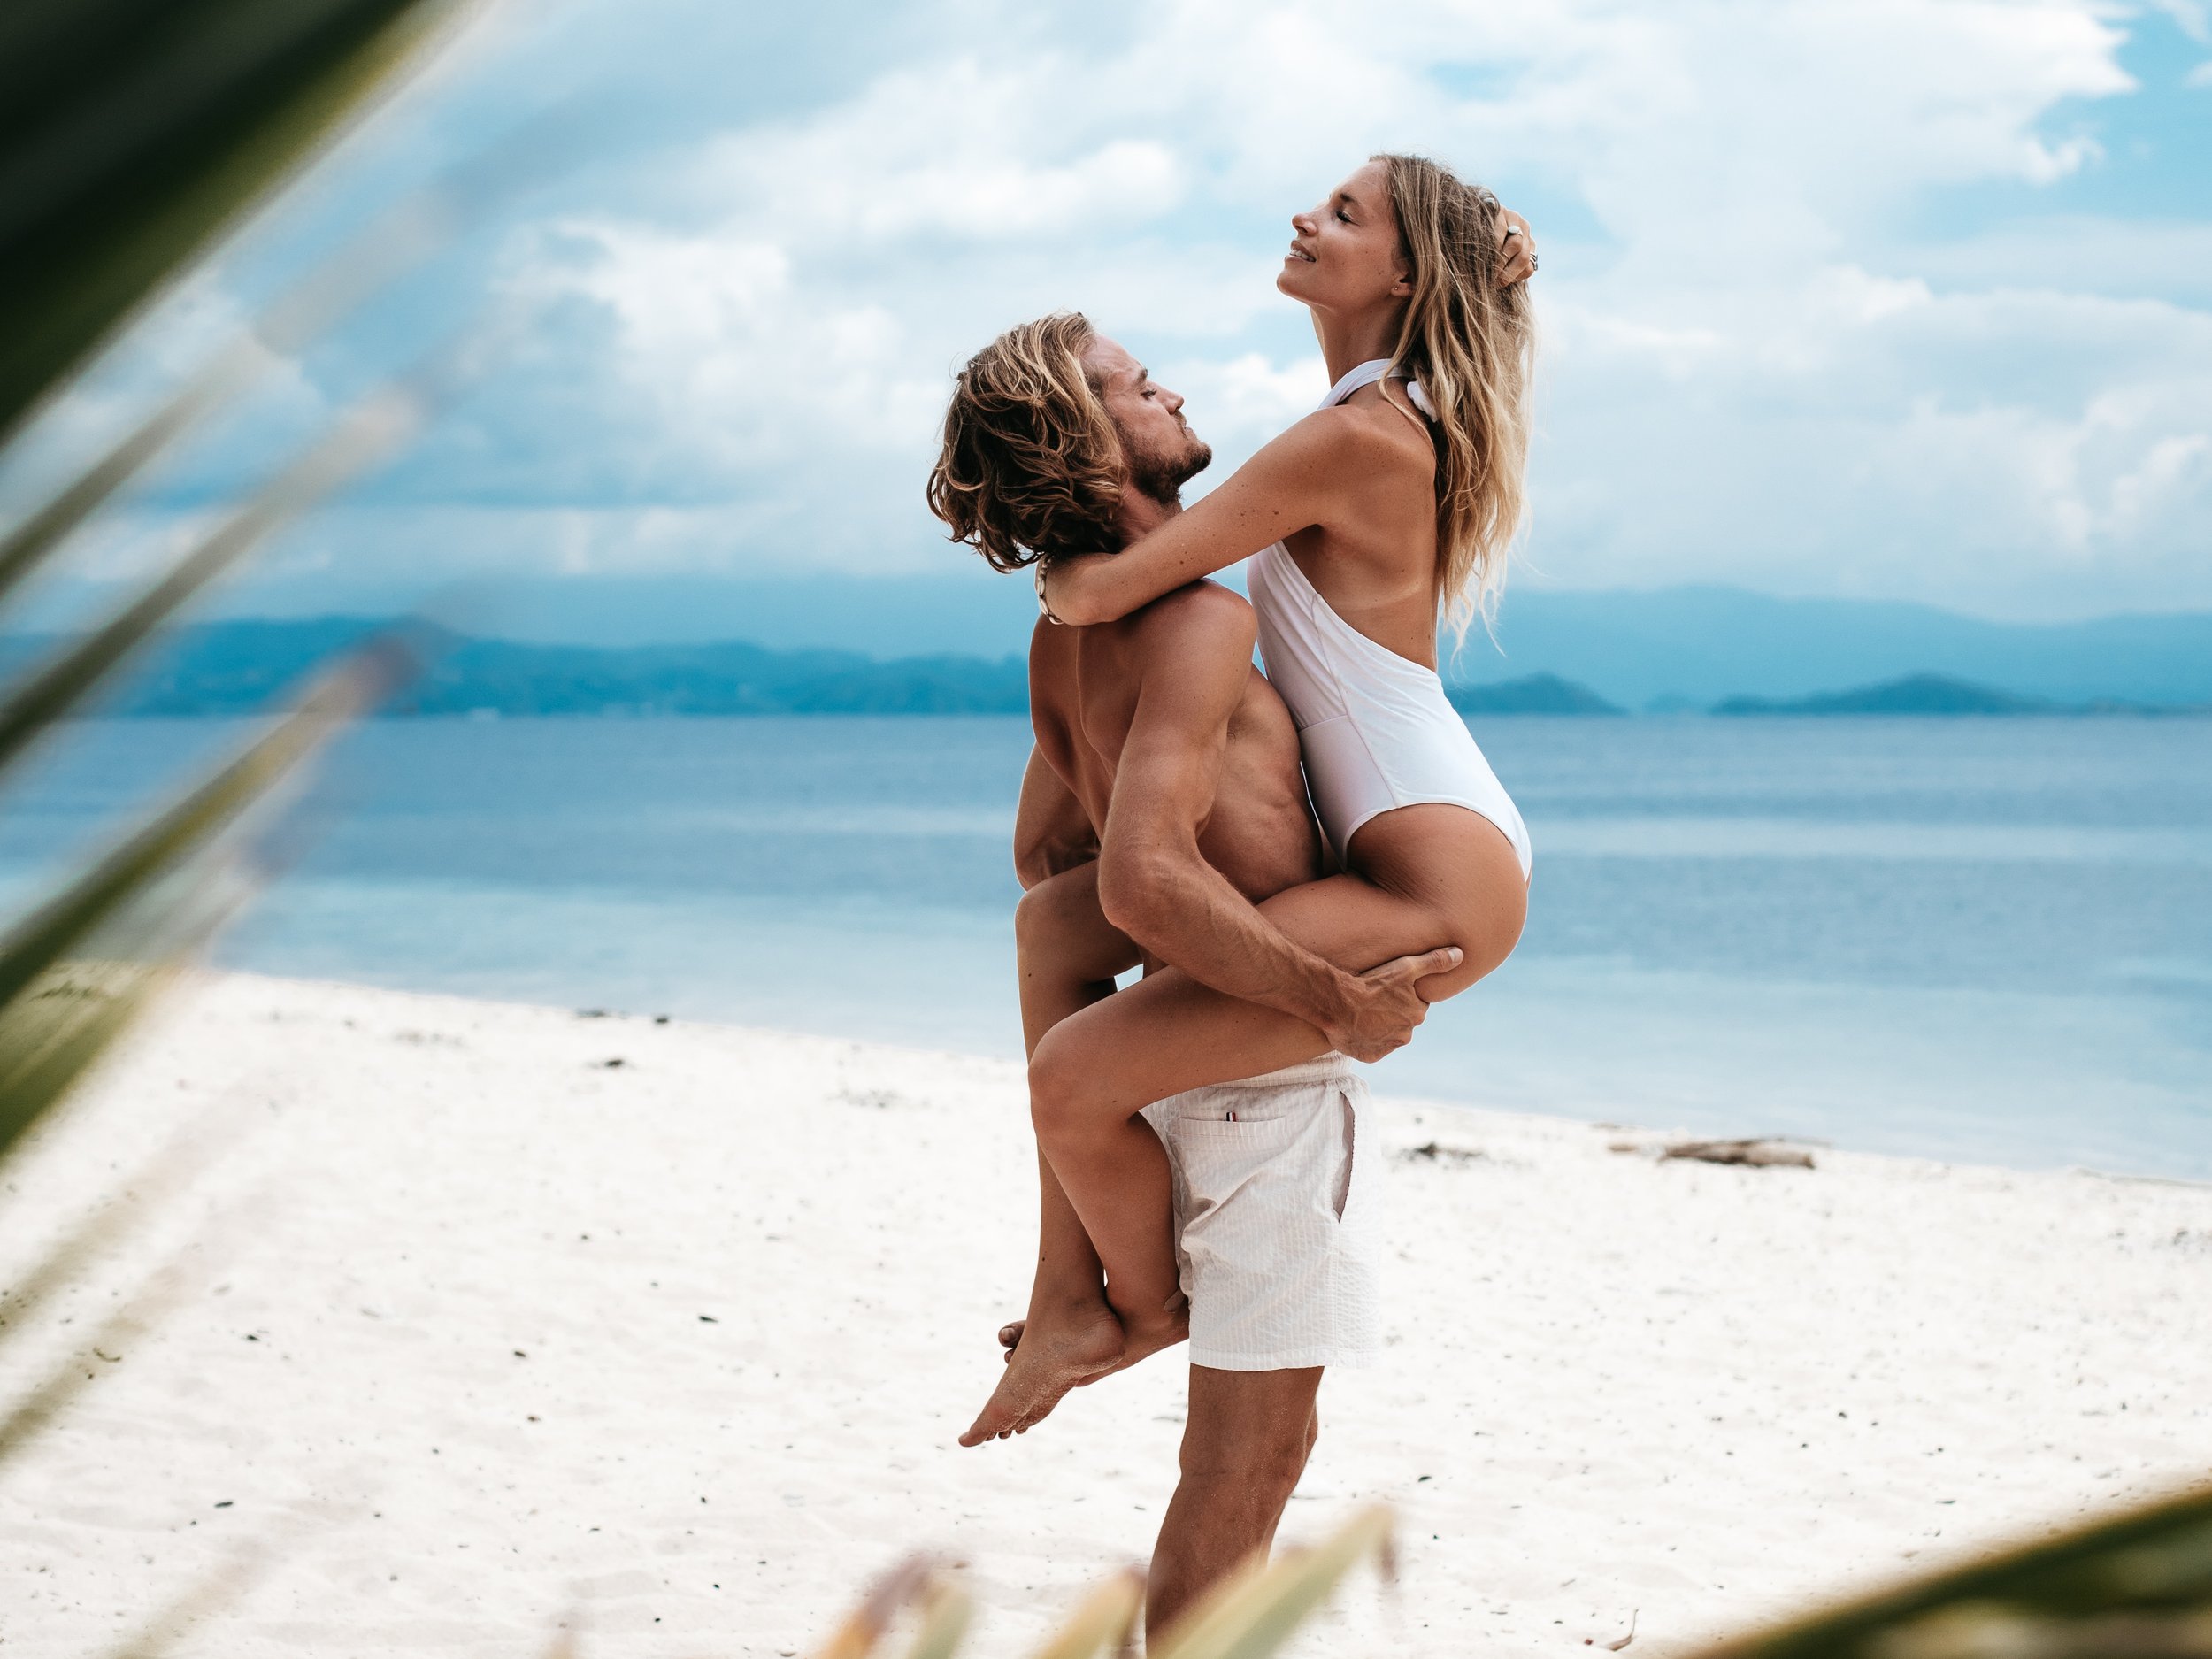
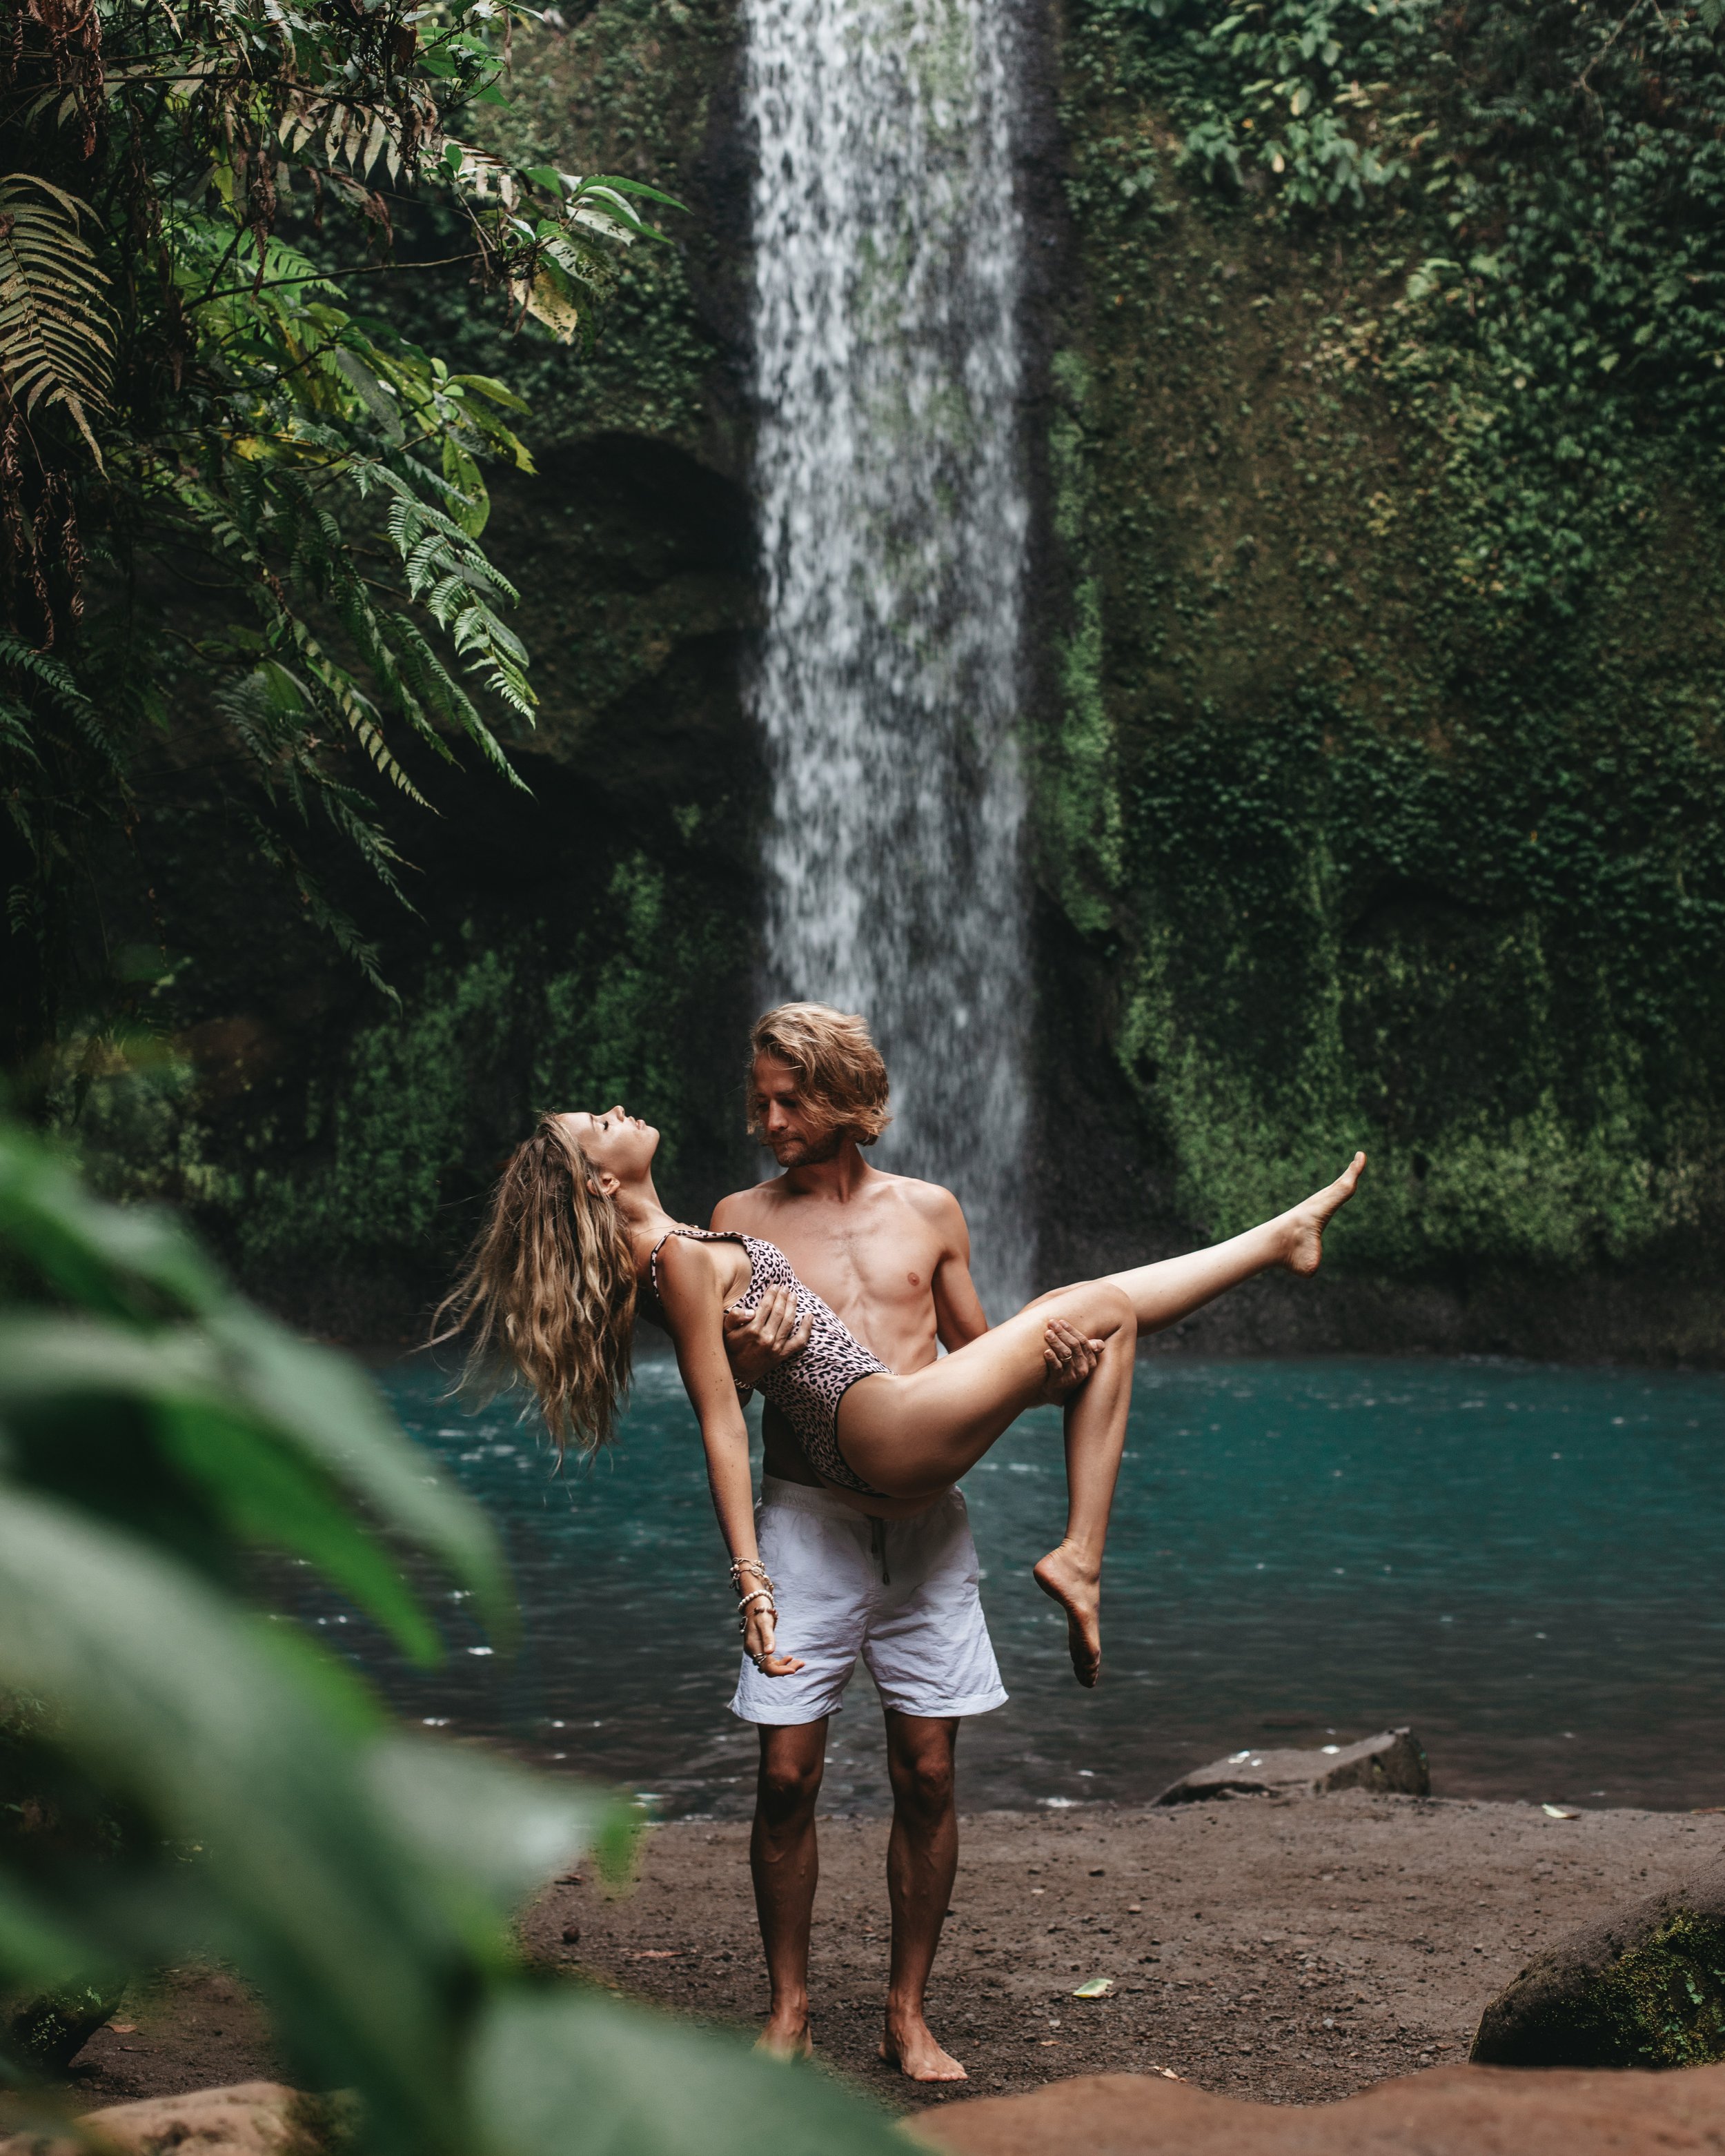
3. THE LIFT
This obviously can be done in so many ways. You can actually do the lift and hold it while trying different poses, or you can try jumping into the lift and time it with the camera click (this can be more difficult to time, but creates a lighter vibe). Most importantly, the person who is flying will want to create either the triangle, K shape, or S curve angles with arms and/or legs. This can be simply kicking one leg up or just lifting an arm up like a ballerina. Also play with turning your head/eyes in different directions for more drama. The base lift is pretty simple. Either pick up your partner around the bum and hold them up, or you can do jumping lifts and support via the sides of the rib cage.
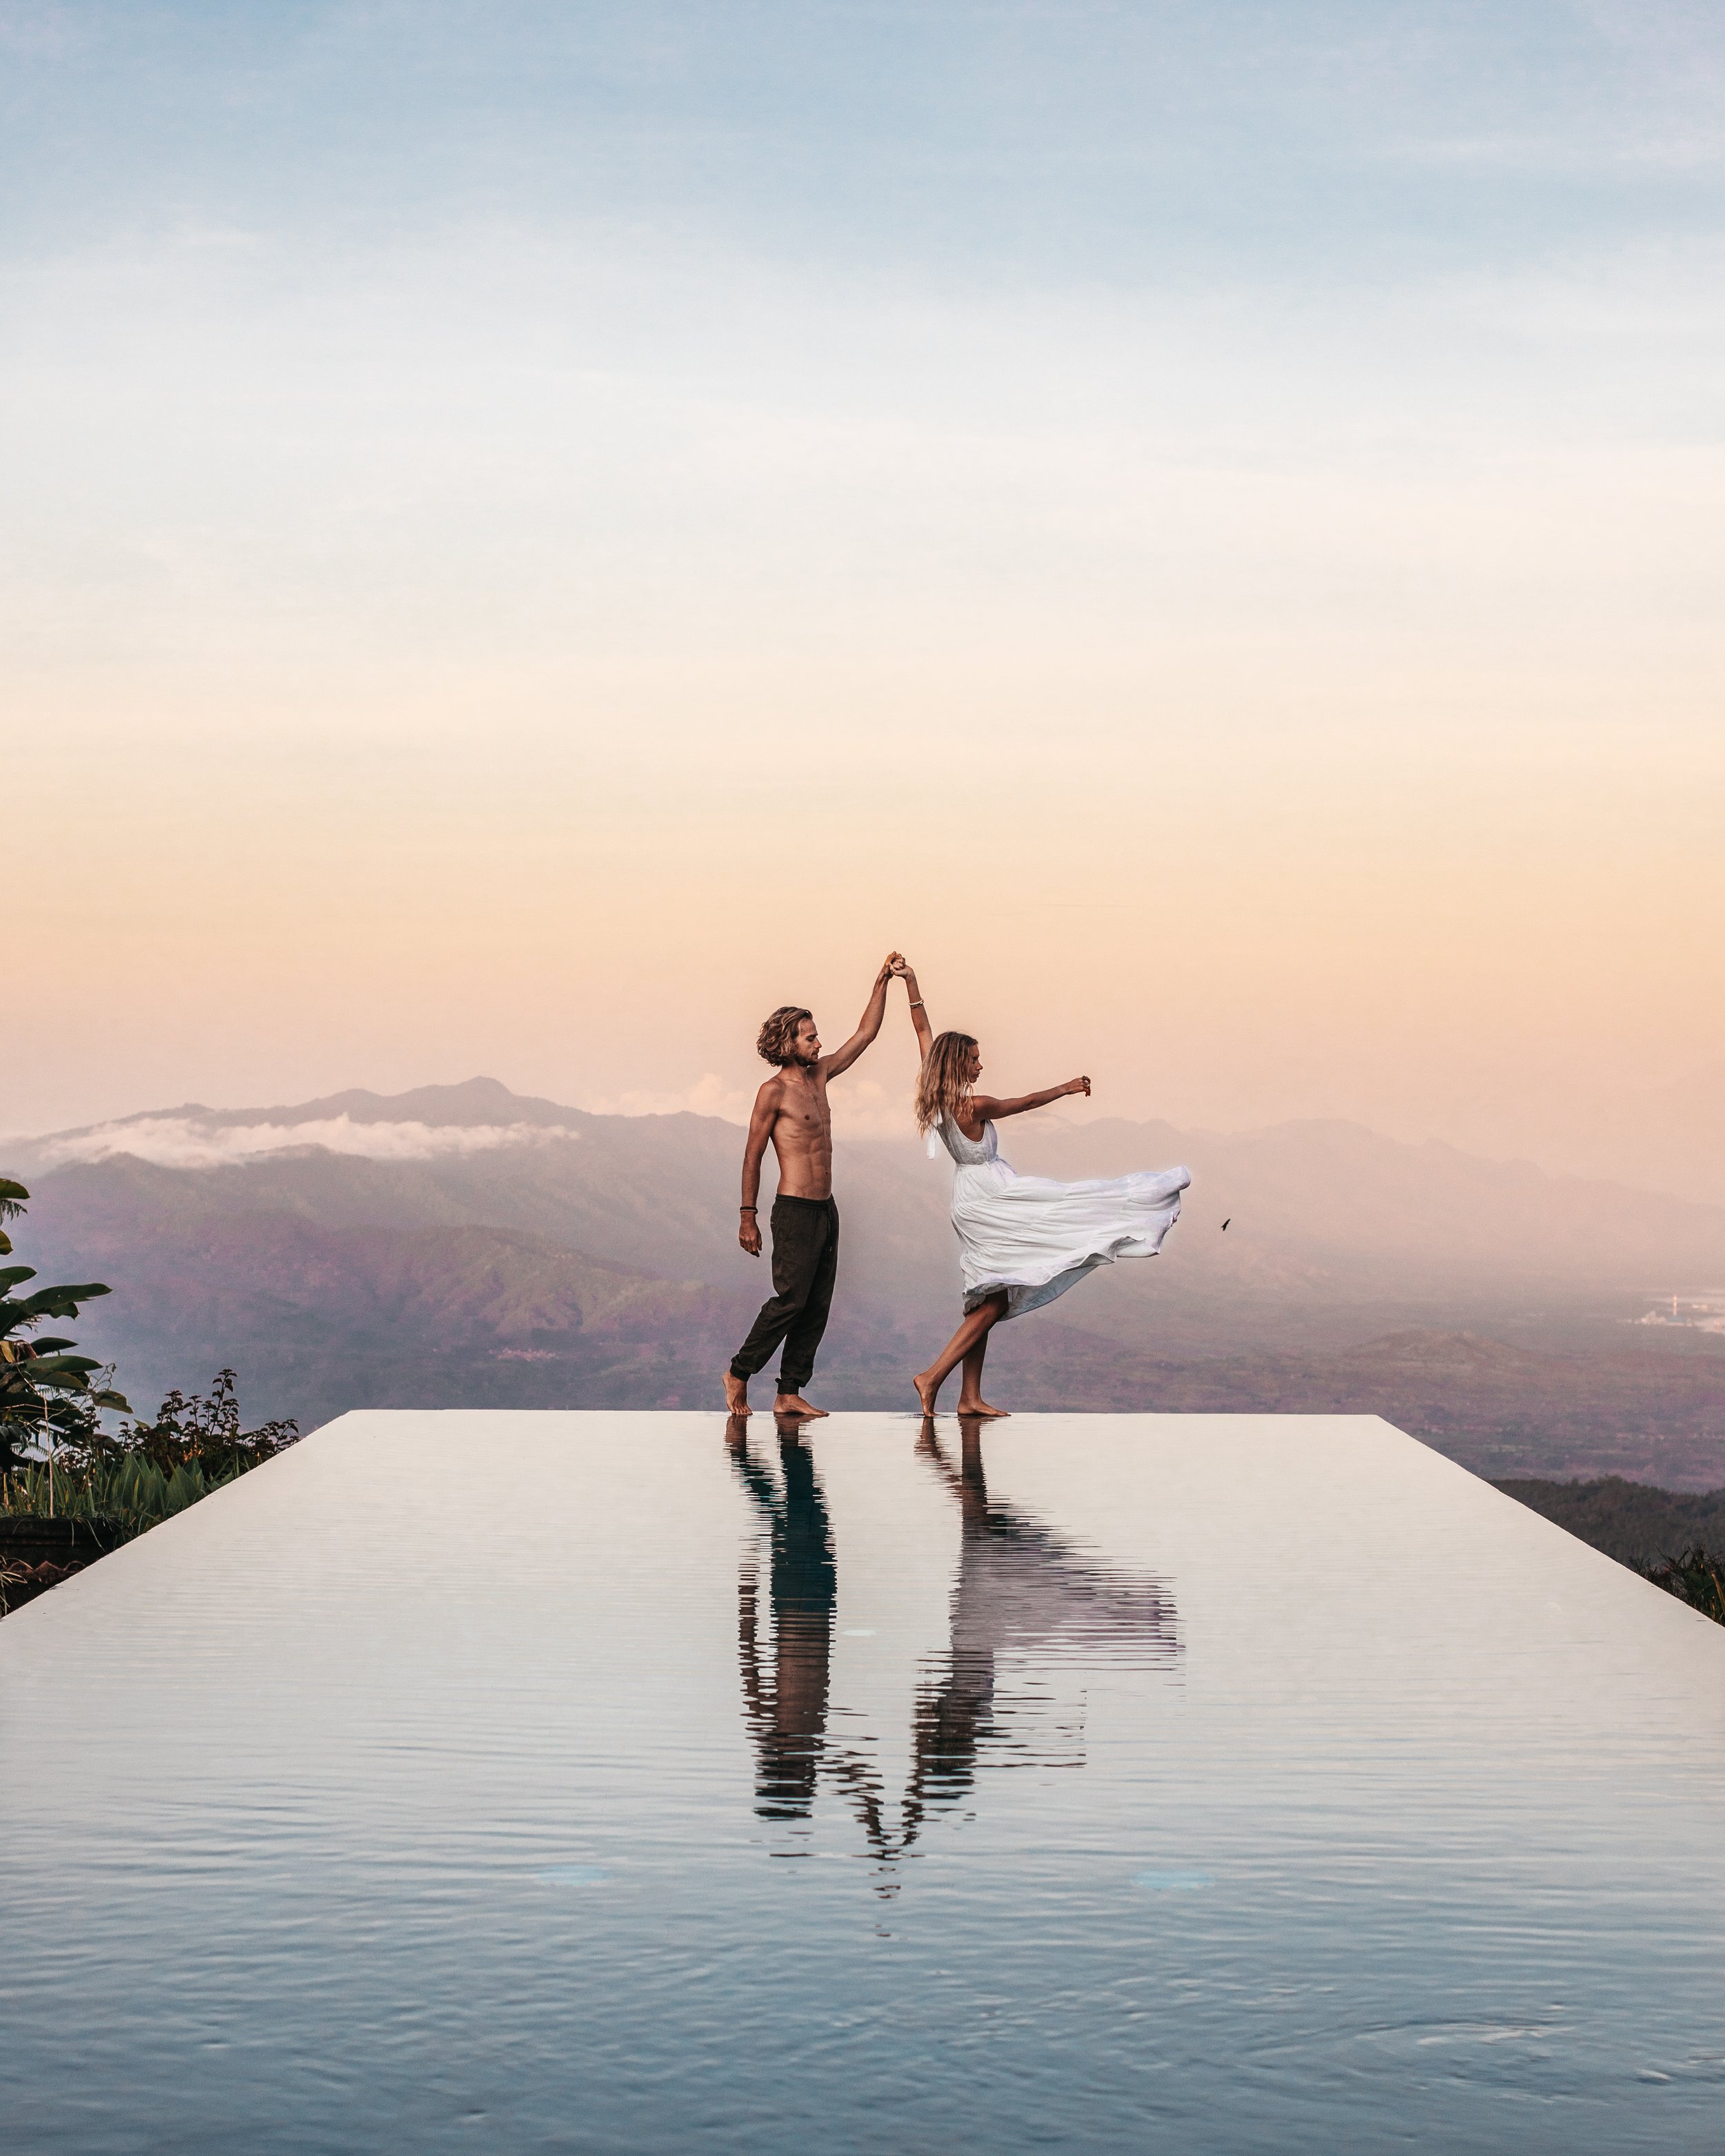
4. DANCING
We like this pose with dresses especially. The easiest version of this is usually mid-twirl. One partner has the hand up as the other is twirling beneath. To get the spinning dress effect without getting dizzy, try grabbing your dress and flicking it with the clicks of the camera. If you know how to properly ballroom dance, then just have a go at that and let the camera snap away!
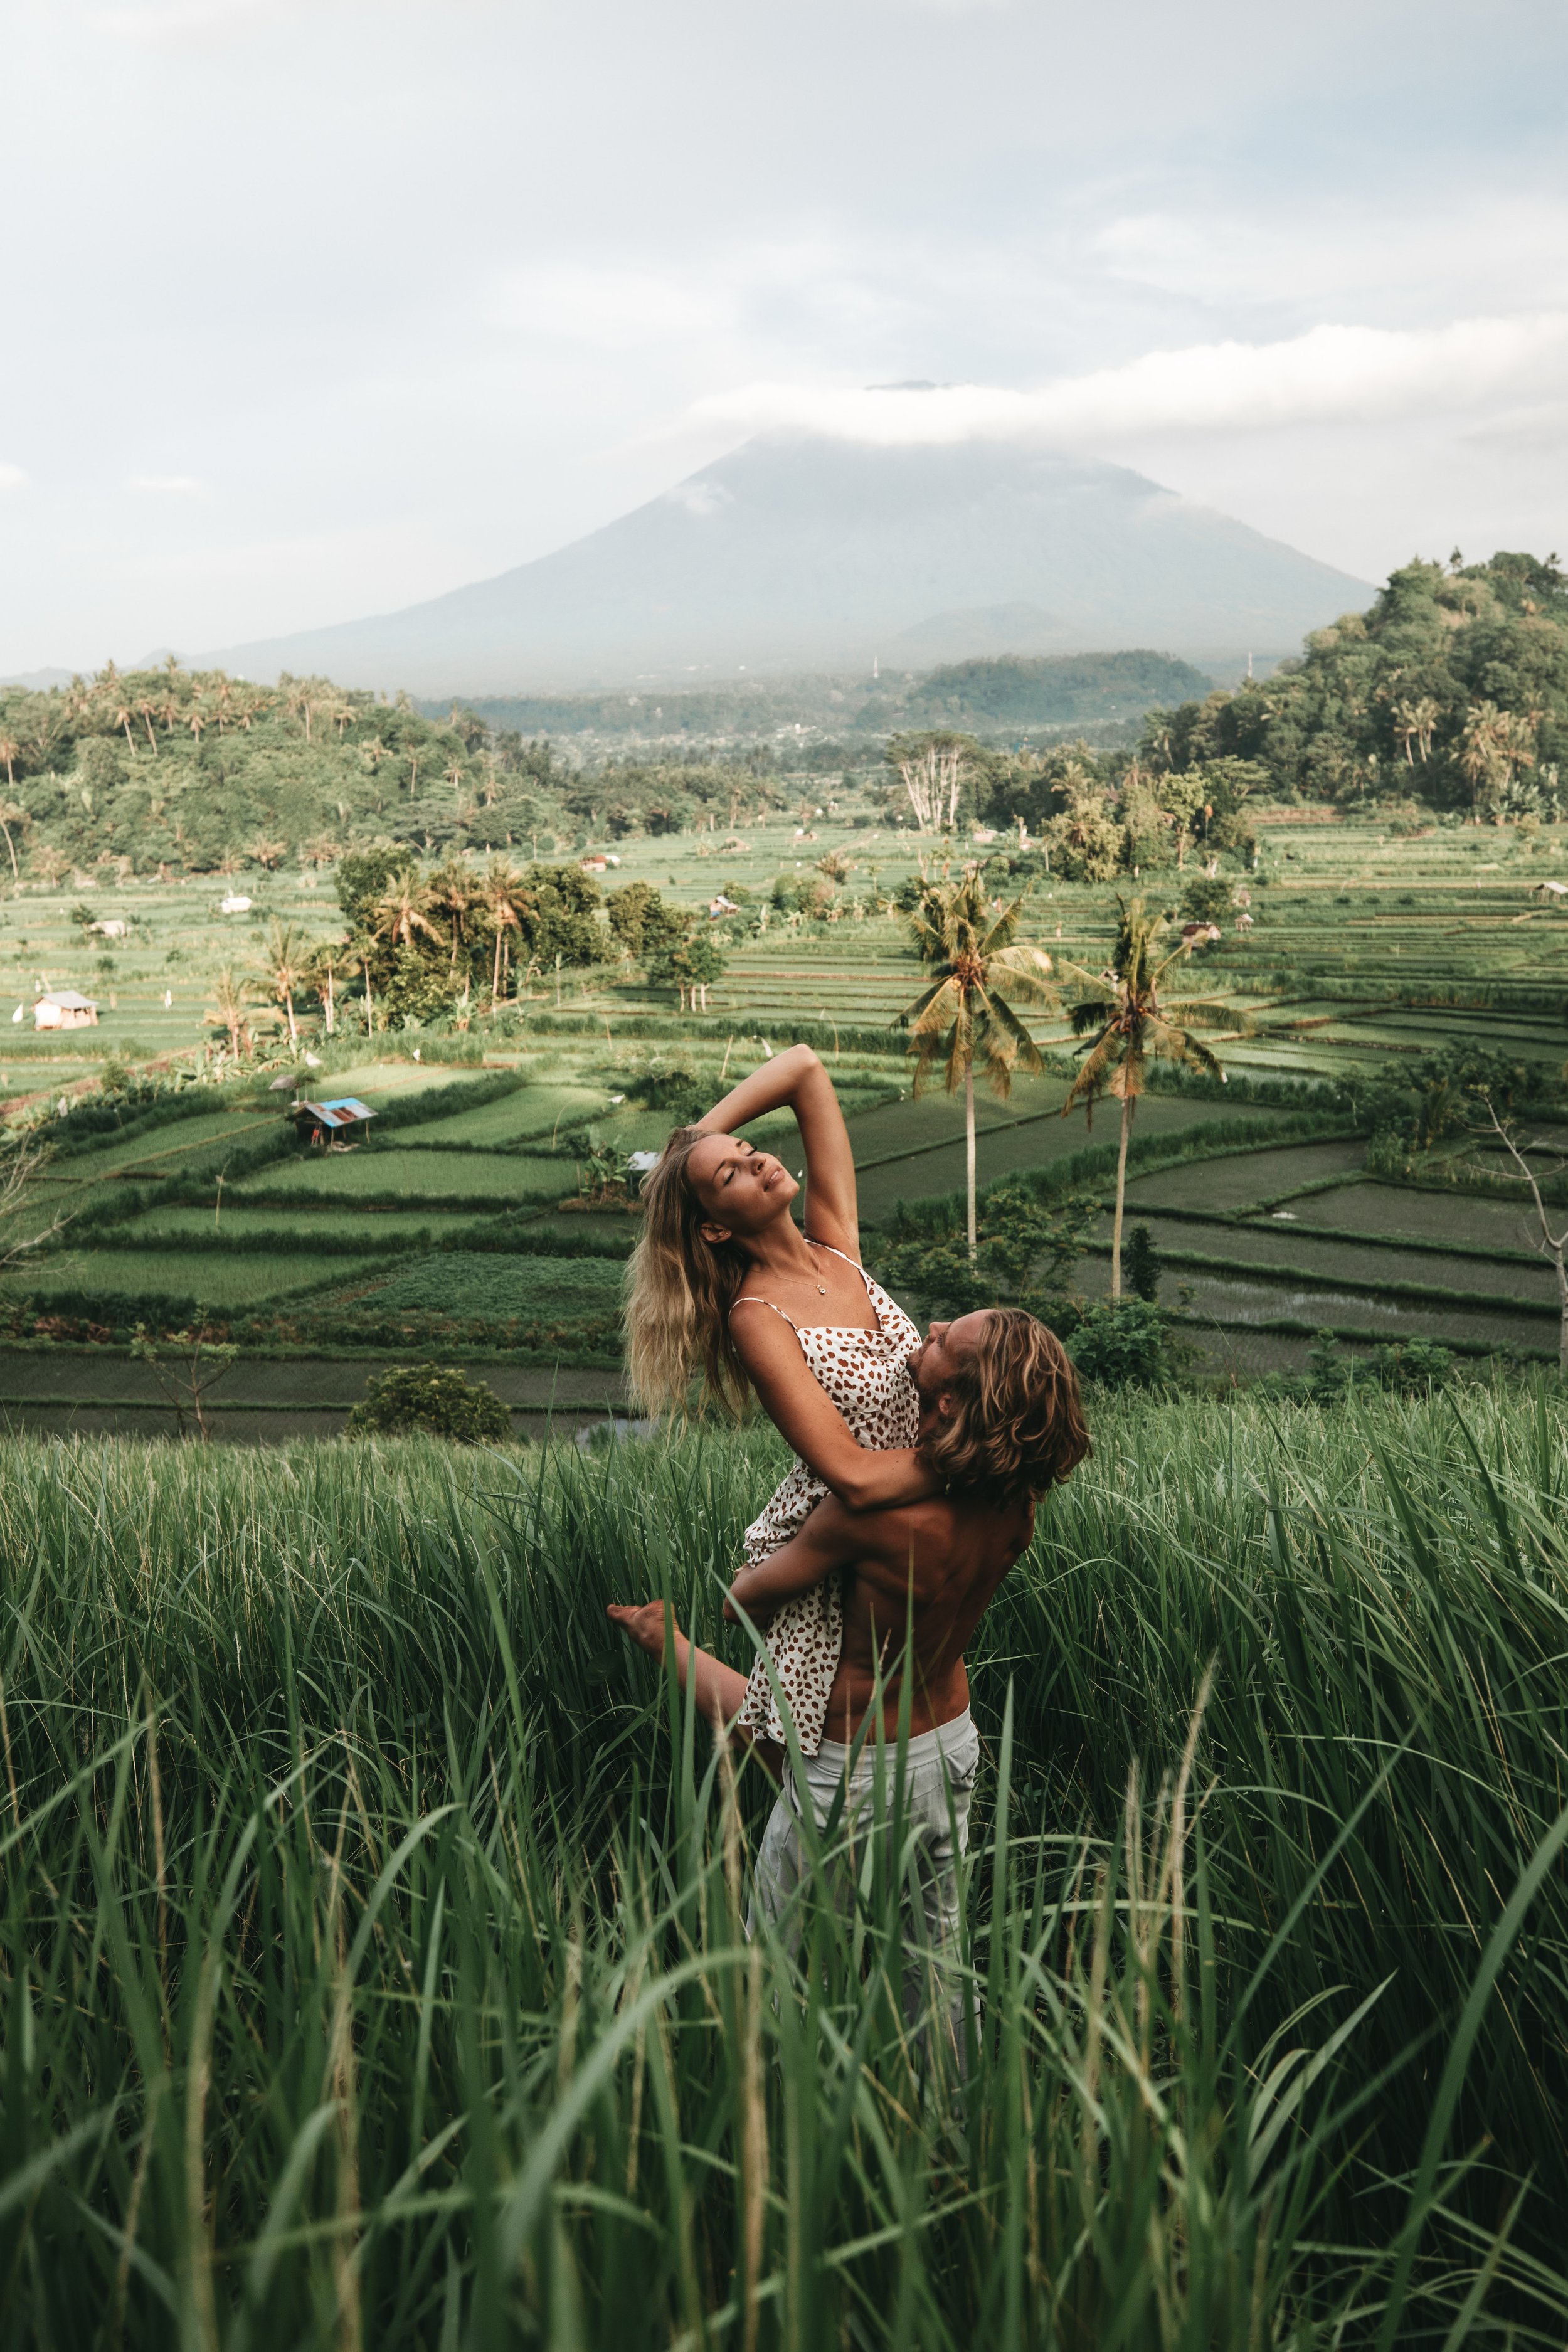
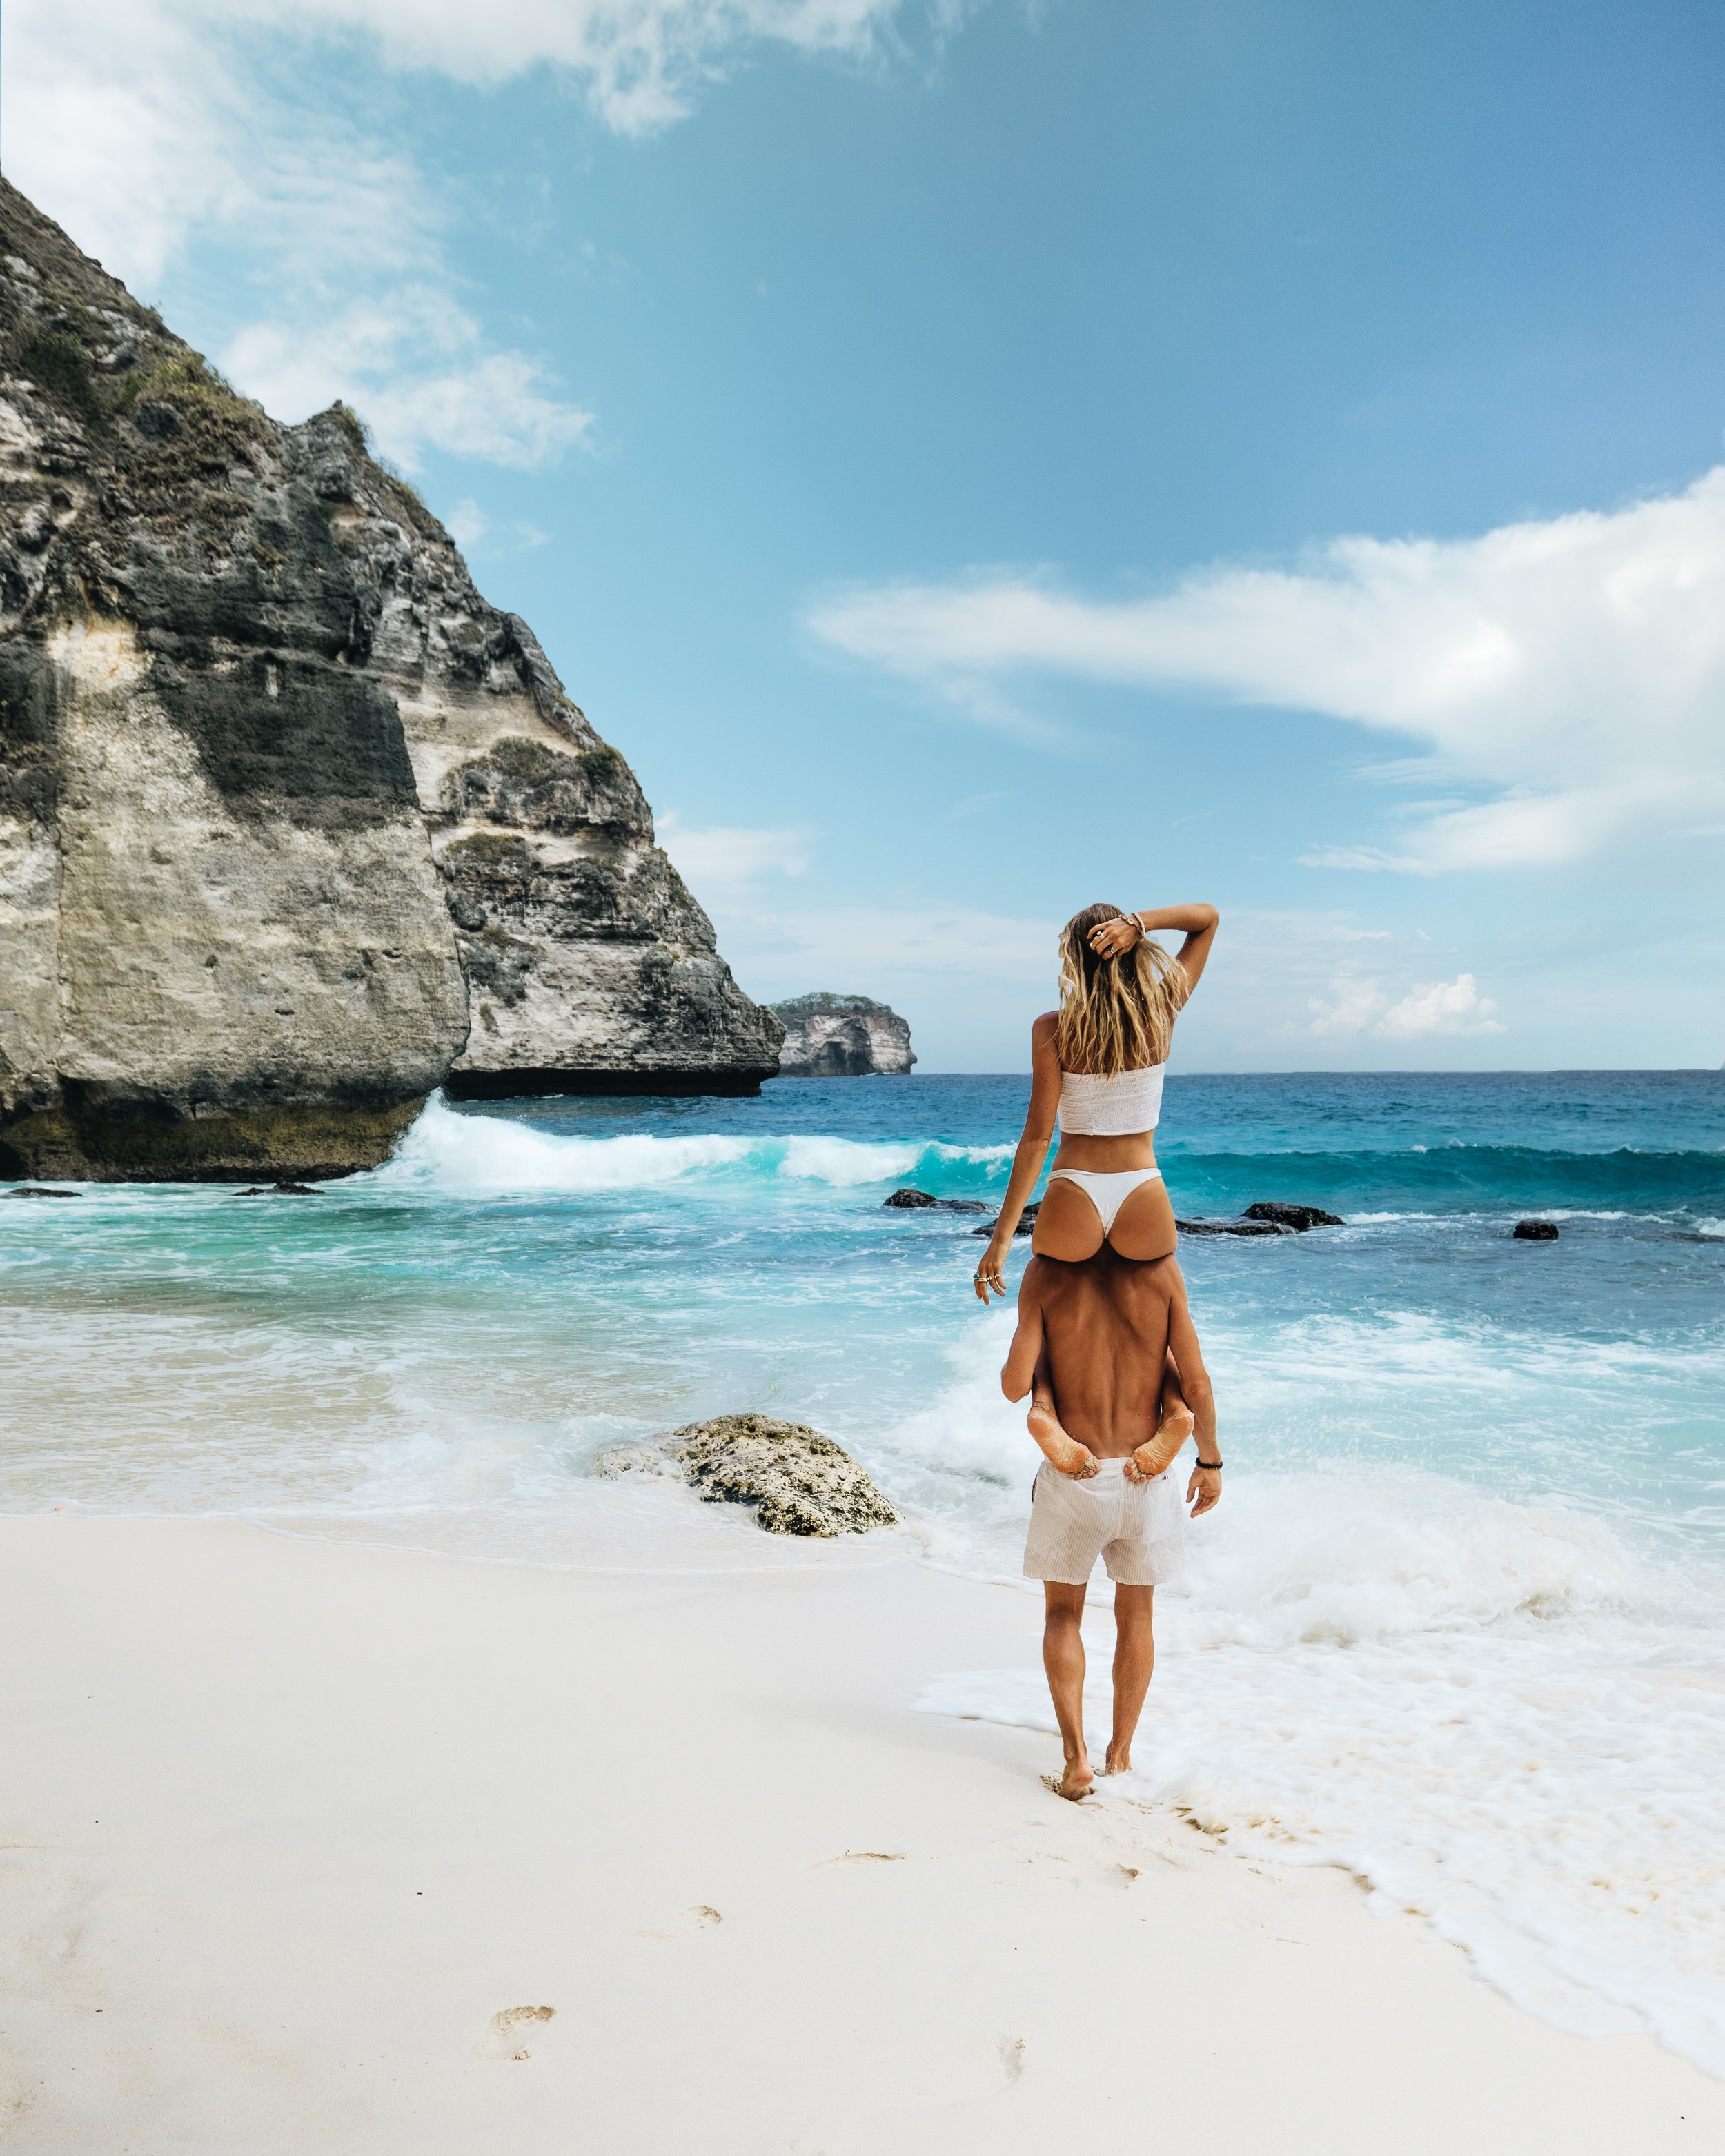
5. THE CARRY
An easy yet playful look. You can do this as a backpack, the wedding bride carry, or on the shoulders. For the backpack and shoulder carry, this works well when one partner is sitting at a higher level and you can kind of just slide into the backpack or sitting on top of shoulders without having to lift. For both options we recommend to not have the rider tie their legs in the front. That can constrict the photo by cover up the other person and keeps the base from walking and moving freely. Instead, have the legs saddled on the side of your base. Also for the rider, be gentle especially in backpack so your partner can breathe!
For the wedding bride carry try to have a loose grip around the neck and for the base to secure arms under knees and at the small of the back so the bride isn’t too crunched in. The bride can try playing with kicking legs out or keeping them together as well as head back or looking up towards the groom.
For any carry, it can also be fun to play with arms, having one arm up or a hand playing with their hair.

GENERAL TIPS WE HAVE TO REMIND OURSELVES EVERY SHOOT:
Chin up and back straight - We want to look as graceful as possible.
Have some point of connection between each other - This can be hand, torsos, or even just eyes.
Don’t block each other - Think about where the camera is angles and make sure you don’t completely block your partner from being seen.
Tighten up the core/stomach - We all have unflattering moments, this can help in creating a more elegant figure.
Angle body toward light source AND camera - Many times it can be as easy as twisting the head or torso a little to make sure the light is hitting you versus shadowing you.
Review the shot on the camera - We don’t all get it right the first time and that’s okay. A lot of poses can be easily tweaked from good to GREAT if you take a moment to review them in camera and try again.
Be adventurous - In the creative space there are NO bad ideas out there. Try anything, be spontaneous, have some fun! Some of our most crazy ideas end up being our favorite photos.
If it’s not working MOVE ON - Sometimes the angle or pose just doesn’t work that day. That’s okay - don’t spend to much time trying to force it. Move on, try a new pose or change the camera location. If we can’t get something after 2 rounds we typically try to move onto something else.
EDITING
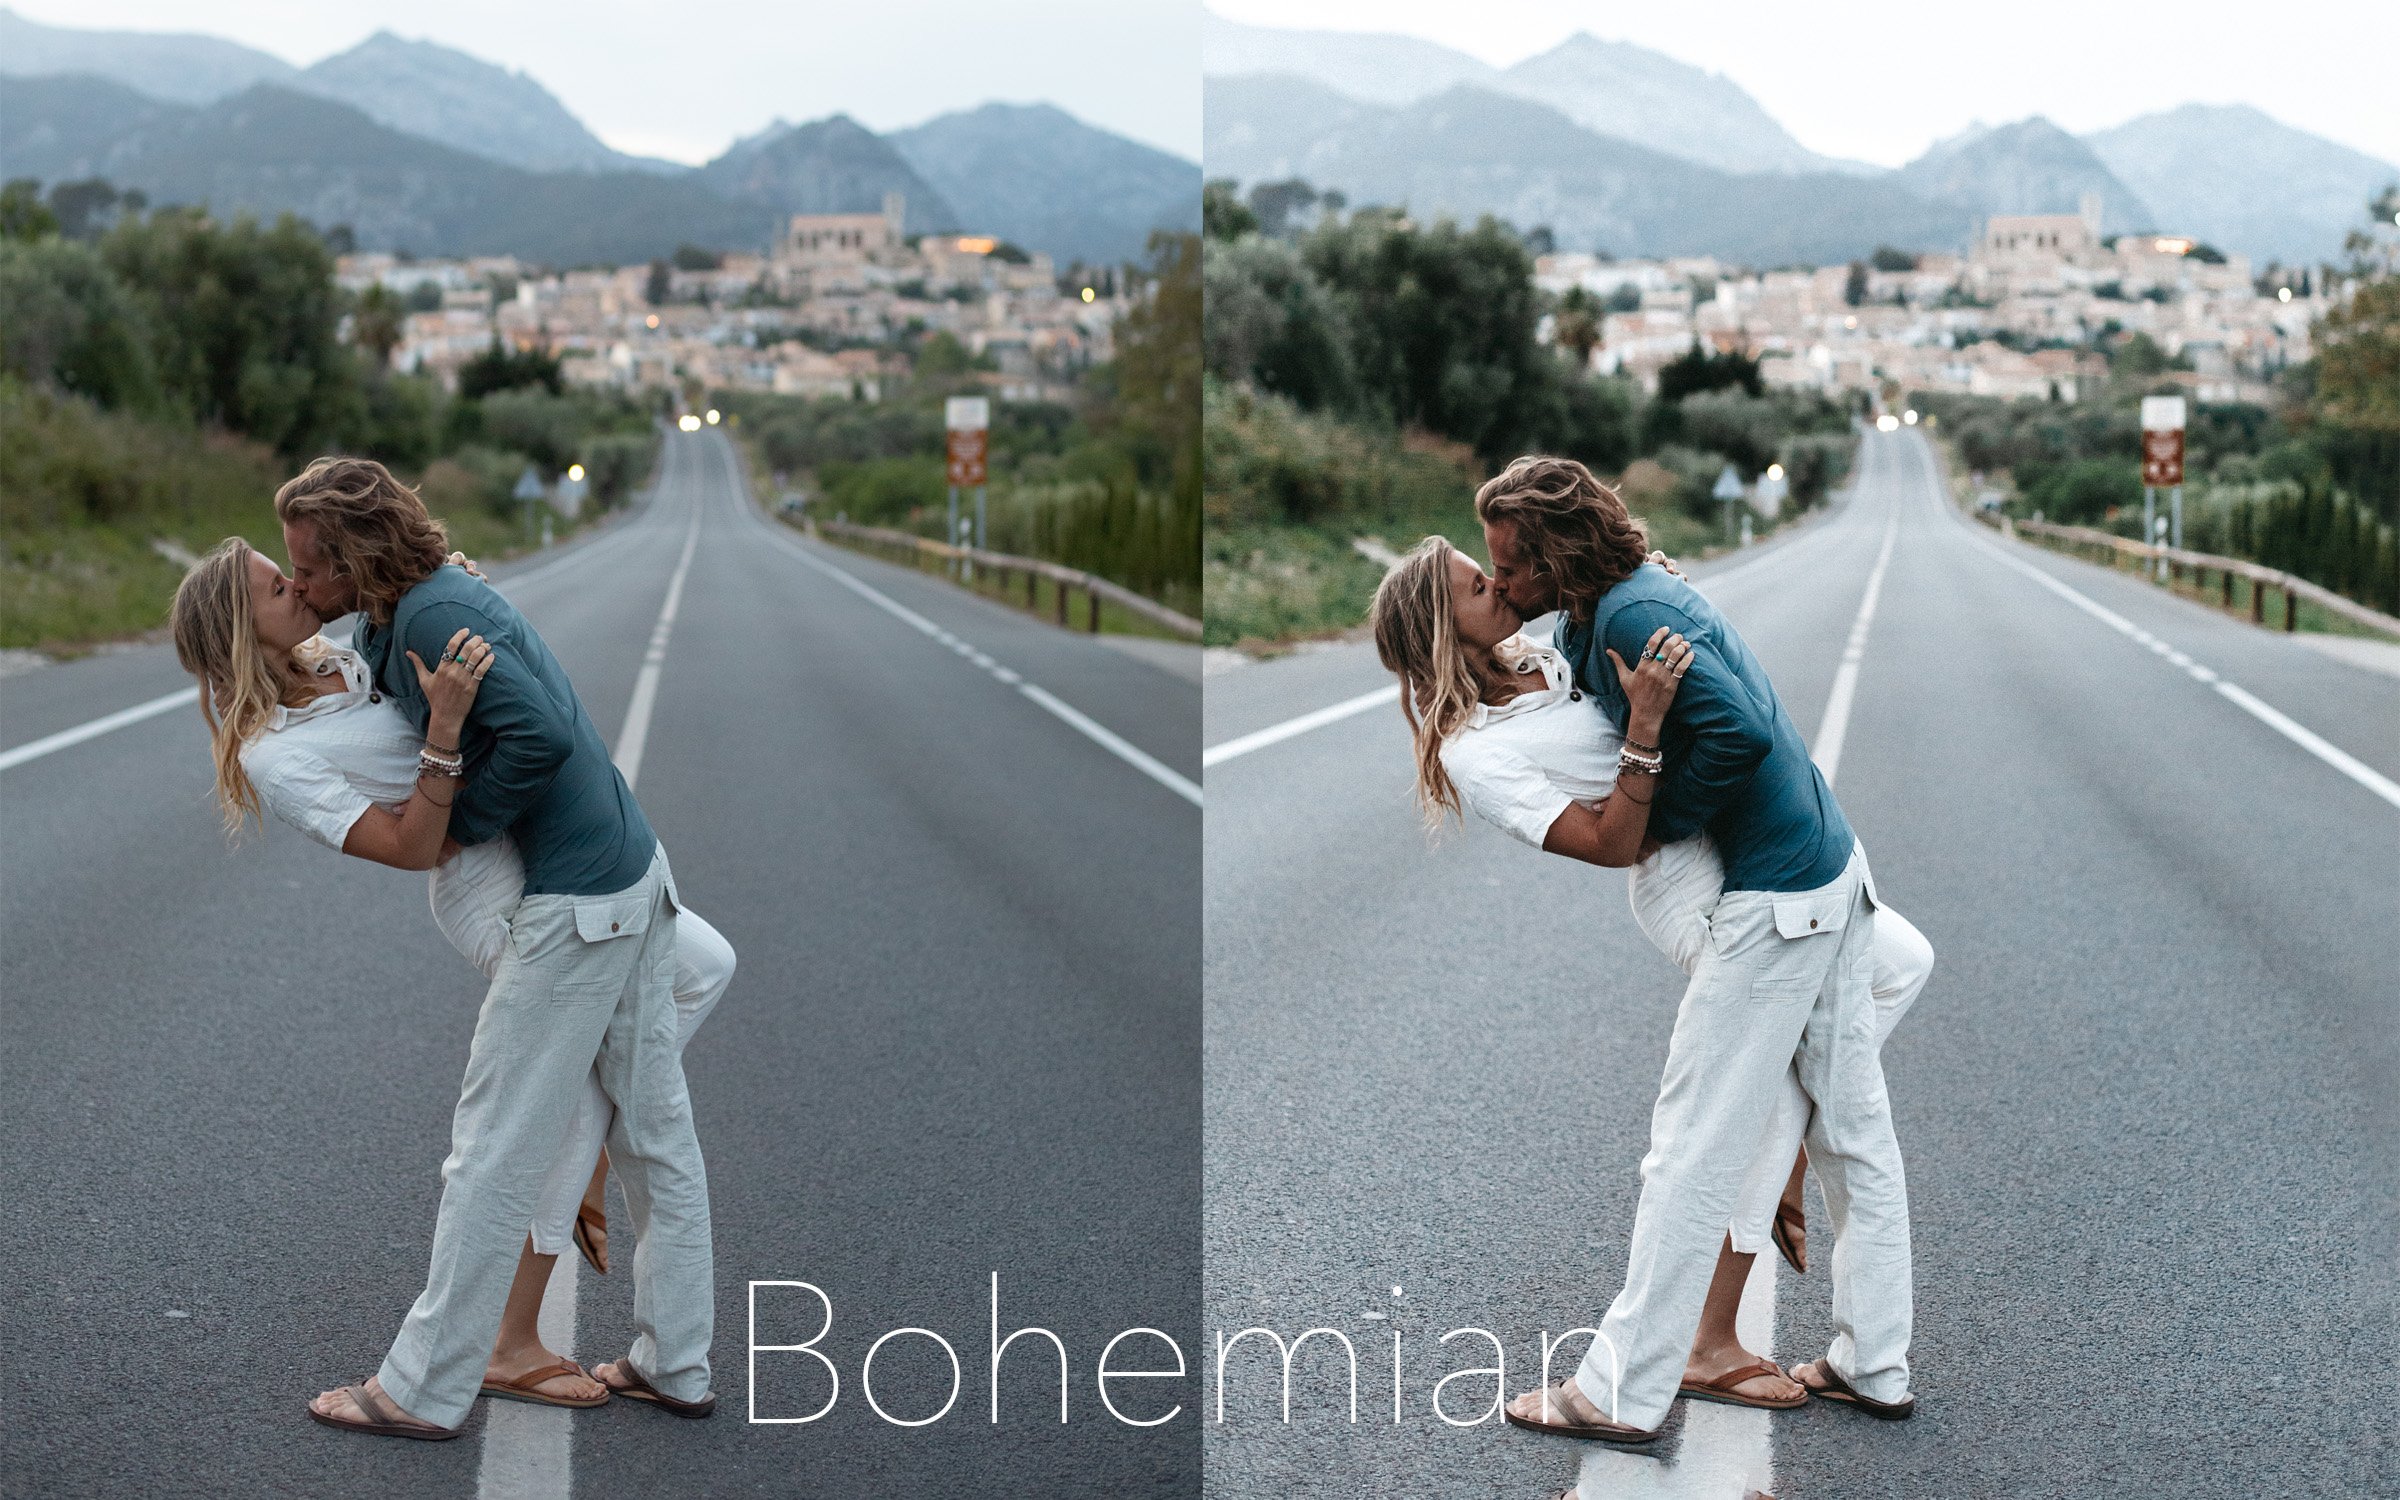
So much can be done to add a specific mood for a shot just by the way you edit it. You can create a romantic feel with moodier earth tones, happy and exciting emotions with brighter pops of color and whites, or adventurous vibes by bringing out more shadows and contrast. You’ll want to use a program with a lot of control over color profiles and lighting. Our favorite for post editing is Adobe Lightroom. We used to spend hours trying to create the mood we were looking for, but in order to speed up that process, we create custom made filters called “presets” so that we can now achieve the mood we are looking for in just minutes. We use presets for editing all our Instagram and website photos!
FINAL NOTES
Find poses you like and save them somewhere on your phone or computer. Study what works and what doesn’t, think about the shape of their hands, the angle of their arms, the bends in the legs, are the feet pointed or not etc. These small things make a huge difference. And don’t be afraid to practice these before hand in a mirror or shooting at home, so that you can get in and out of a shot quickly if you need to!
Let us know if you try any of these poses or have any other to add in the comments below! As always lots of love from both of us.